Beginner Tutorial: Describo and Research Object Crates (RO-Crate)
Hi 👋,
In this five minute tutorial you'll get to know Describo and how to use it to work with and describe your data.
The best way to get to know the feature set of Describo is via the product tour. This will walk you through all of the capabilities and how to use them. Once you are done, download Describo to your computer and read on.
Introduction
Describo started life as a tool to describe data with metadata conforming to the RO-Crate specification. If you are reading this you probably know what that is; but just in case:
info
The RO-Crate specification describes "a method of aggregating and describing research data with associated metadata". https://www.researchobject.org/ro-crate/1.1/introduction.html
In simpler terms, a complementary definition could be:
info
A method of describing content with a metadata file in the same folder; think an index that lives with the content.
In this 5 minute tutorial, you will start describing your data as RO-Crates (which is applicable whether you are using it as a researcher or not!).
Audience: about you
You have data that you want to work with.
You might want to describe it or just understand what's there. Maybe it's research data or maybe it's a folder on your company fileshare. You could be a researcher or you could be an analyst working with lengthy policy documents.
Whoever you are and whatever your use case, Describo has modes of operation that can help you do your job quickly and efficiently.
Specifically, Describo creates a file in your folder called ro-crate-metadata.json and that's where all of your efforts are stored. Think of this as like an index to the folder. It's up to you how detailed that index is. You can describe all of the people, places and organisations related the content or just create a simple description for reference in future. Either way, Describo will guide you in the creation, and management, of that index.
When you select a mode, specific optimisations will be enabled in order to adjust Describo for different use cases. Regardless of which mode you select and how you use it, the outcome will be a standards compliant and interoperable description of your data.
Get Started working with your data
If you've not yet installed Describo, do that now. Get Describo - free download.
When you open the application you will see the dashboard.
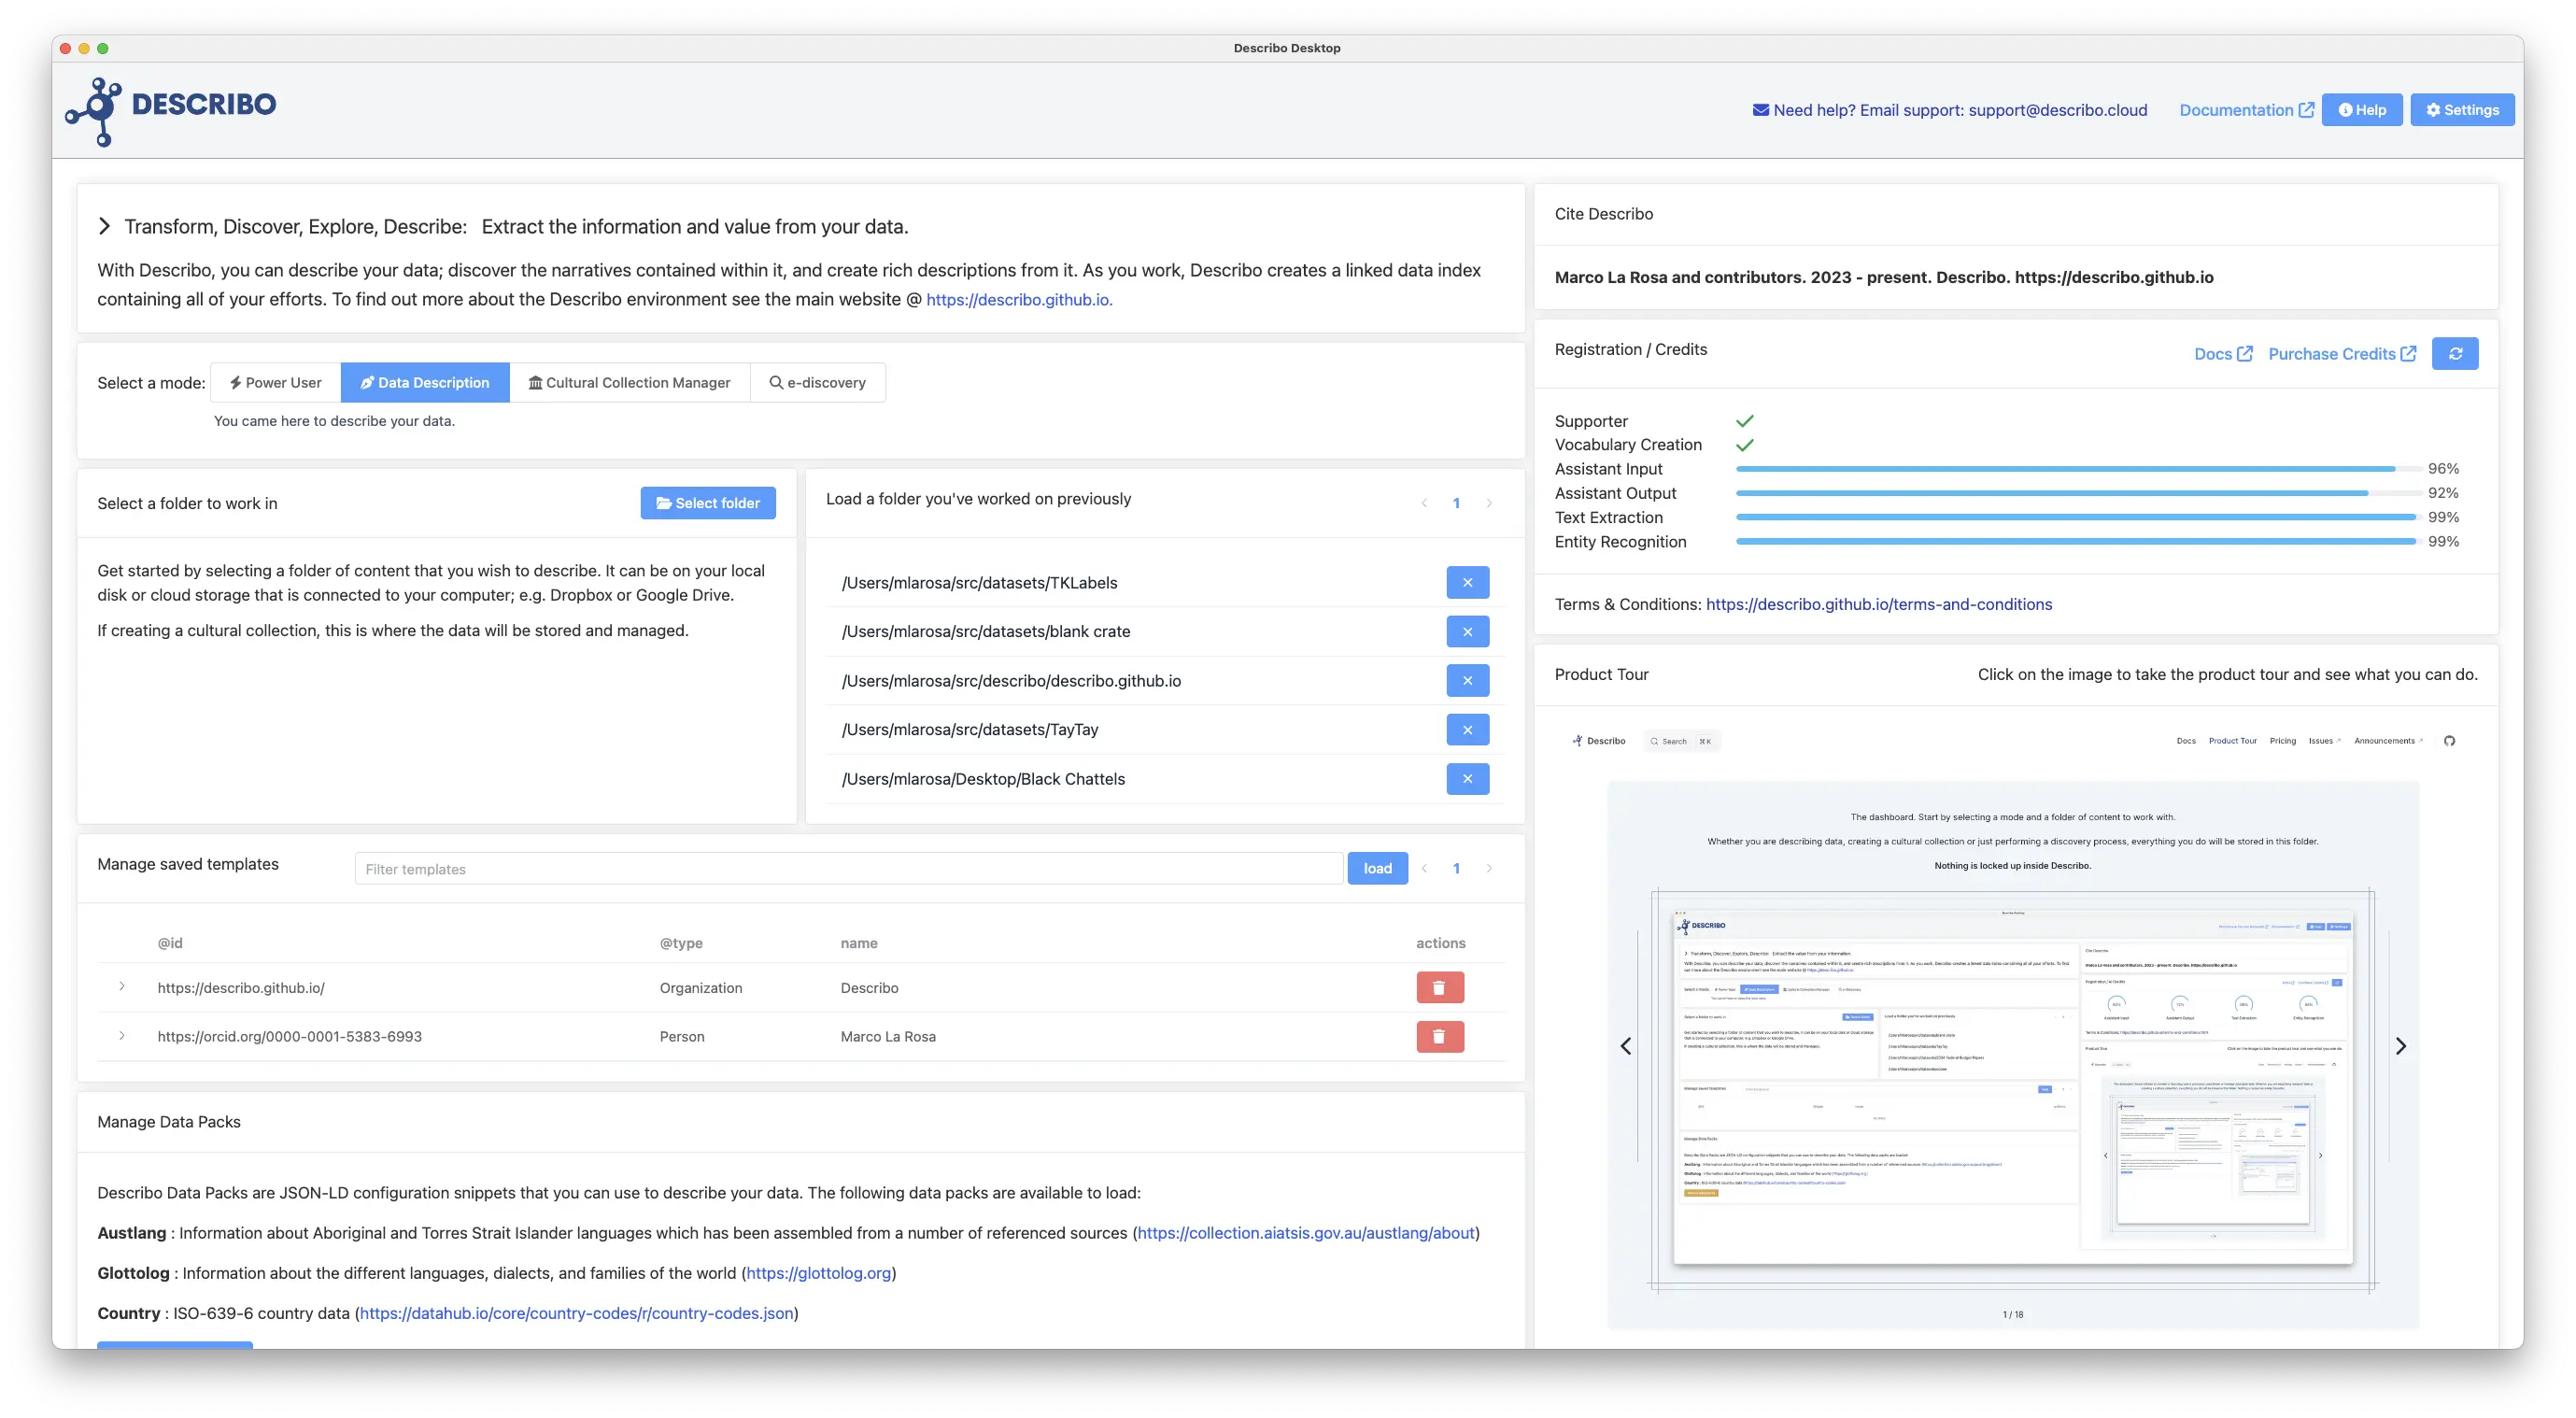
To get an overview and orientate yourself press the Help button in the navigation bar.
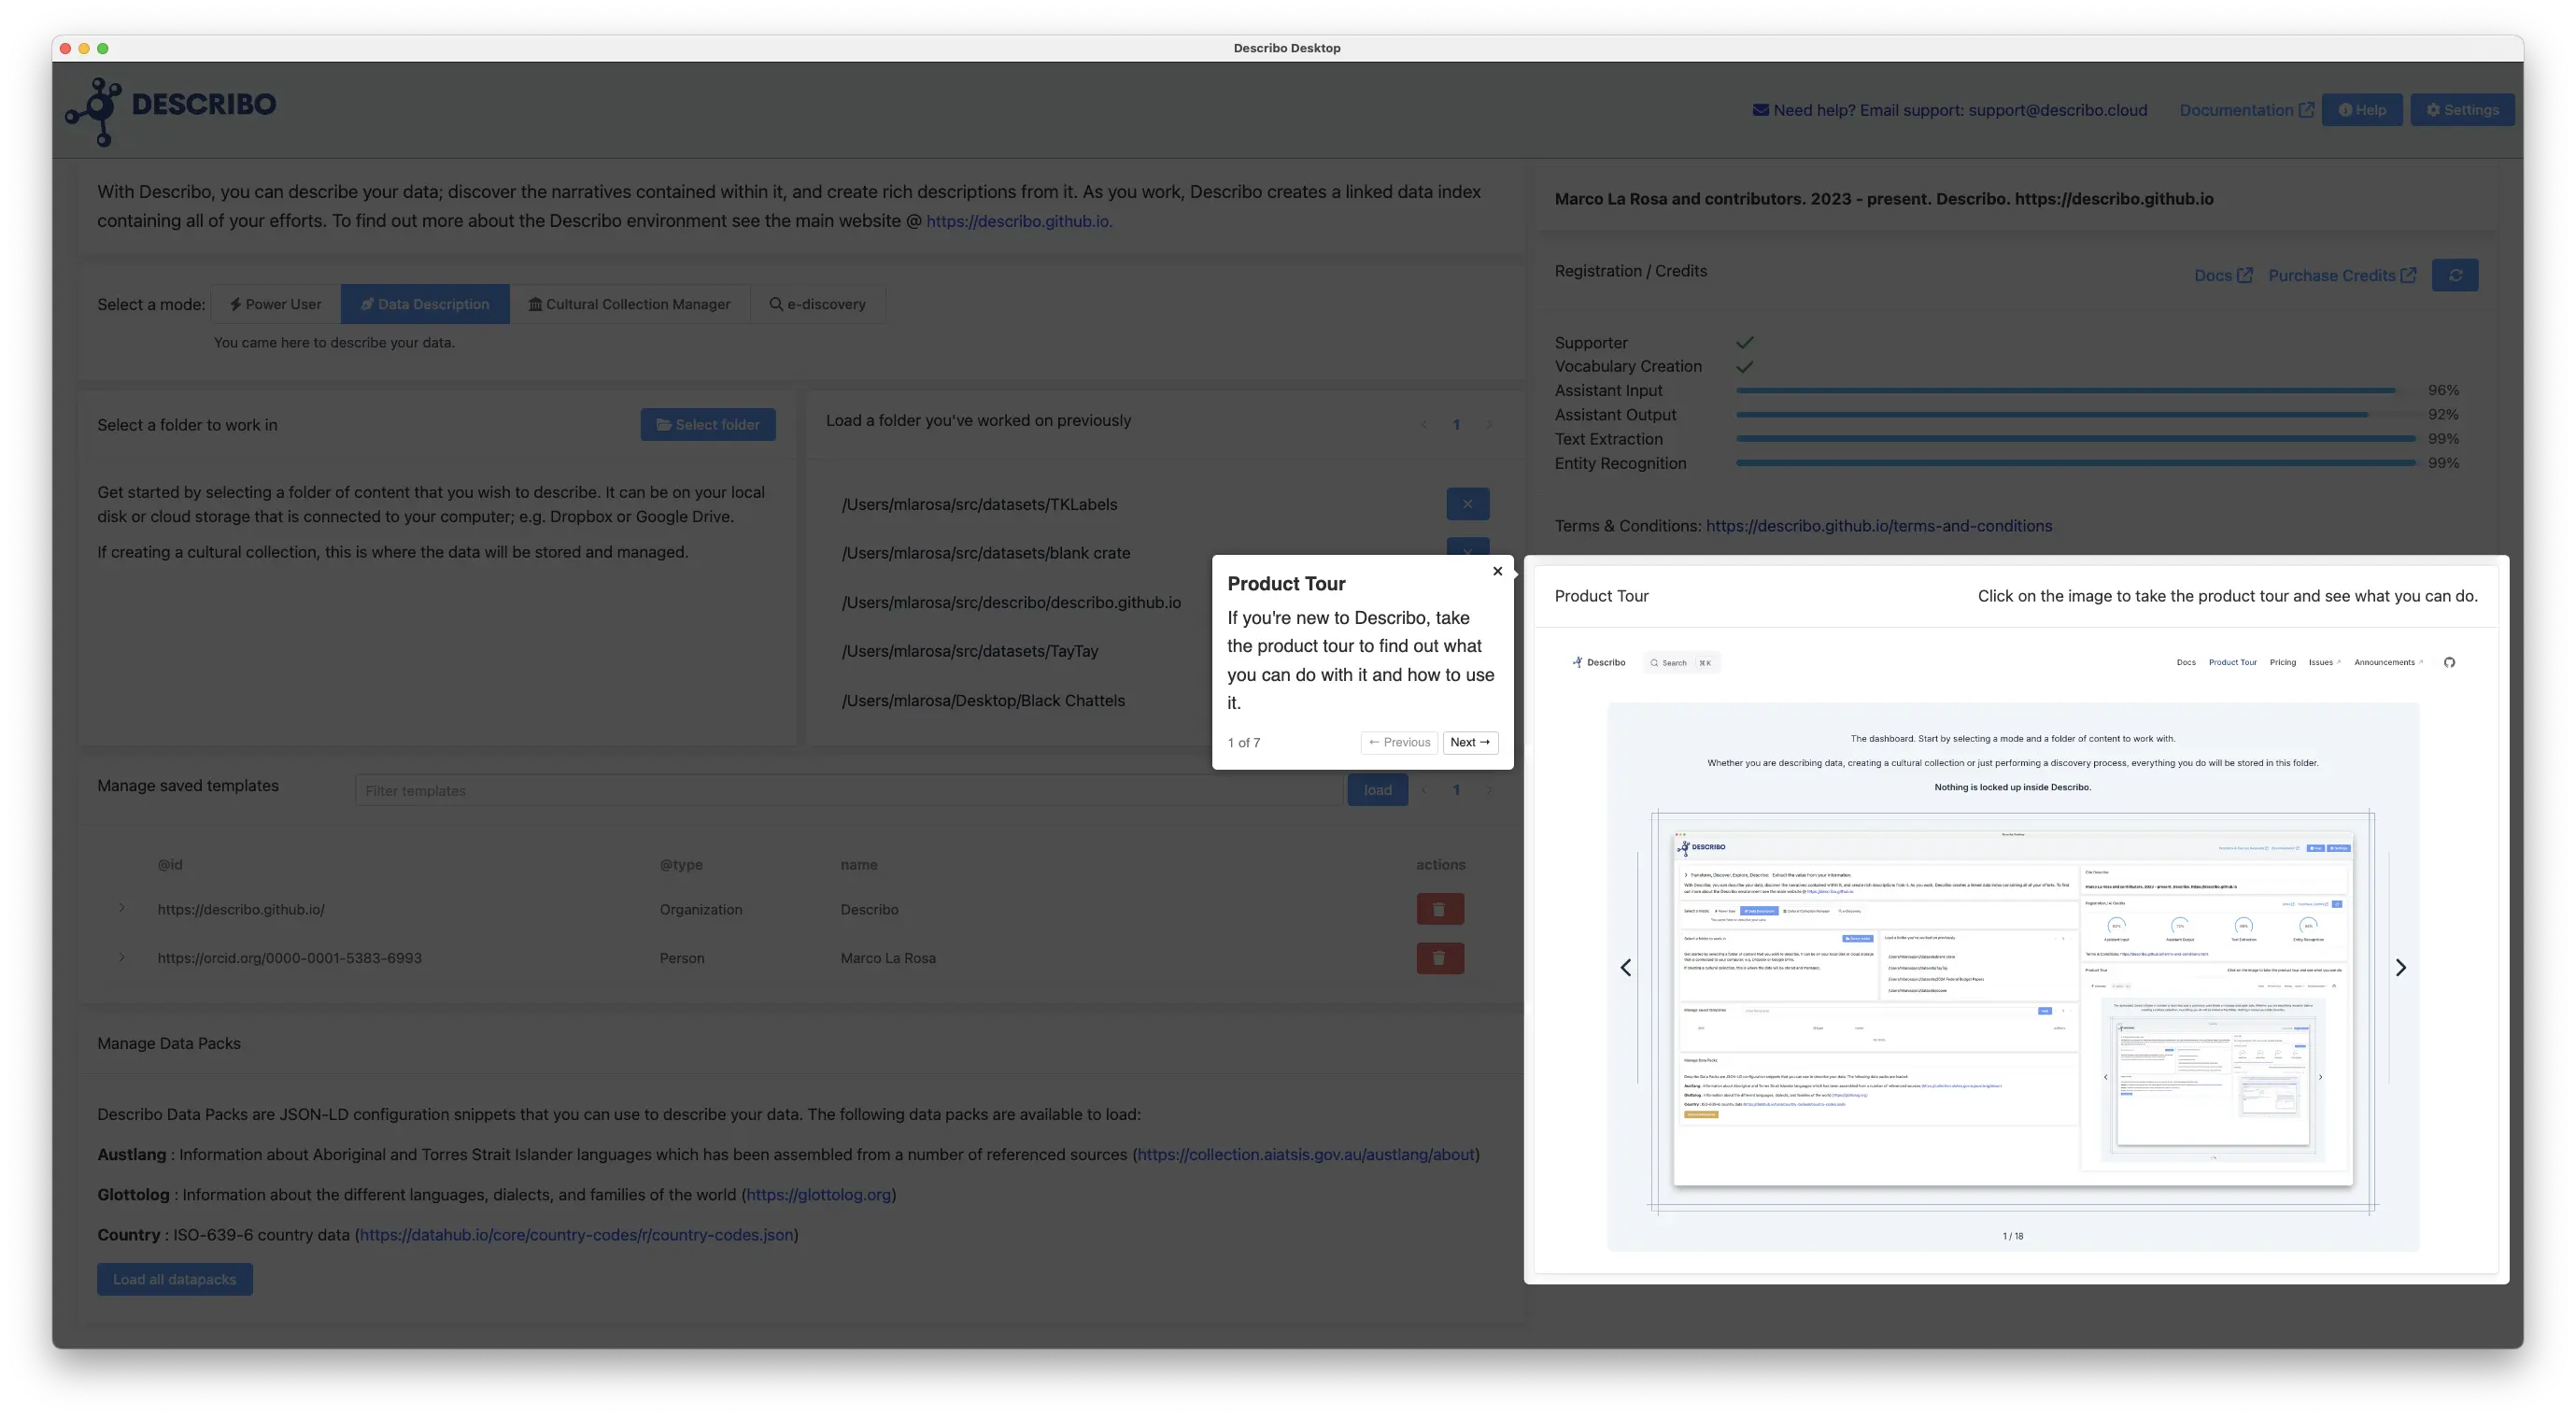
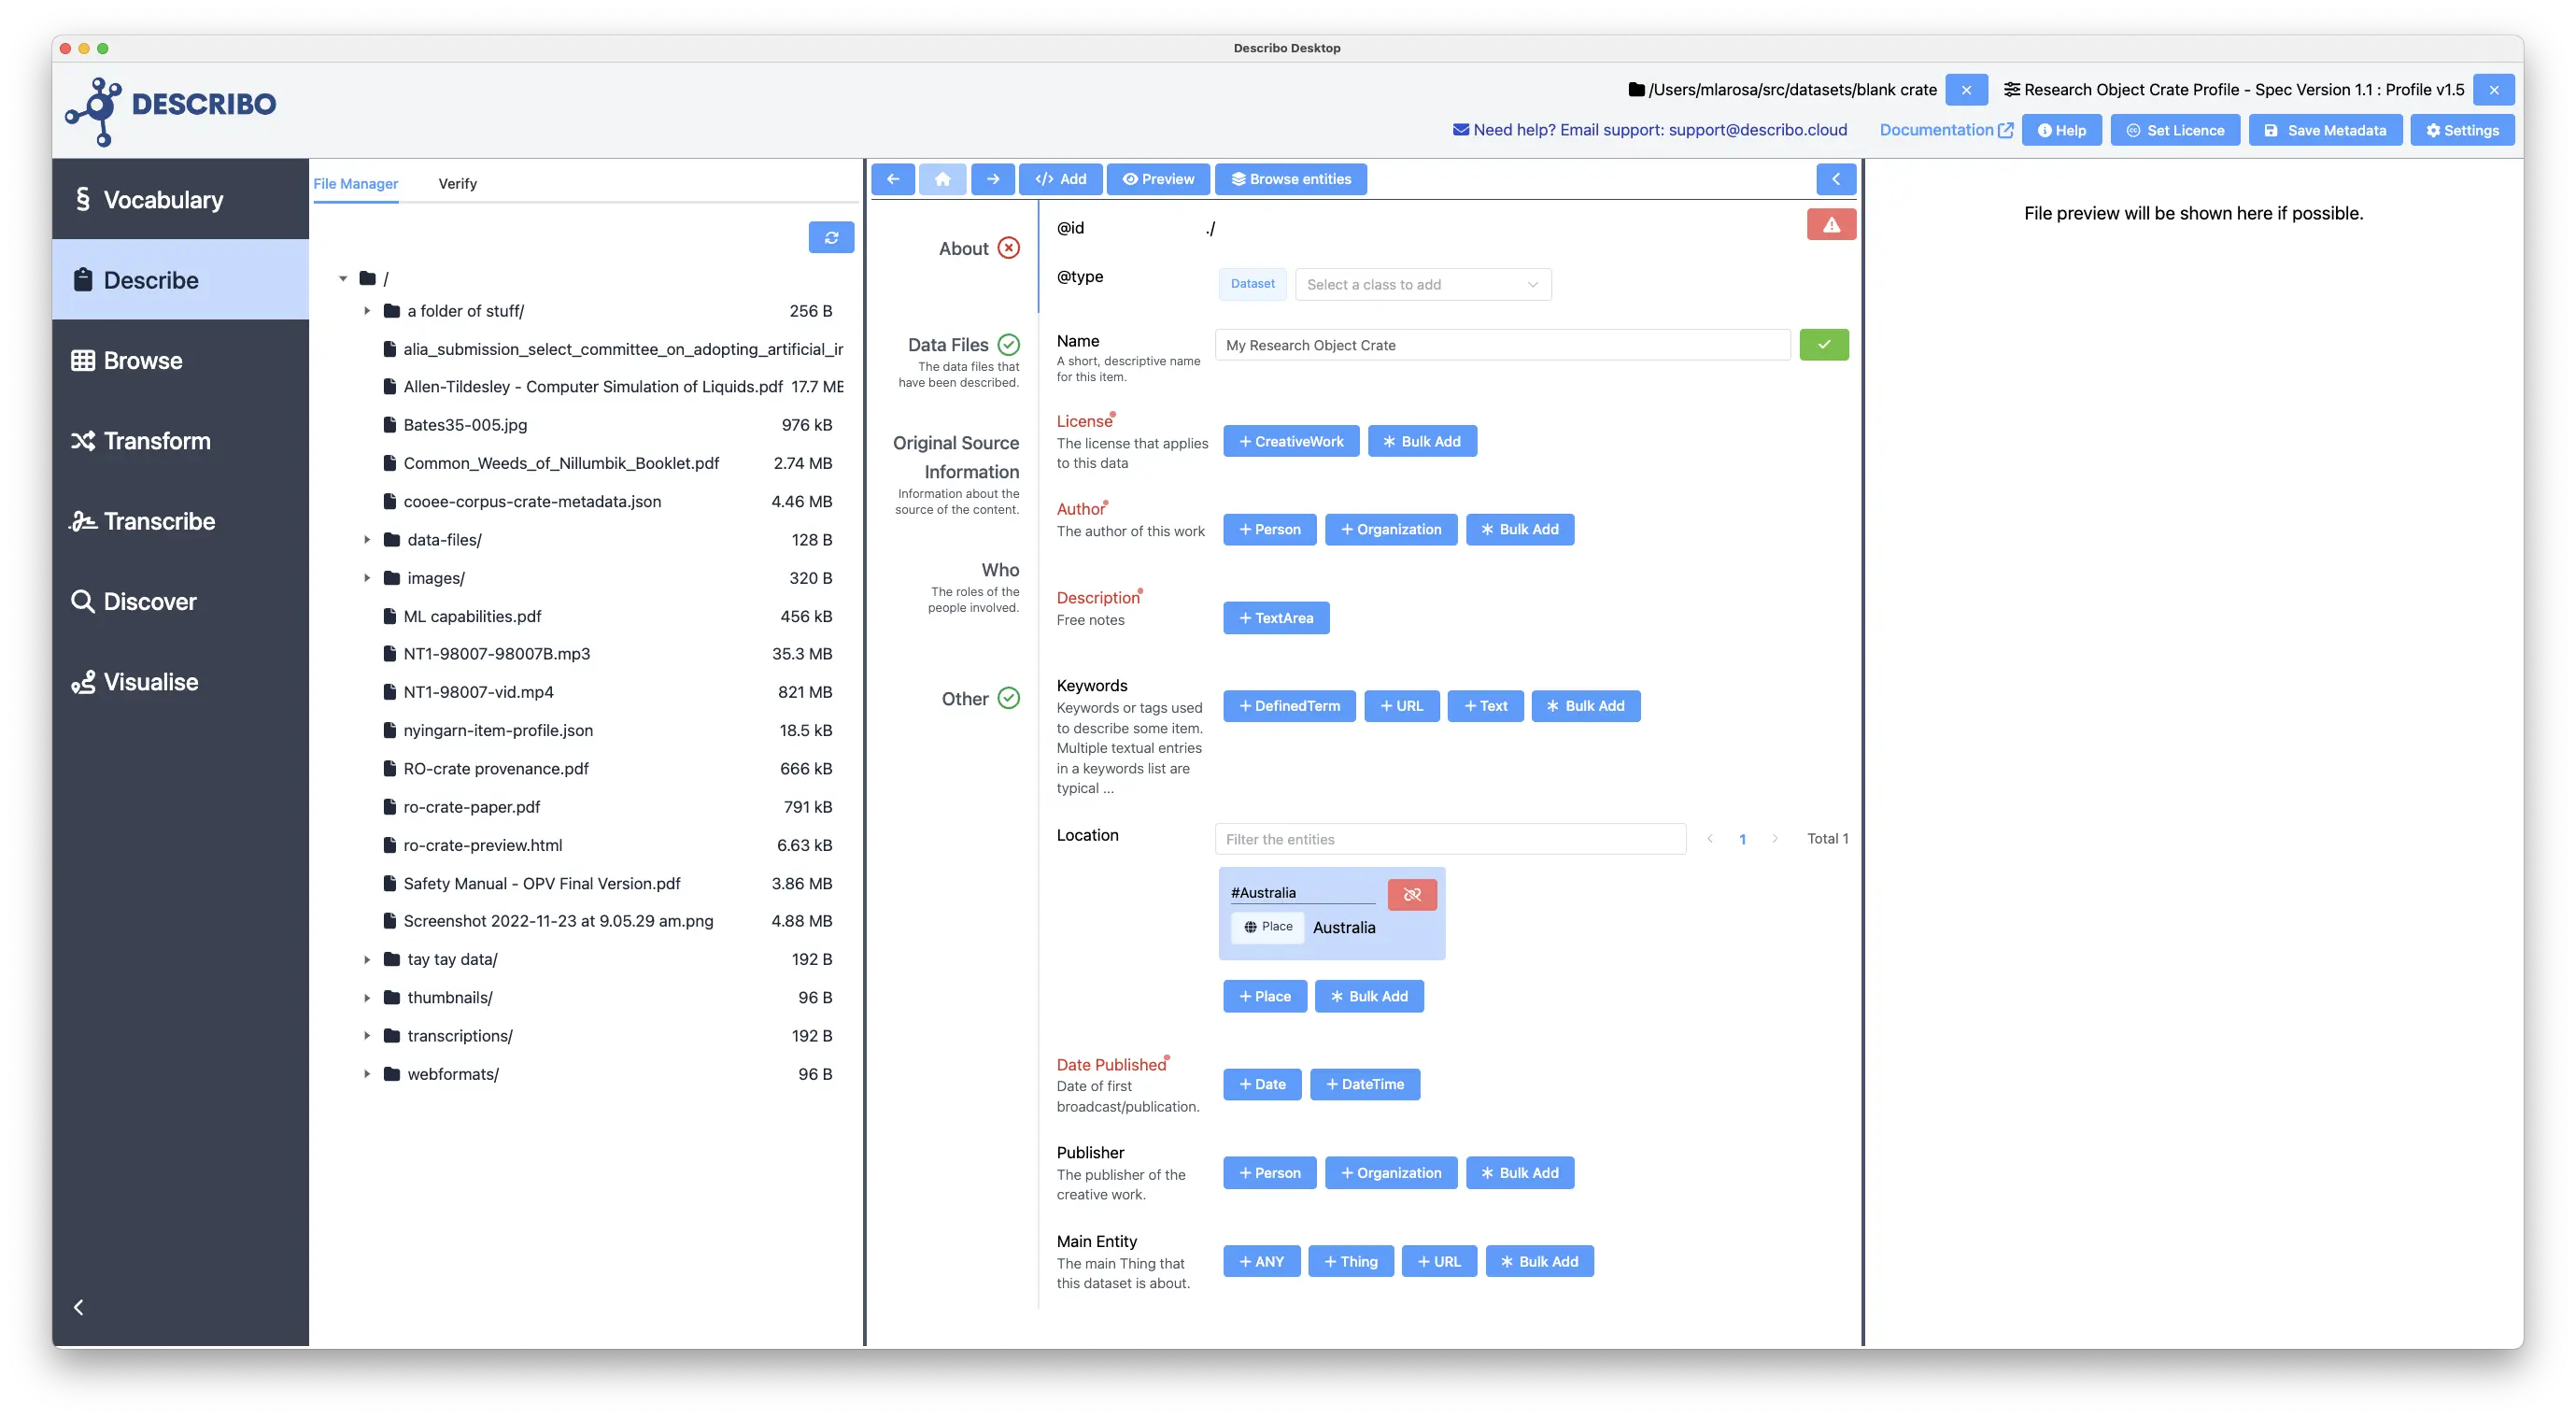
Start by selecting a mode (go with Data Description for now) and a folder of content to work with. When you select the folder, you will be taken to the workspace. The Describe tab will be loaded.
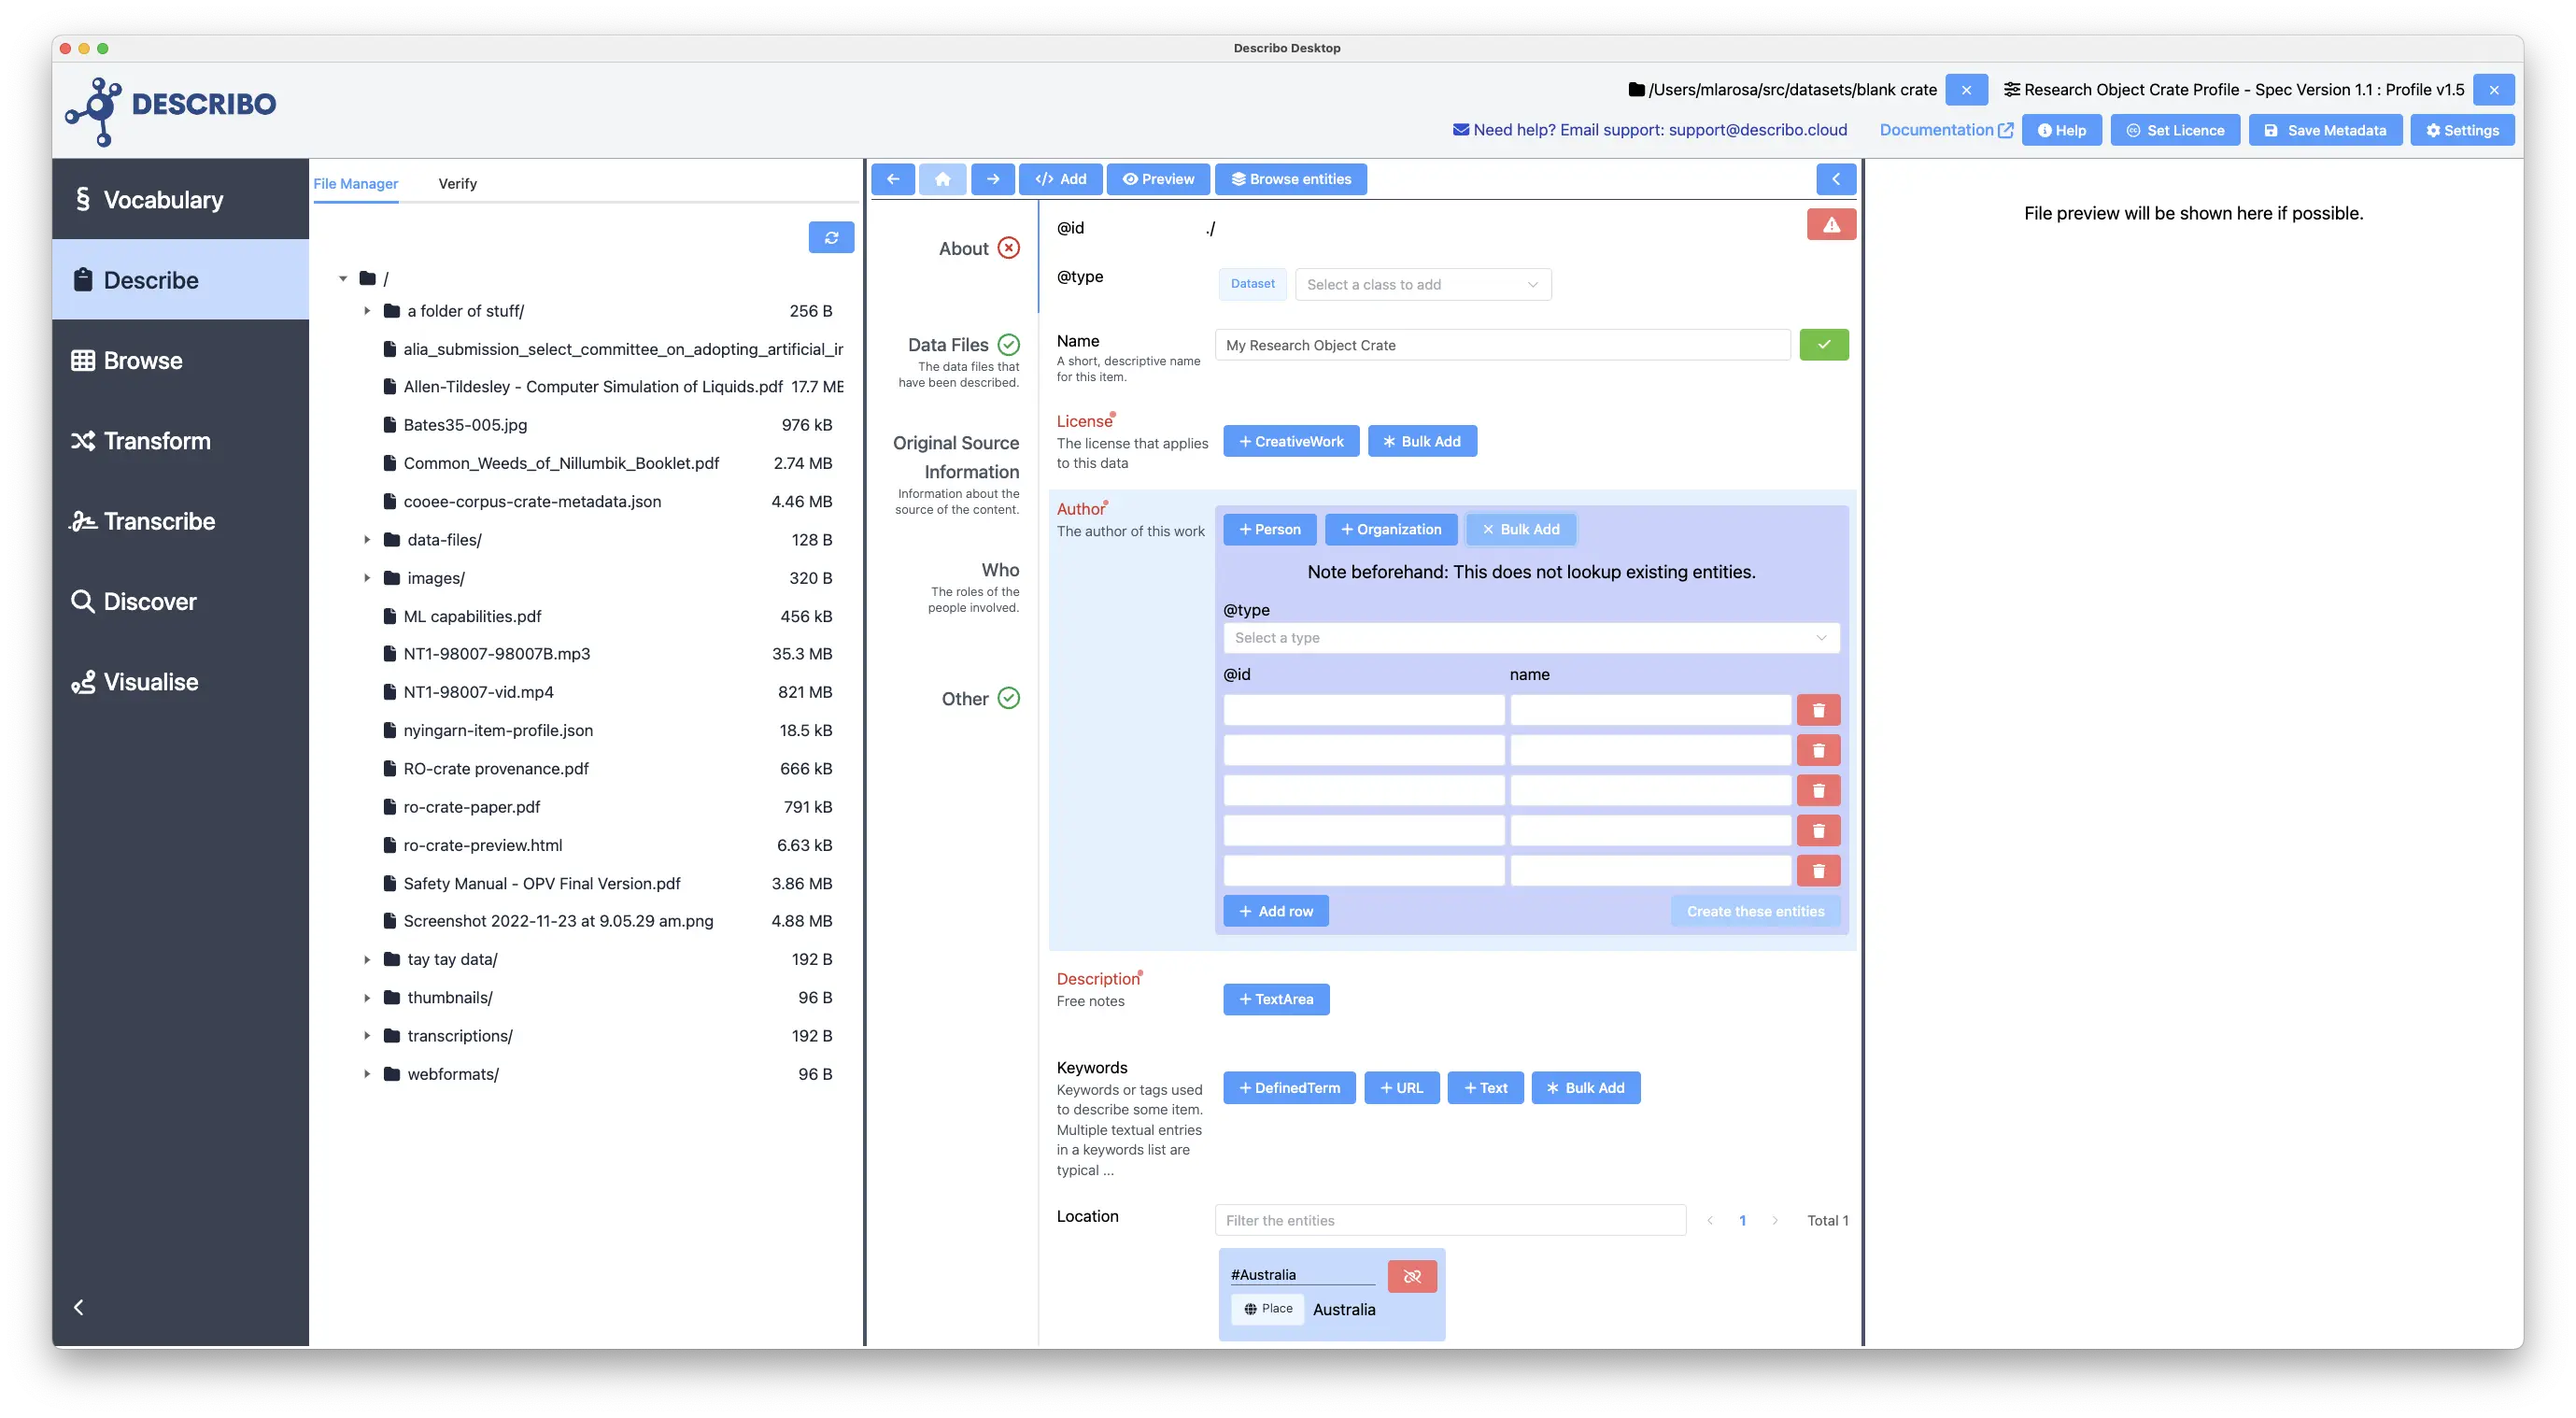
On the left you will see a file browser showing the content of your folder. In the middle will be the metadata editor. And on the right will be a file preview section.
Notice those properties in red? License, author, description etc? That's to show you what the mode thinks you should be describing. Leaving those blank doesn't stop anything working but if you have that information, then it's good if you provide it. Indeed, the power of Describo lies in it's ability to guide you in creating an index to your data. Both by telling you what information to provide and what type of data is expected at any point.
If you select a file in the file browser, it will be added to the index and a preview will be displayed.
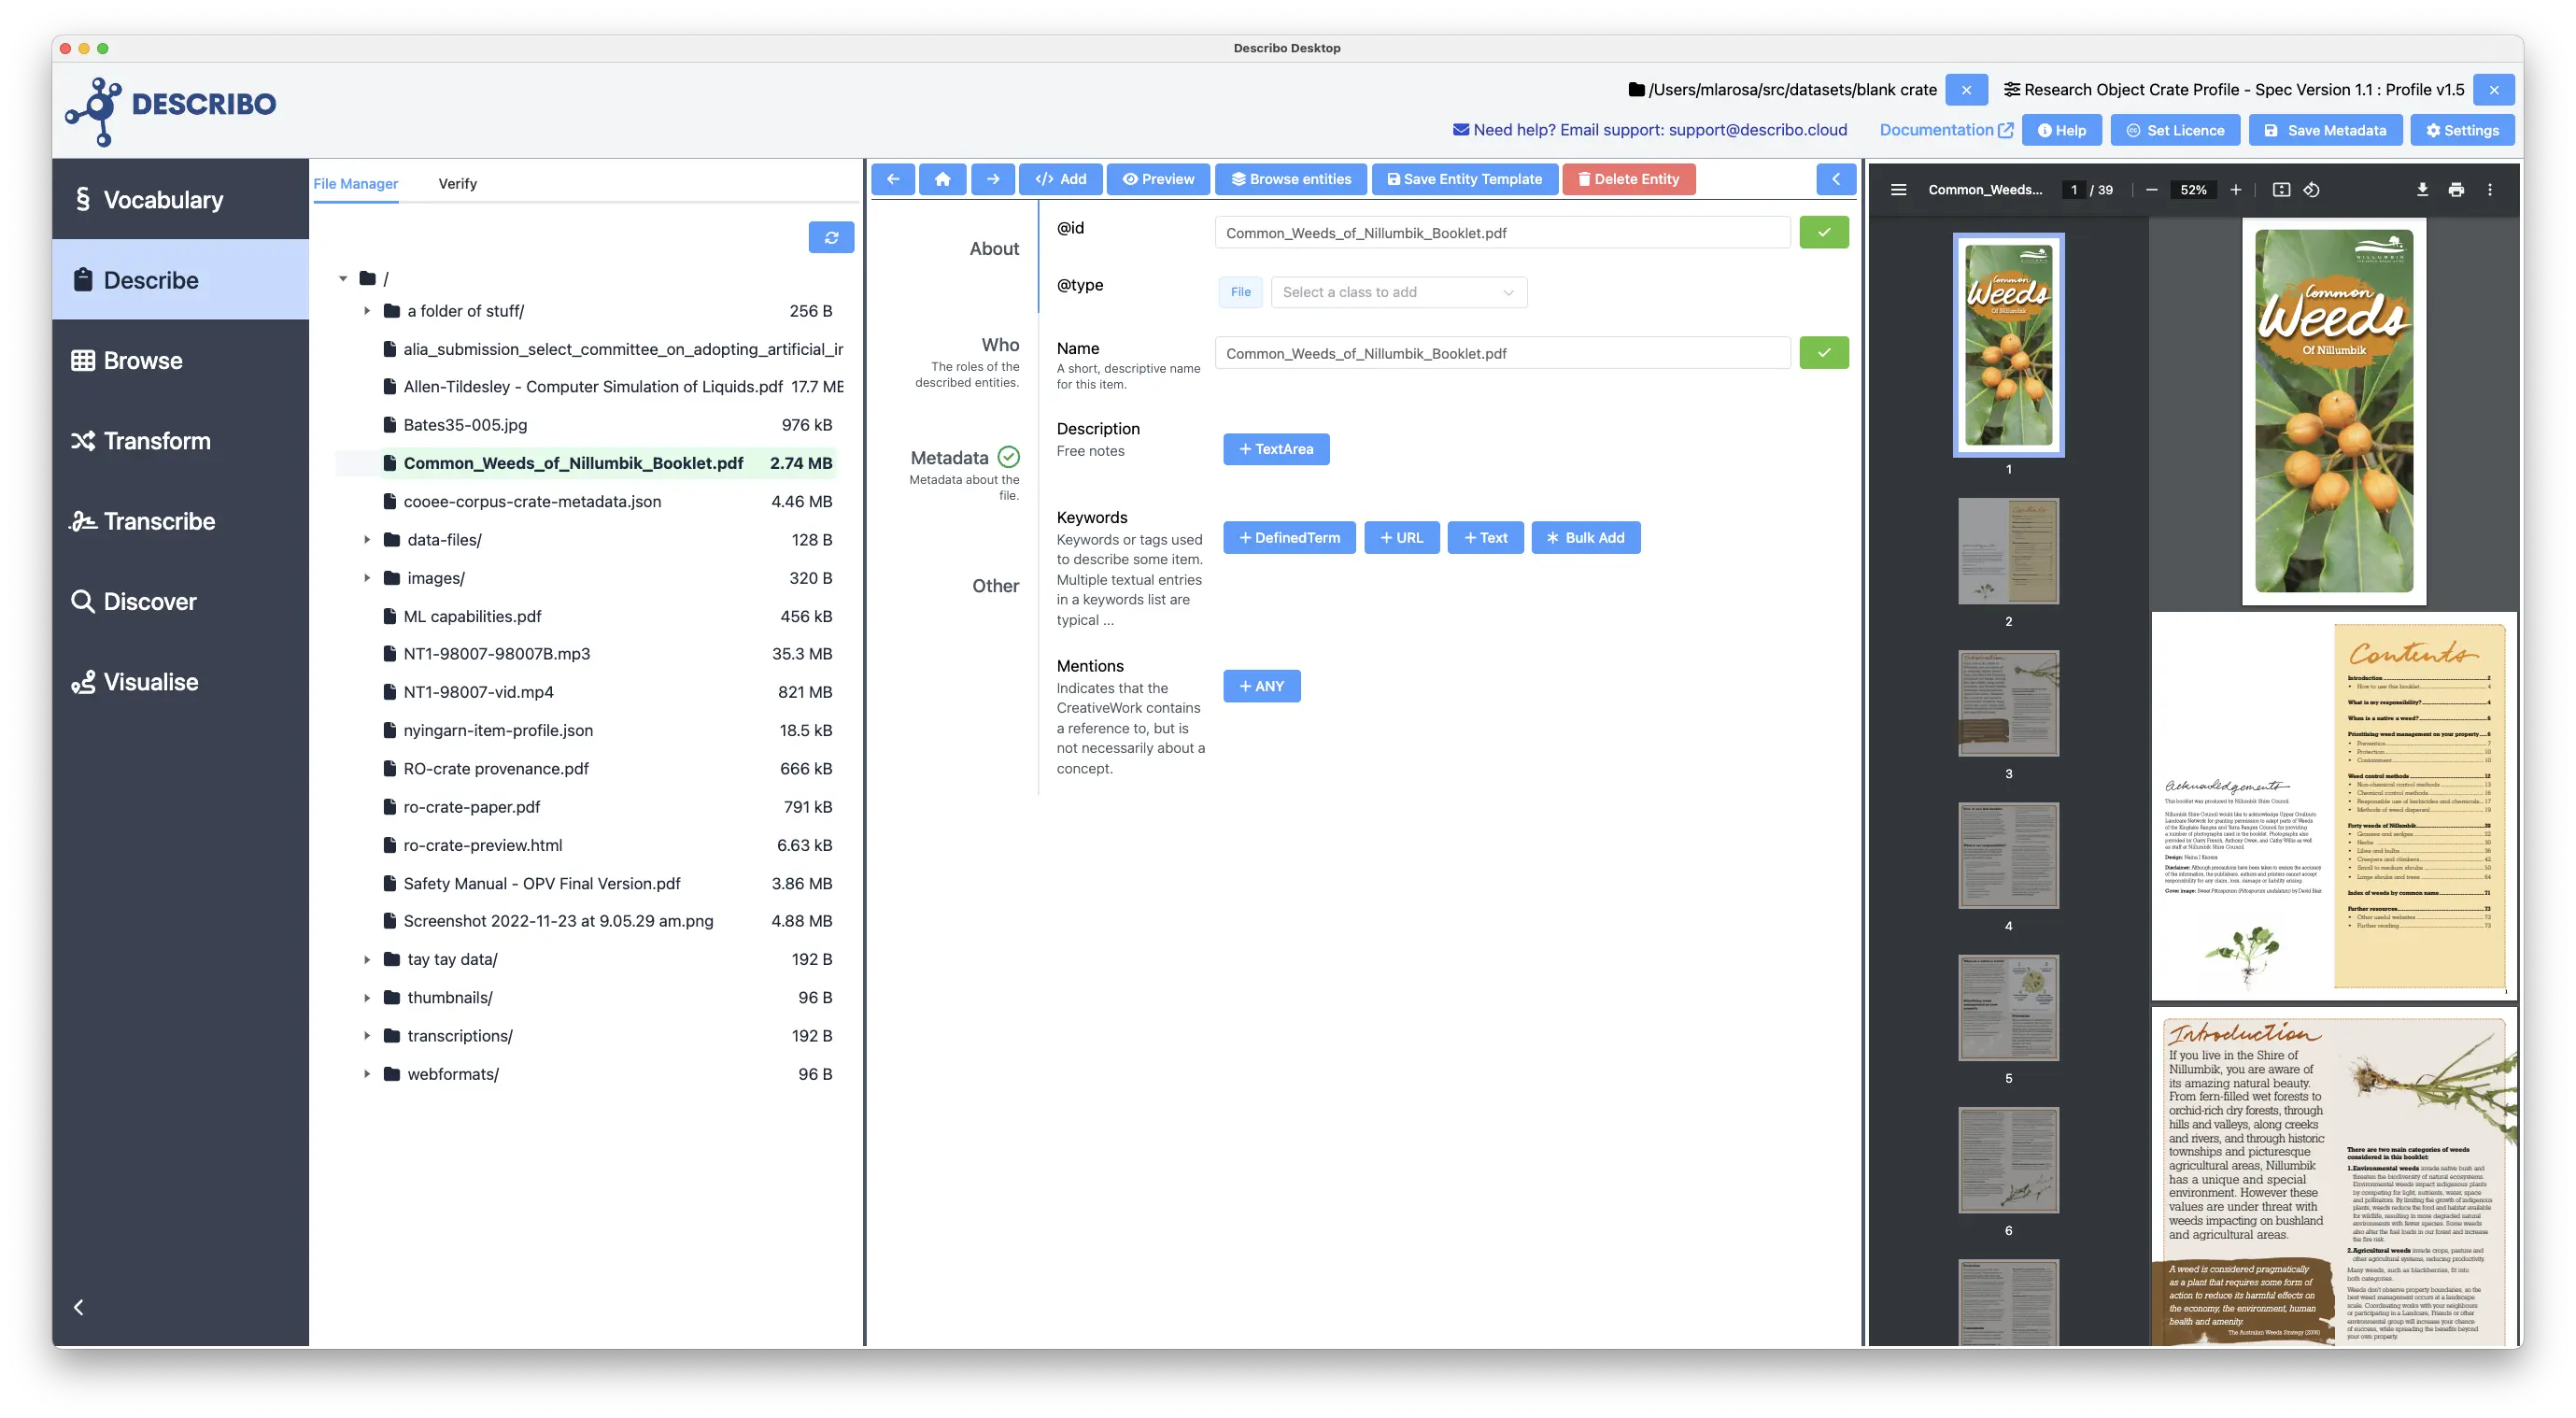
You can now start editing the metadata (creating the index to your content).
- The buttons guide you in what you can do. Try pressing + TextArea next to
Description. A free text box will appear for you to type into. You can keep adding those by pressing the button again and again in order to create highly detailed descriptions. - Now try pressing + URL next to
Keywords. Type in your name. You'll see feedback saying that a URL is expected. Delete that and puthttps://describo.github.ioinstead. Press enter or click the button. You should see that an entity of type 'URL' has been created and associated as a keyword.
The buttons tell you what type of data is expected. If you add something and change your mind, you can delete / unlink it and do it again. Be sure to check out what you can describe in the individual sections (tabs) as well.
Notice the button * Bulk Add next to some of the properties? In cases where you want to describe a number of related entities all at once (e.g. multiple authors), you can use the bulk add controls to quickly add sets of entities.
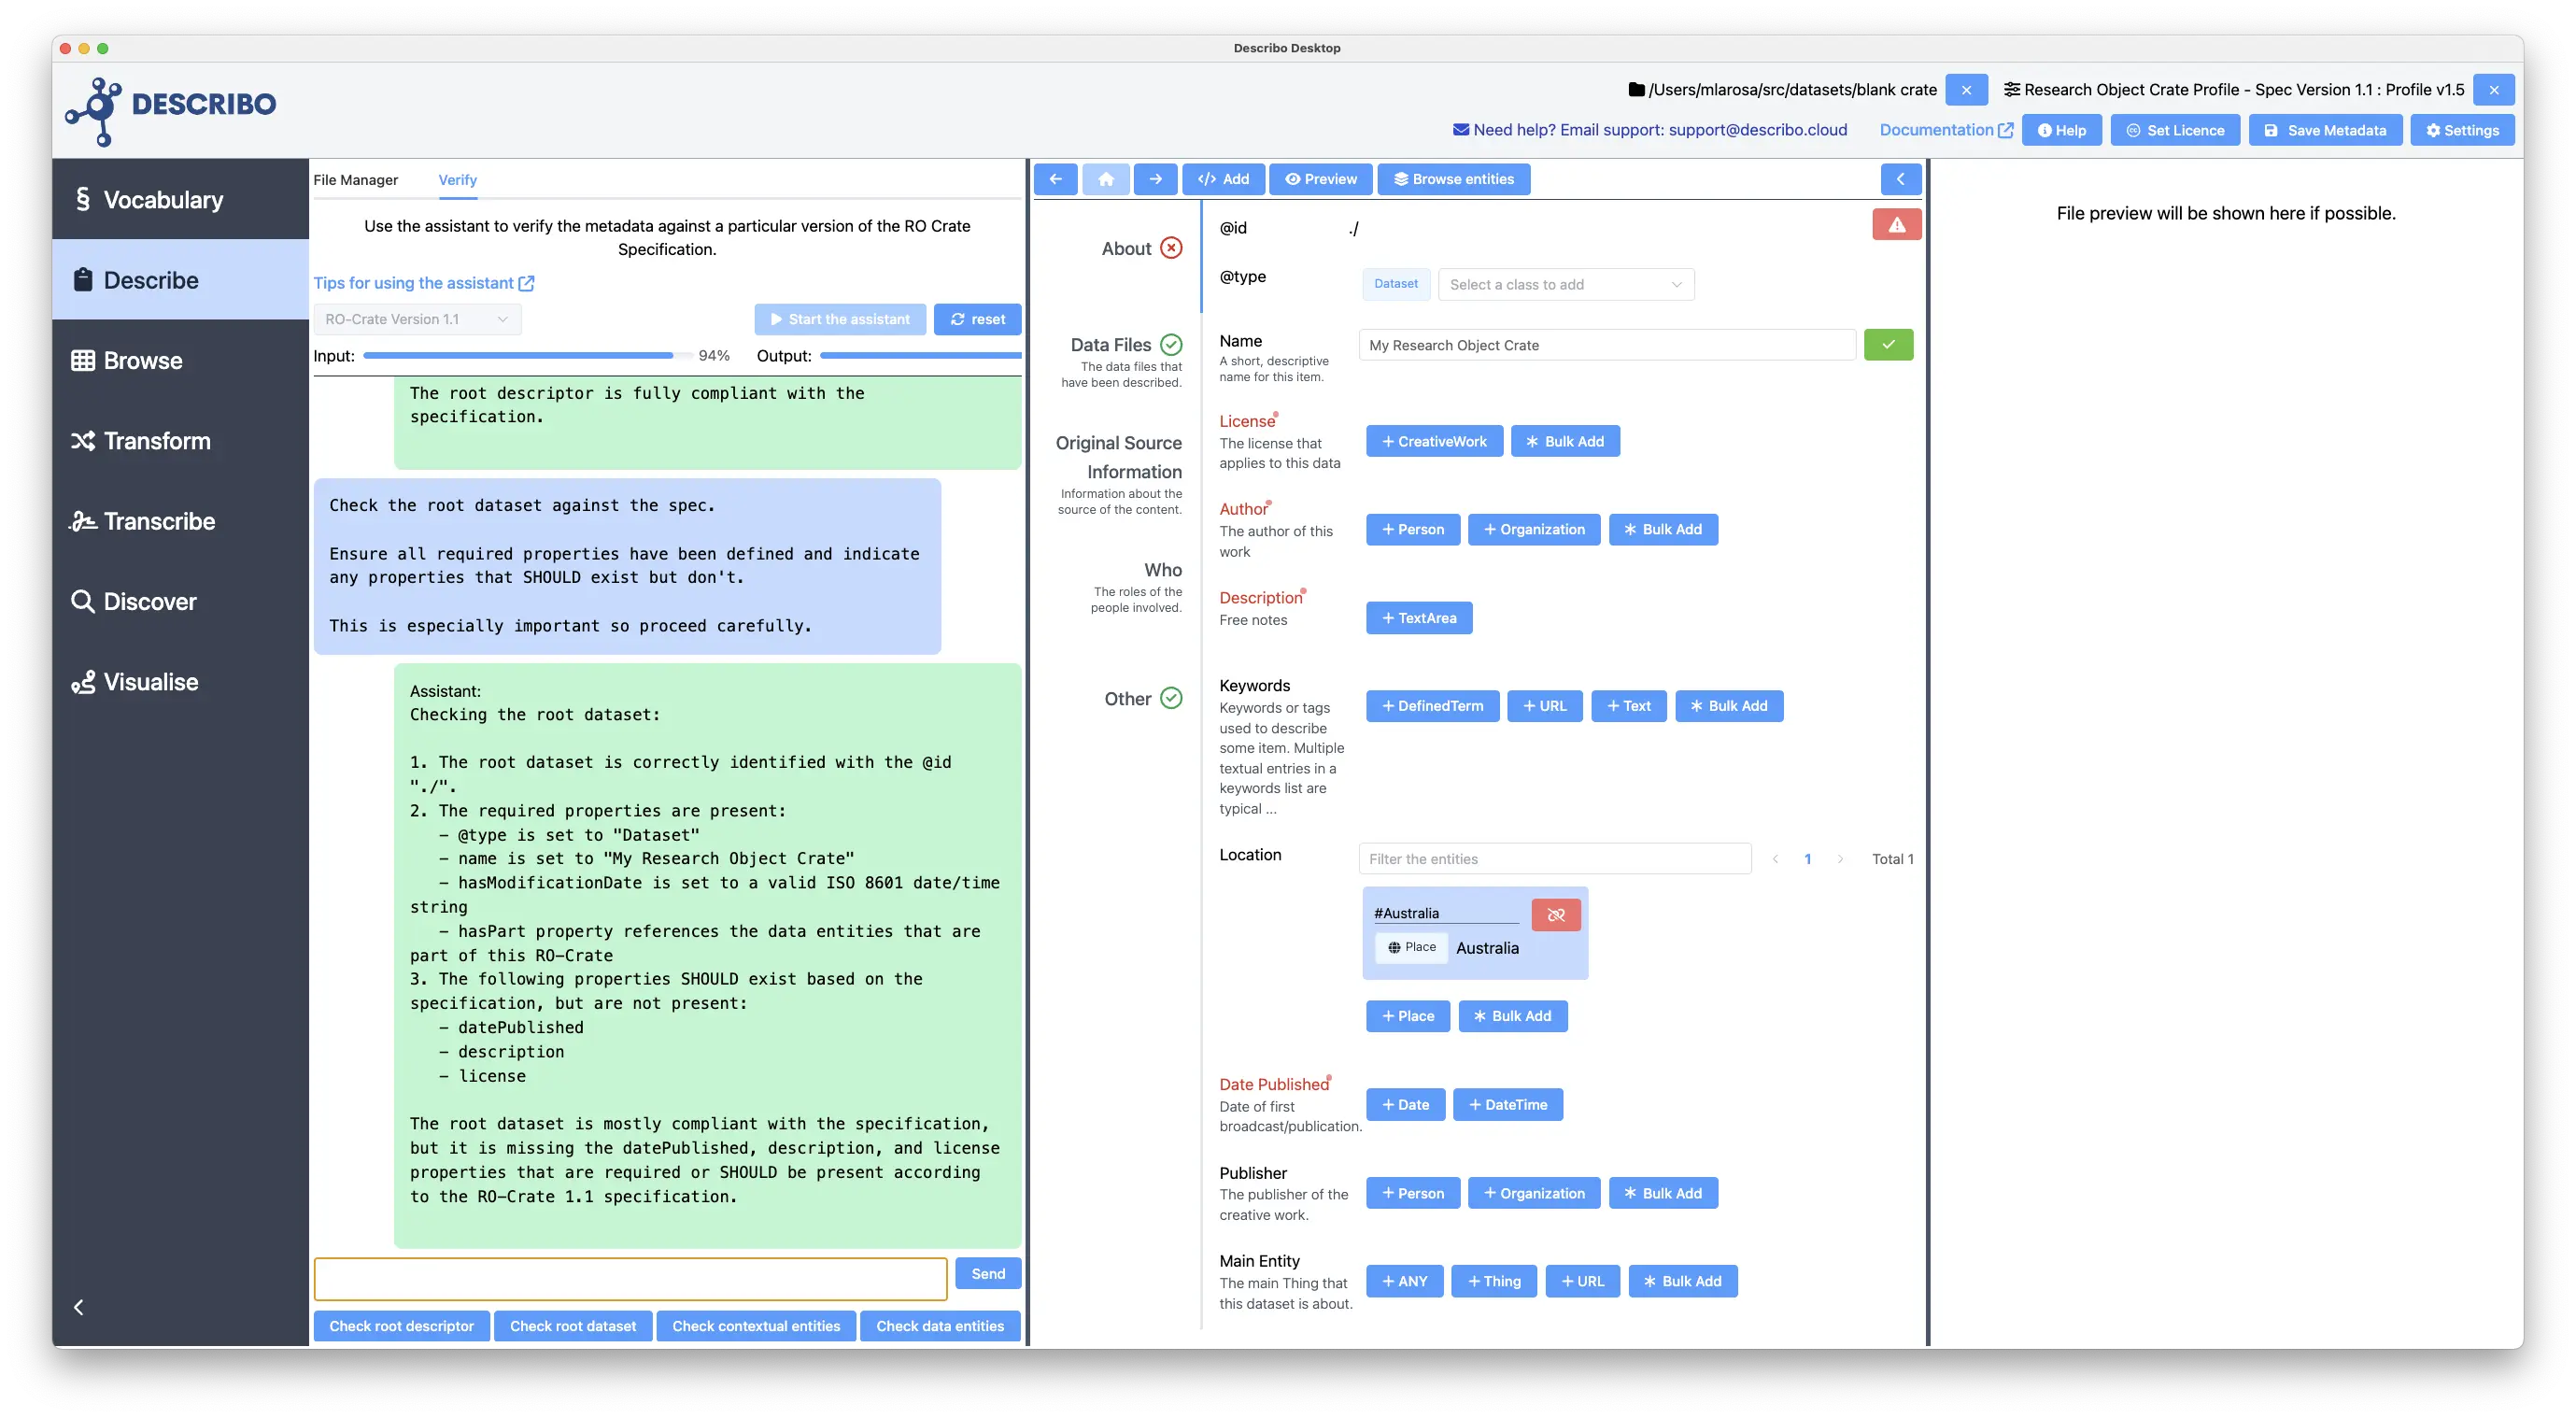
When you're finished, you can use the AI Assistant to help you verify the data against the spec.
Useful information
For those so inclined, you might want to read the following documentation from the specification itself in order to get a better understanding of what Describo is helping you do.
And that's an RO-Crate!
Well done, you created an RO-Crate by describing your data in a standard, spec compliant way!
Useful links where you can learn more
(this is just for reference, you won't be tested on this)

