Creating your own Vocabulary
Info
To use the Vocabulary tool you need to first register with describo.cloud. Two months of free access will be provided upon registration.
Whilst RO-Crate is primarily composed around schema.org definitions, it does draw on other Ontologies (or vocabularies) as required. For example, Object and Collection as defined in Portland Common Data Model are mapped into the namespace as RepositoryObject and RepositoryCollection respectively. The point of this is to say that we can create our own custom Vocabularies whilst still conforming to the RO Crate specification.
The Vocabulary tool in Describo helps you do this and this documentation will show you how.
Definitions
- A
classdefines a type ofentity. For example, defining a classTKLabelwill enable you to create entities whose type isTKLabel.
Vocabulary Controls
- Open the Vocabulary definition in your browserto view the HTML rendering of the Vocabulary;
- Load the Vocabulary into Describowhich loads the generated profile into Describo;
- Save Vocabularyto save your work and generate markdown and html renderings of the Vocab;
- Trash button to delete the Vocabulary.
Define your Vocabulary
The first step in creating a new Vocabulary is to define it!
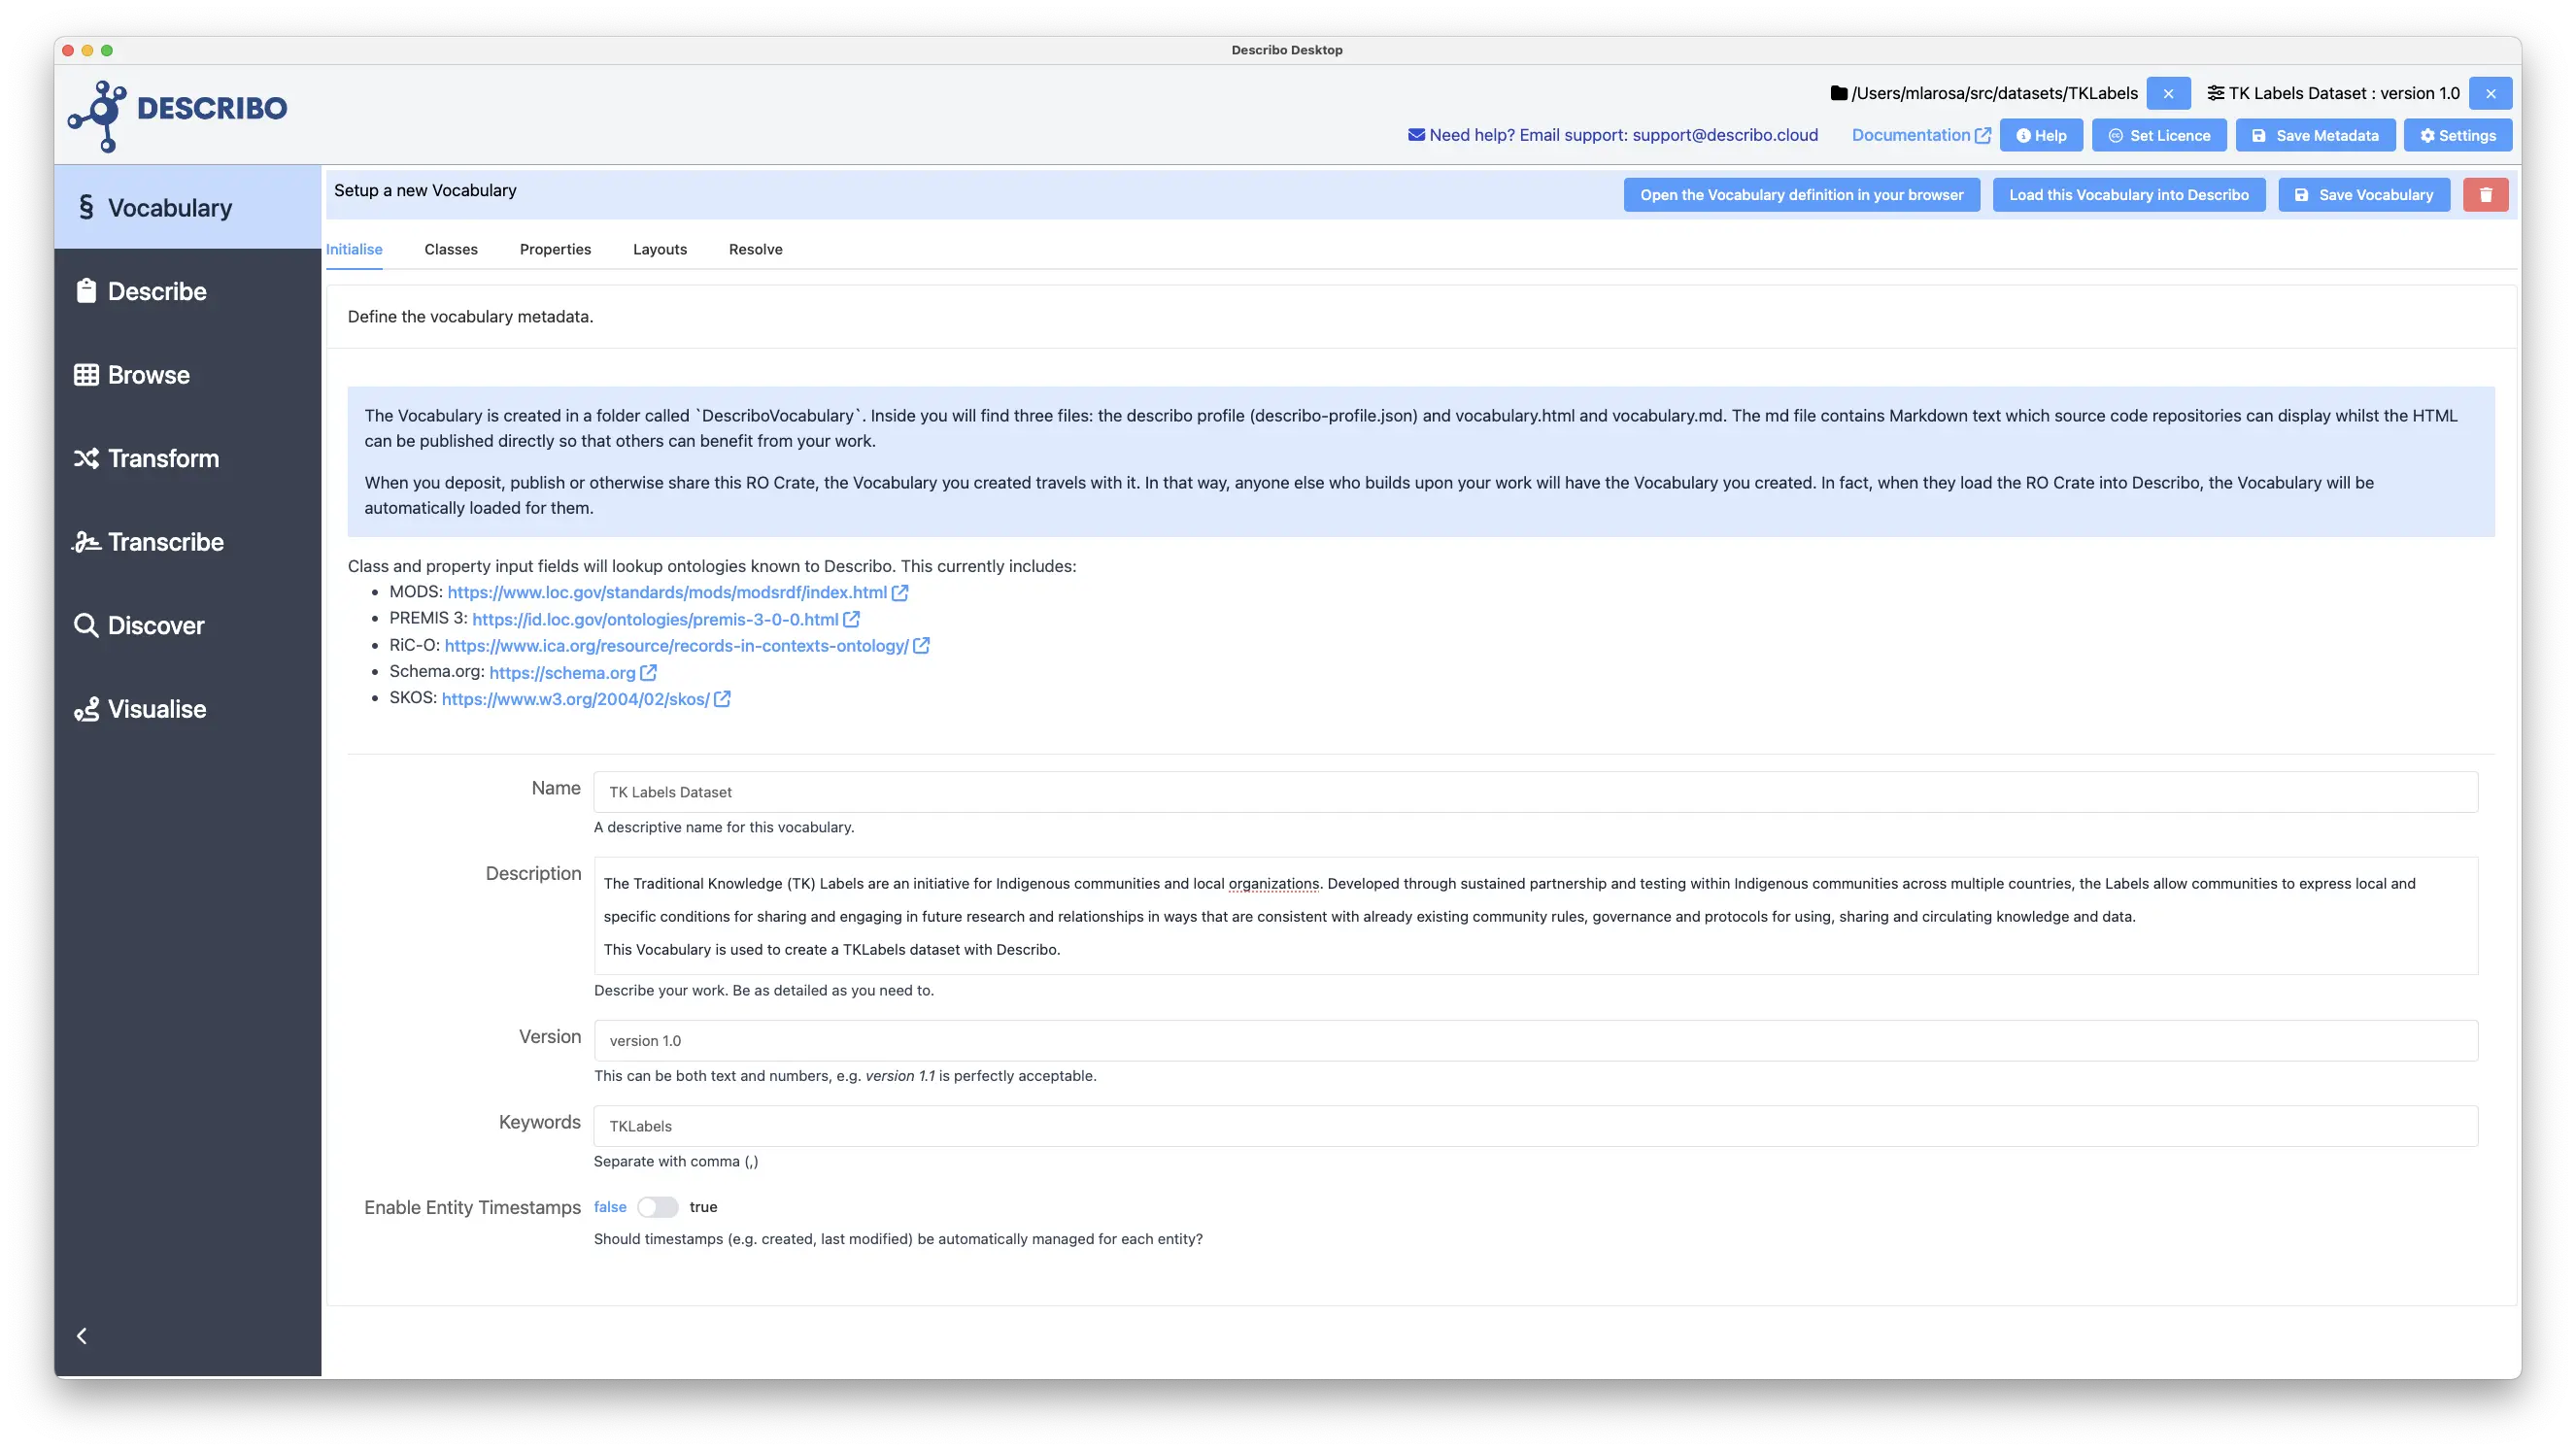
On the Initialise tab we can define the Vocab metadata including:
- giving it a name,
- providing a description about it,
- setting a version, and,
- defining keywords.
- The toggle "Enable Entity Timestamps" allows us to turn timestamping on and off. If set to true, Describo will add two extra fields to each entity: "hasCreationDate and hasModificationDate" which track the date of creation and last modification respectively for every entity. This is useful in the context of a cultural collection manager where you want to track dates related to entity creation and modification.
Known Ontologies
To ease the process of creating a new Vocabulary, and to benefit from the work of previous efforts, Describo offers lookups into classes and properties defined in schema.org as well as MODS, PREMIS-3, RiC-O, and SKOS.
Class Definitions
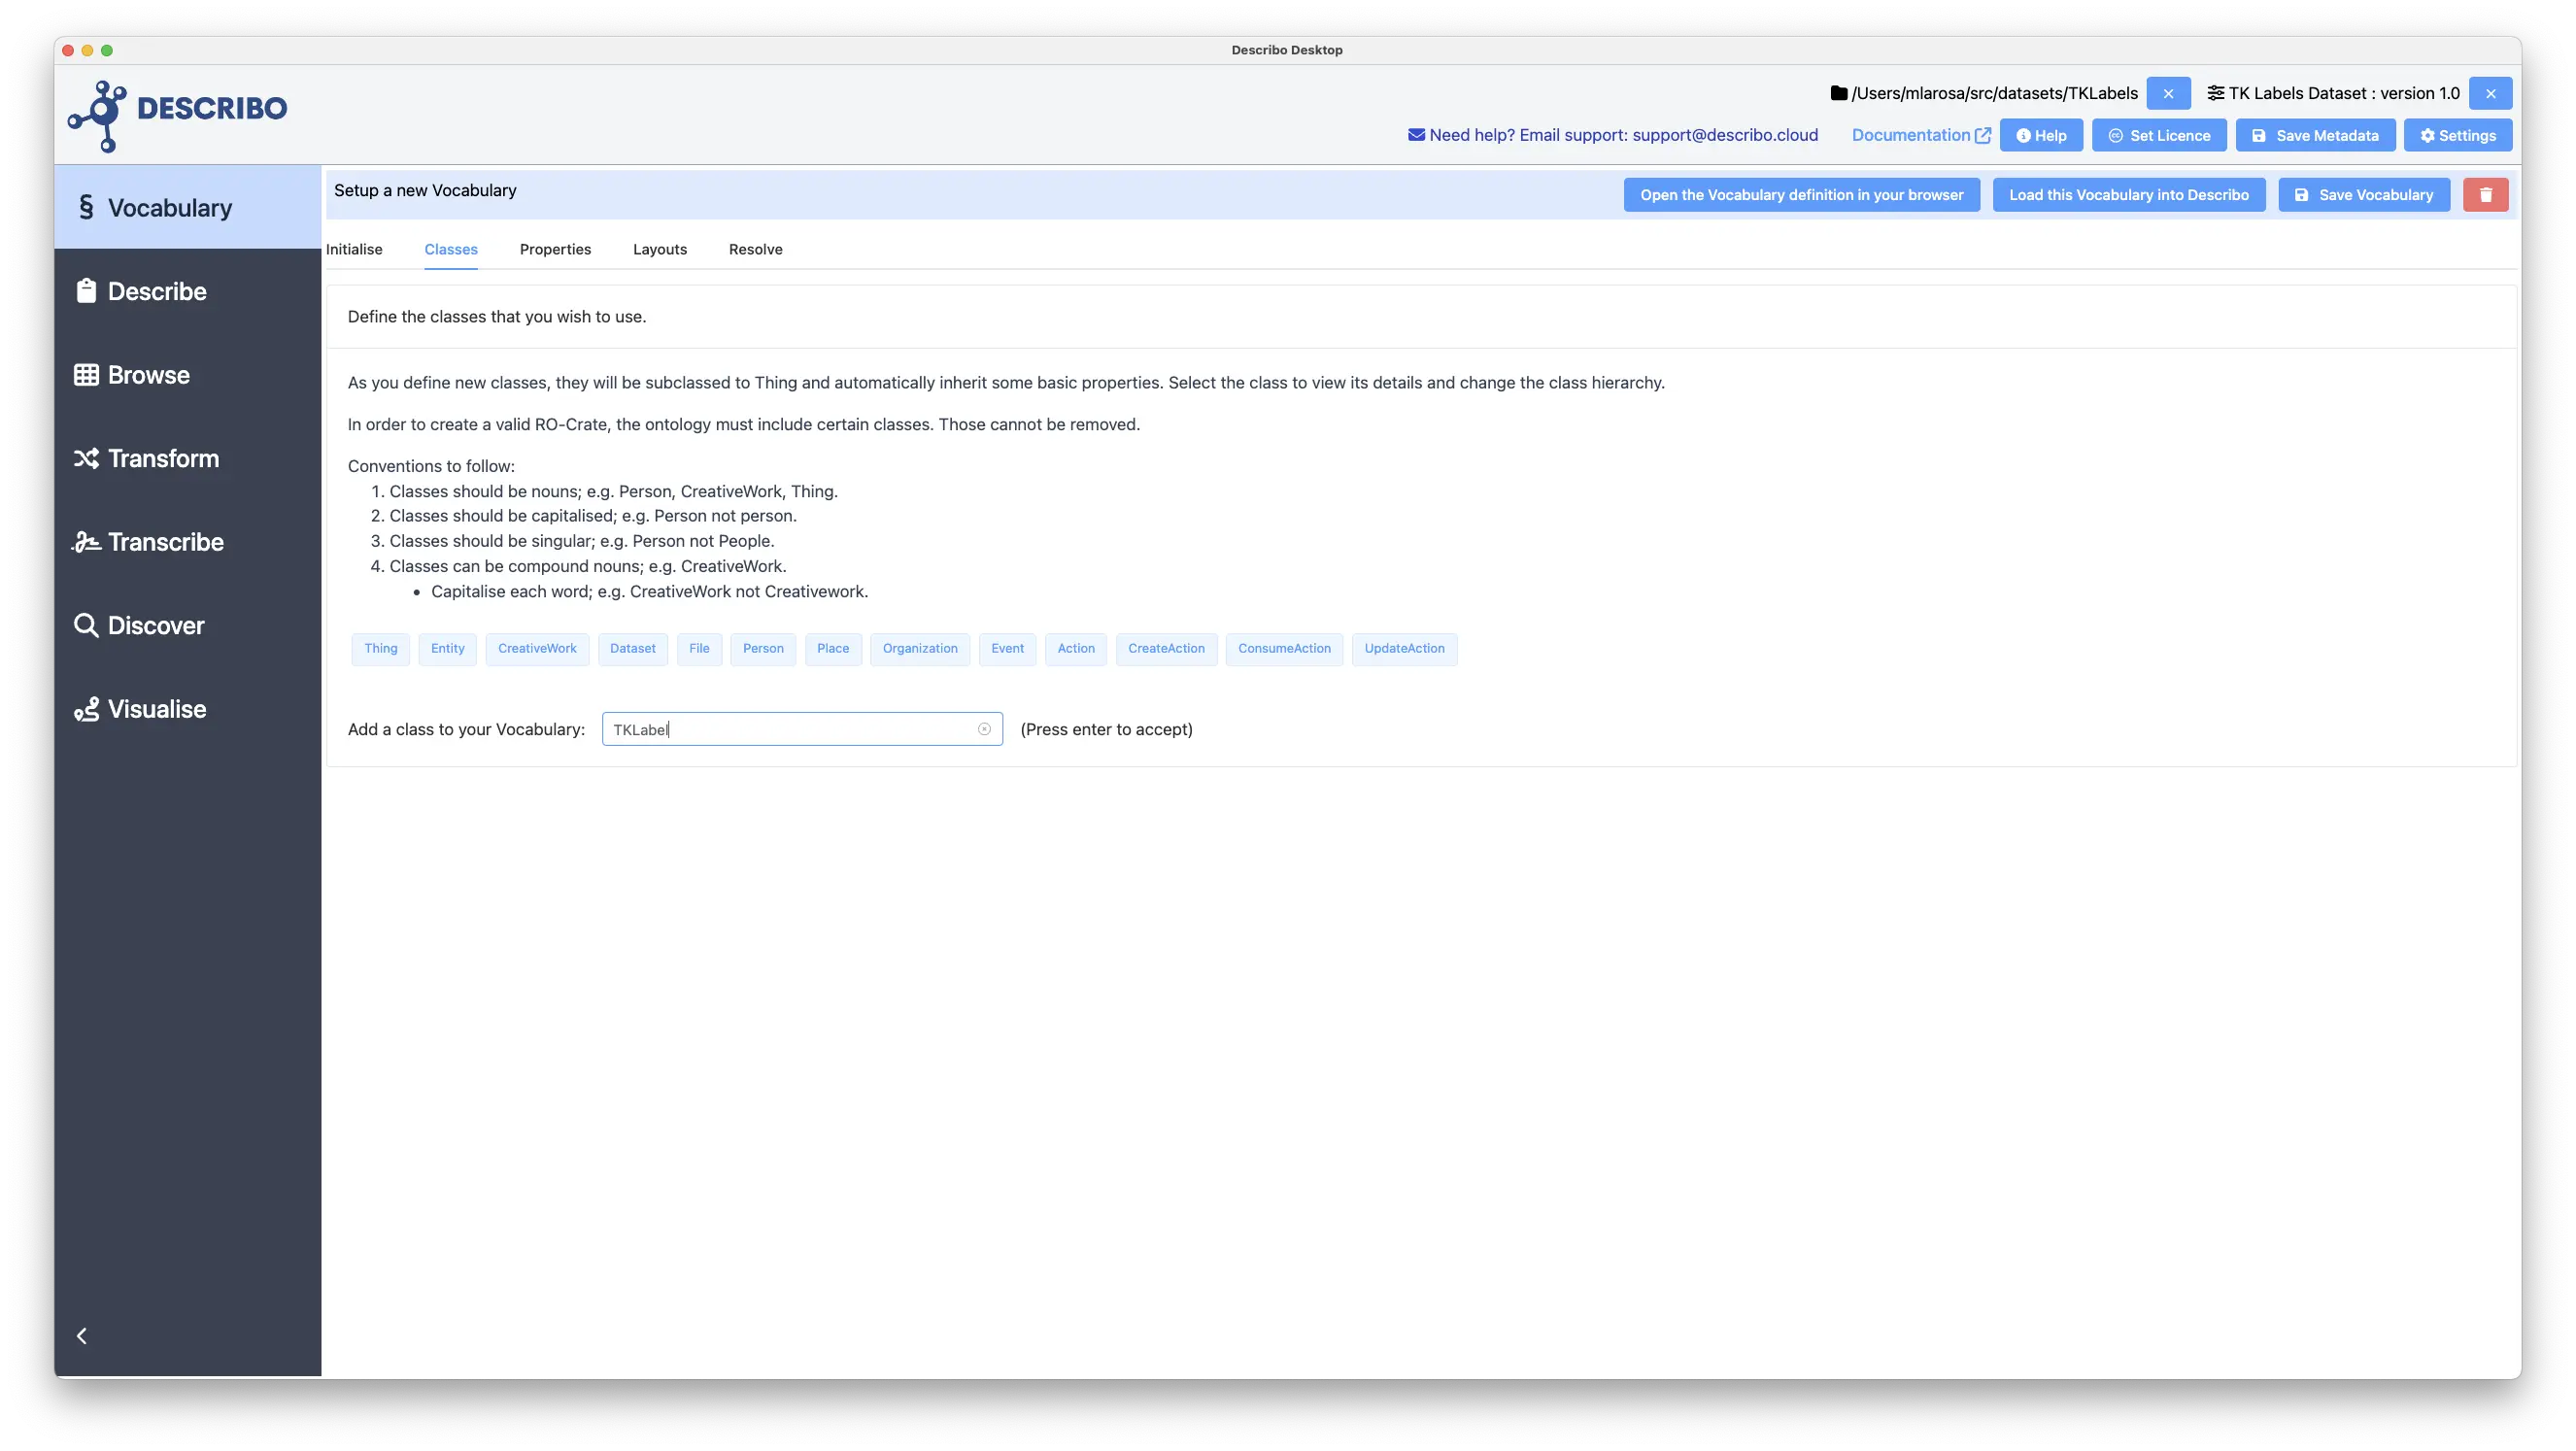
The next step in creating your Vocabulary is defining the classes (entities) that you wish to describe. In the image following you'll see that a number of classes are already defined (e.g. Thing, Person, Event et. al.). These are required by the RO-Crate spec in order to produce a valid RO-Crate. As such, these cannot be removed.
To create a new class we can just type the name into the input box ("Add a class to your Vocabulary") and if there is a match in one of the known ontologies, that can be selected. If not, pressing enter creates the new class. In the image we are about to create a new class TKLabel.
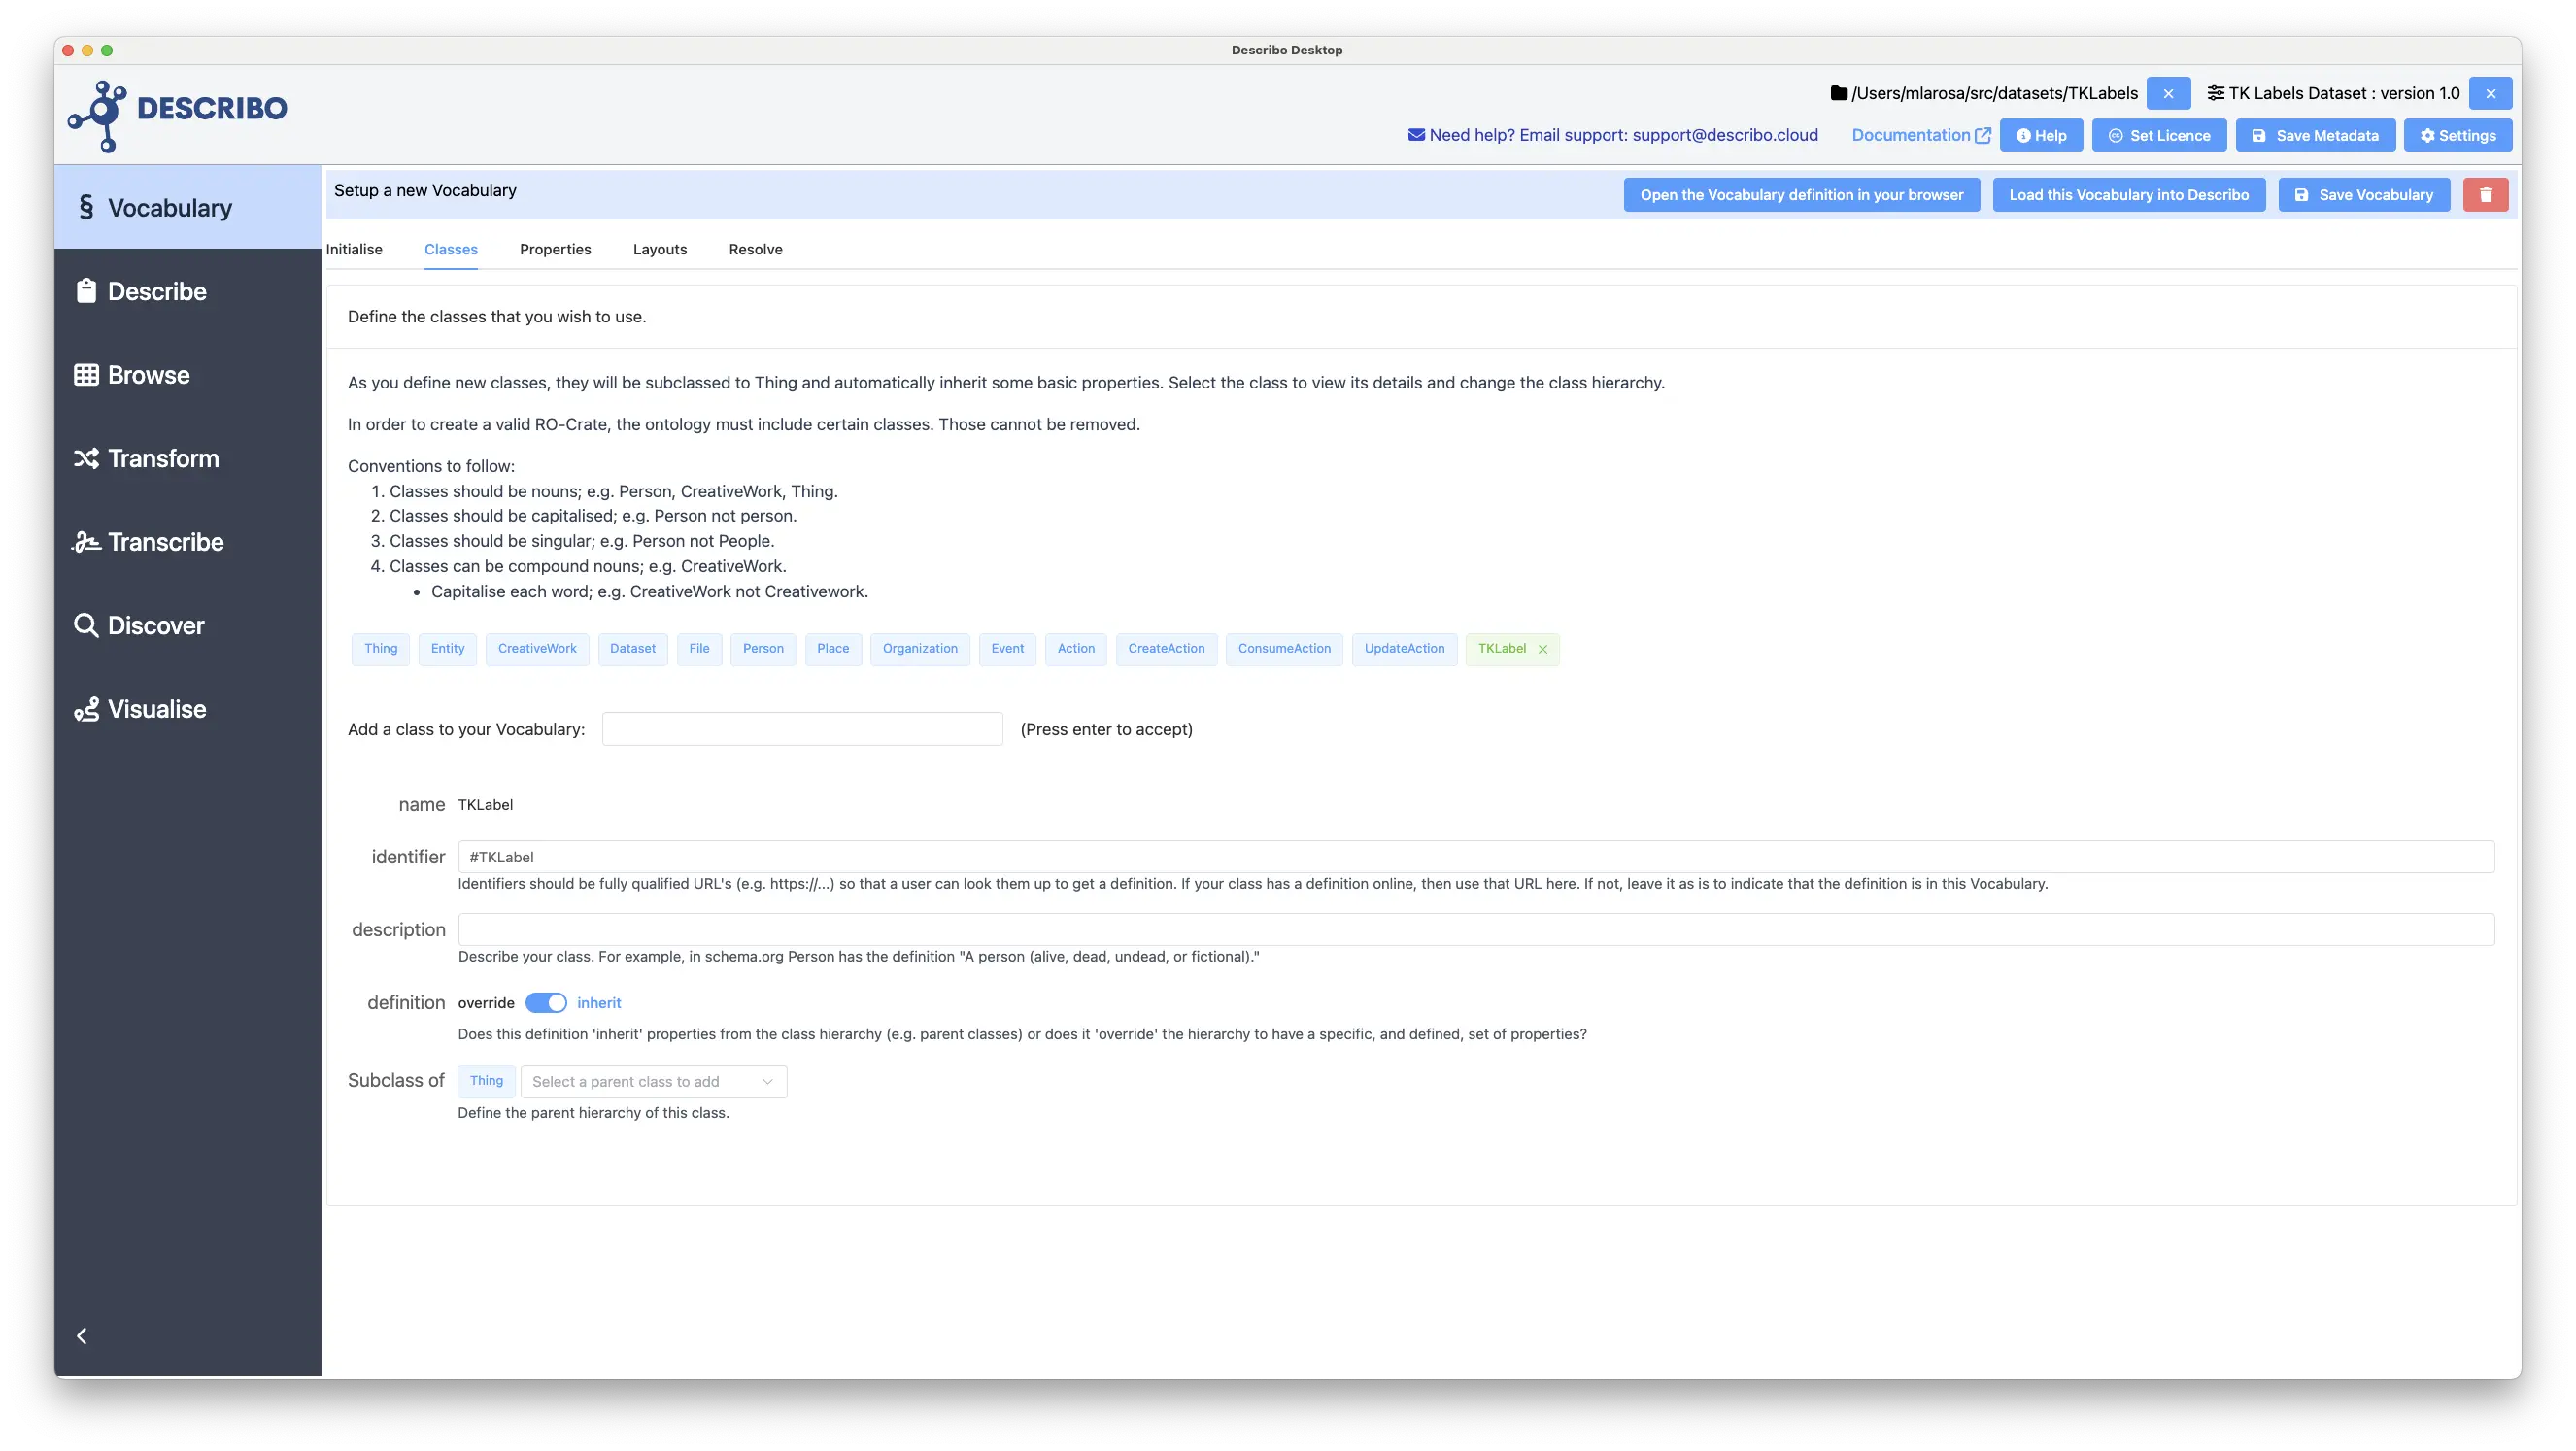
When the class is created, we can see that the identifier is set to #TKLabel. This signifies that the definition of the class is internal to the Vocabulary. Further, we can (and should) provide a description so others know what this class stands for.
The definition can be override or inherit. If you wish to have a tightly controlled set of properties for a given class, then set this to override and then define the exact properties you wish on the Properties tab. If you leave it at inherit, Describo will load all of the properties up the class hierarchy back to Thing.
Finally, you can specify the parent class hierarchy, and specifically, you can specify multiple parent classes.
Property Definitions
Classes (entities) have properties. On the Properties tab we can specify what those properties are and what type of data they can contain. Consider the following image:
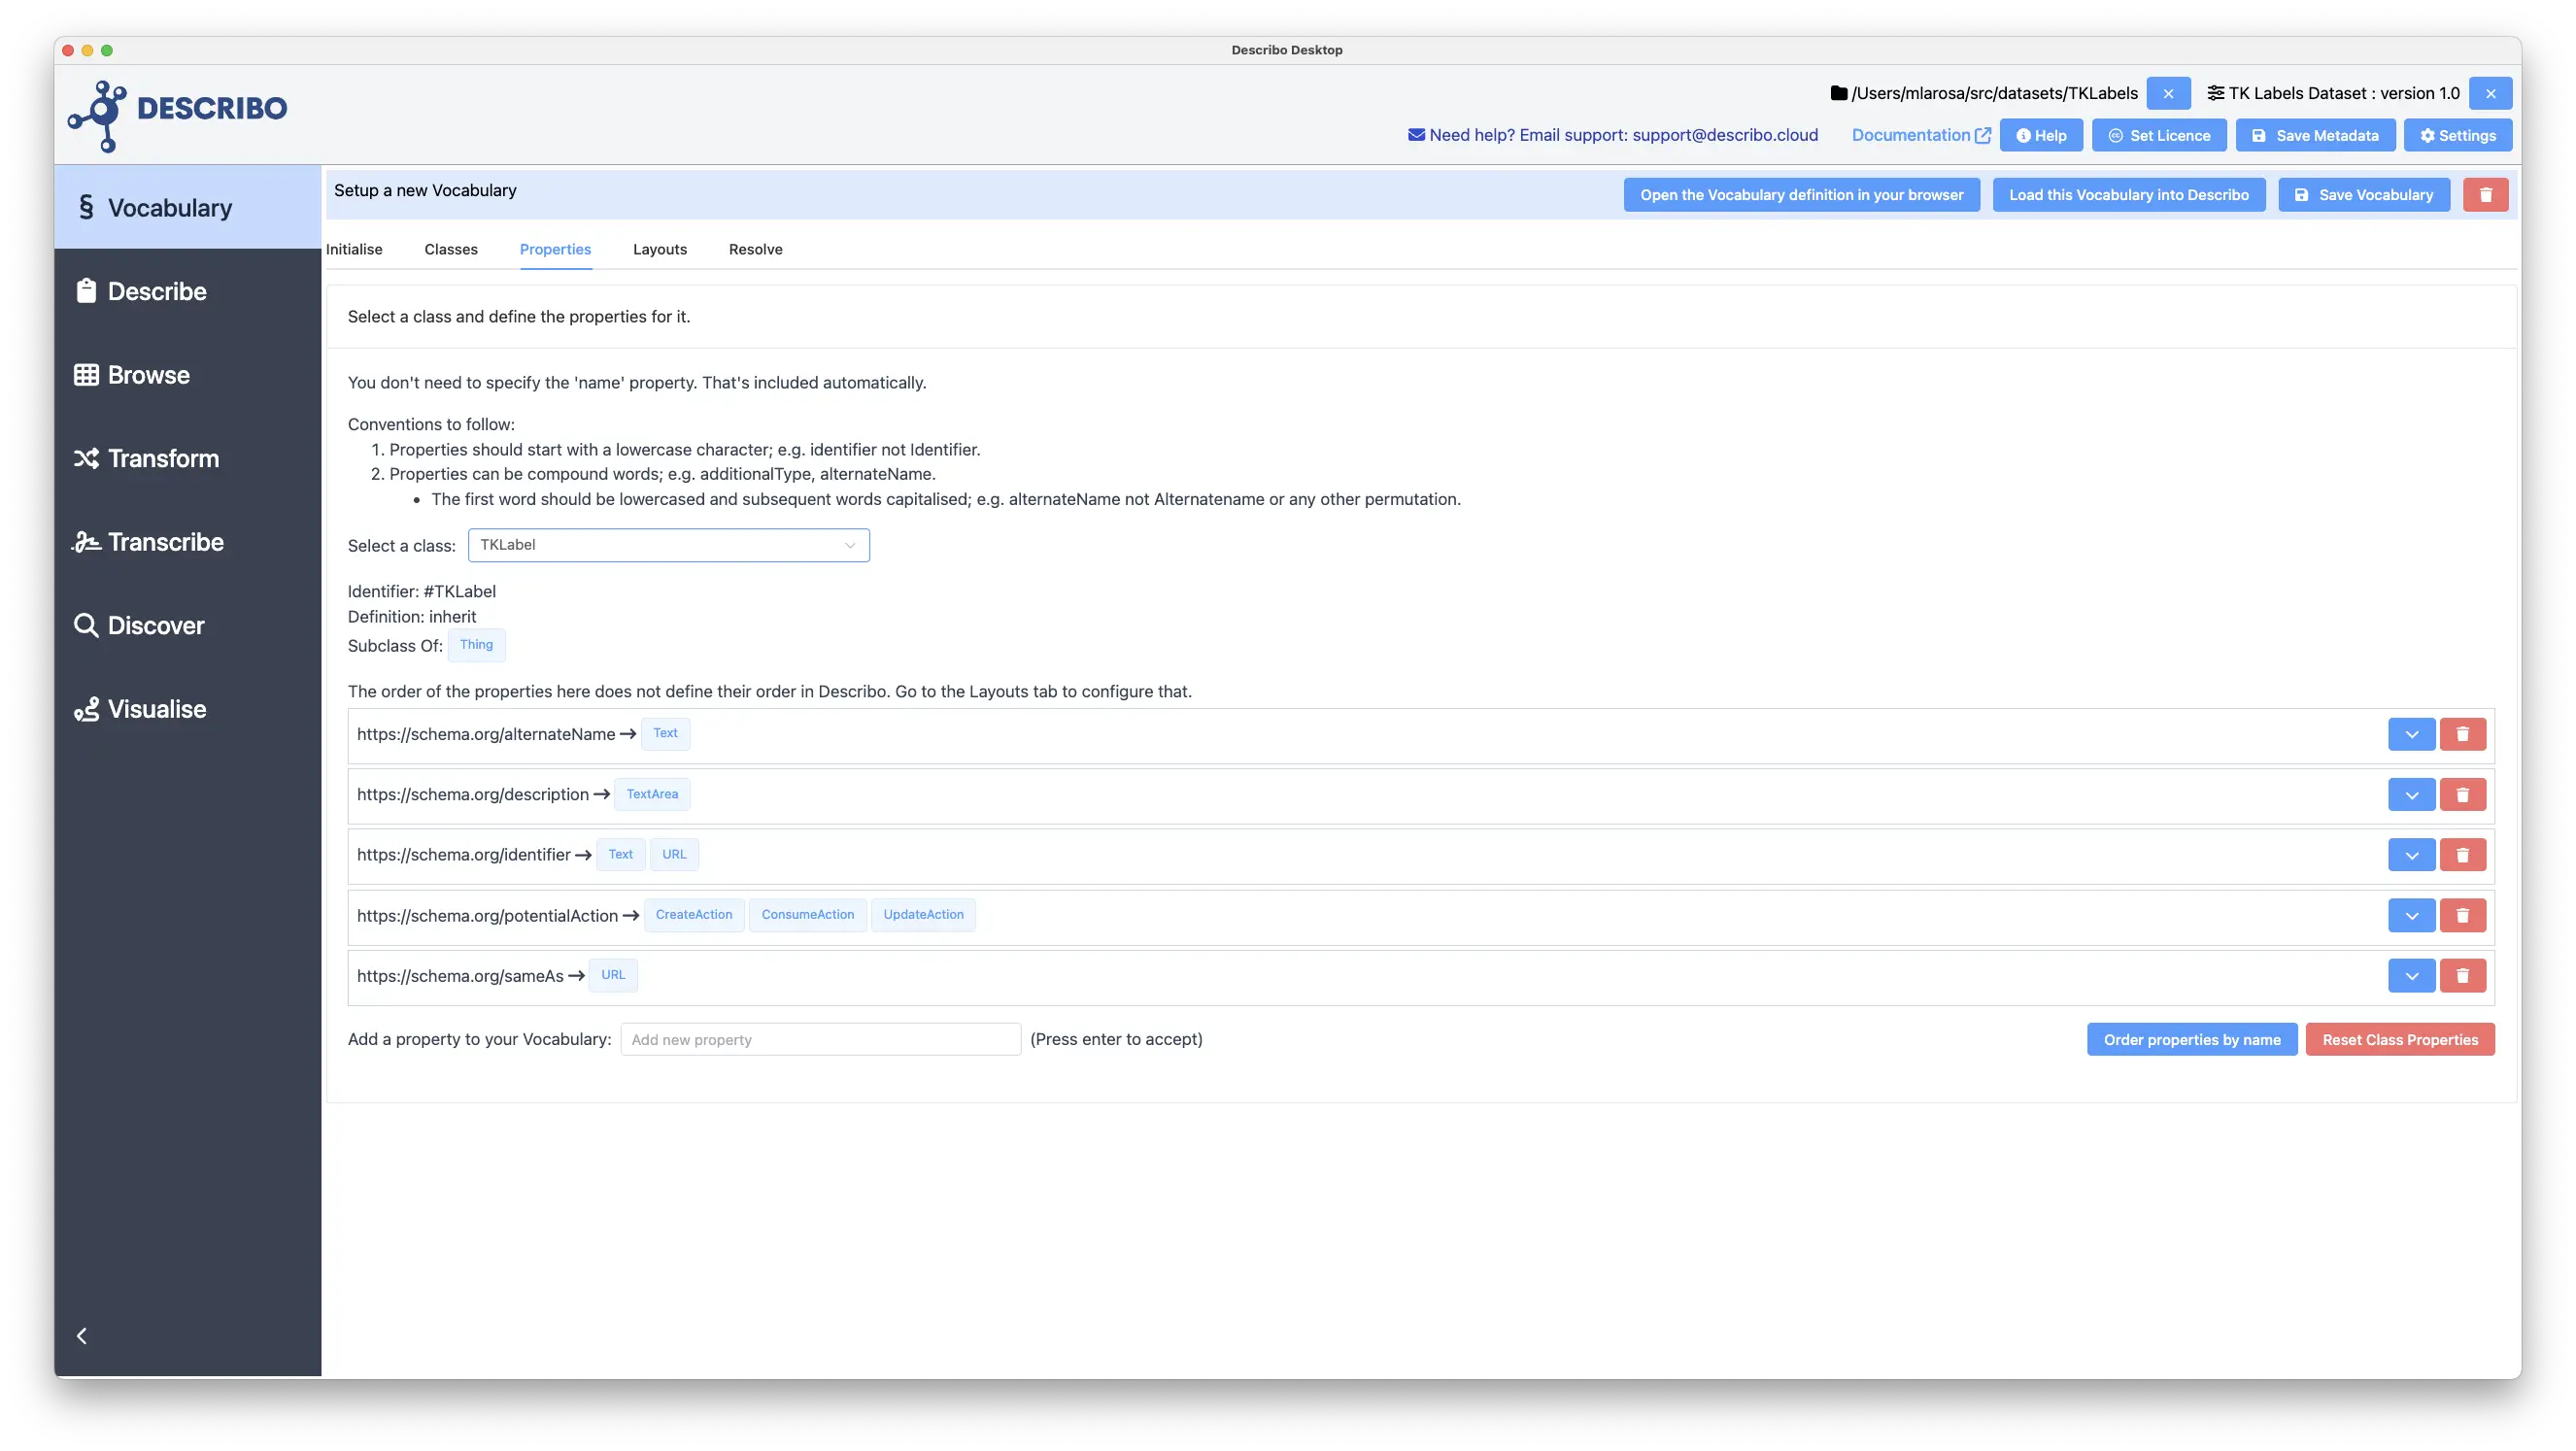
In it we can see that the TKLabel class has been selected and it has 5 properties defined for it: alternateName,description,identifier,potentialAction,sameAs. When defining this class I know that I'm only interested in defining the @id as the URL of a TK Label and the name as its name. These other properties, which were inherited from the parent class of Thing, are not required. So, I can remove all of them.
info
Remember to set the class definition to override before altering the properties.
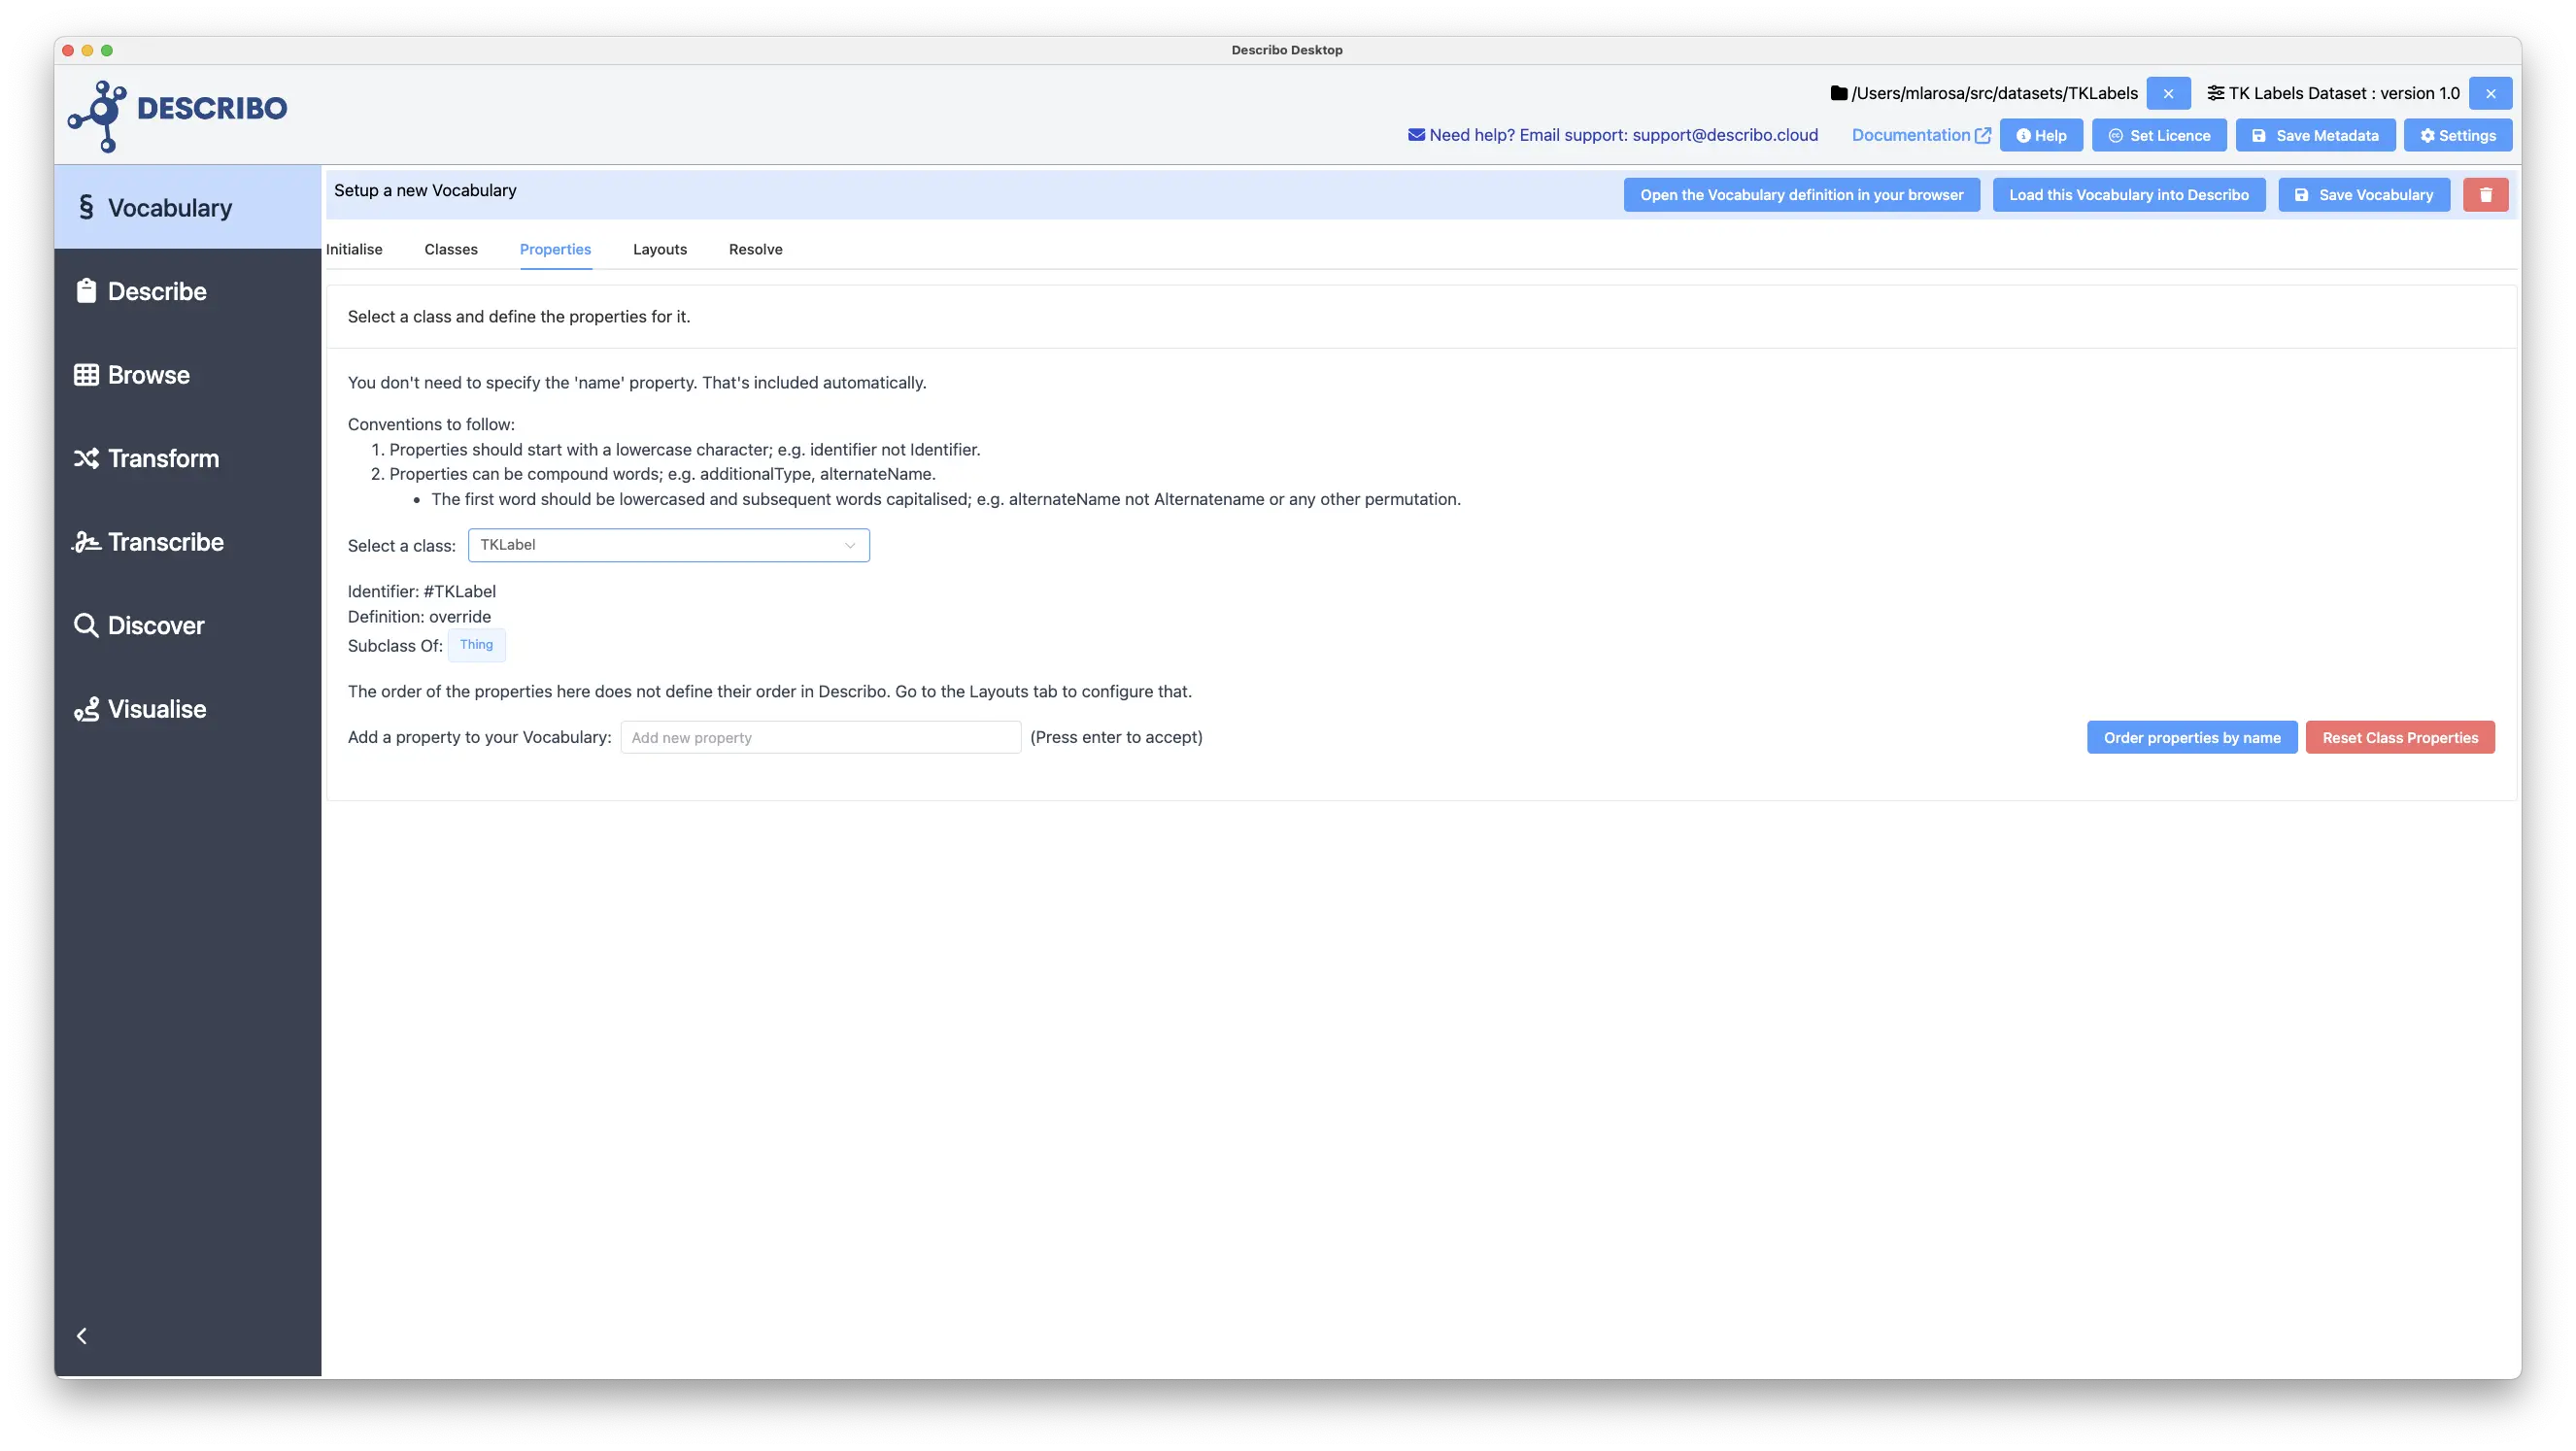
At this stage I've created a new class, defined some metadata for it, and decided what properties it should have (nothing other than @id, @type and name). But I can't use it in my descriptions as I haven't linked it to something.
Since I want to create a dataset of TKLabels, it makes sense to link these from the root dataset. In order to do that, I need to tell Describo how to do that. Consider the following image.
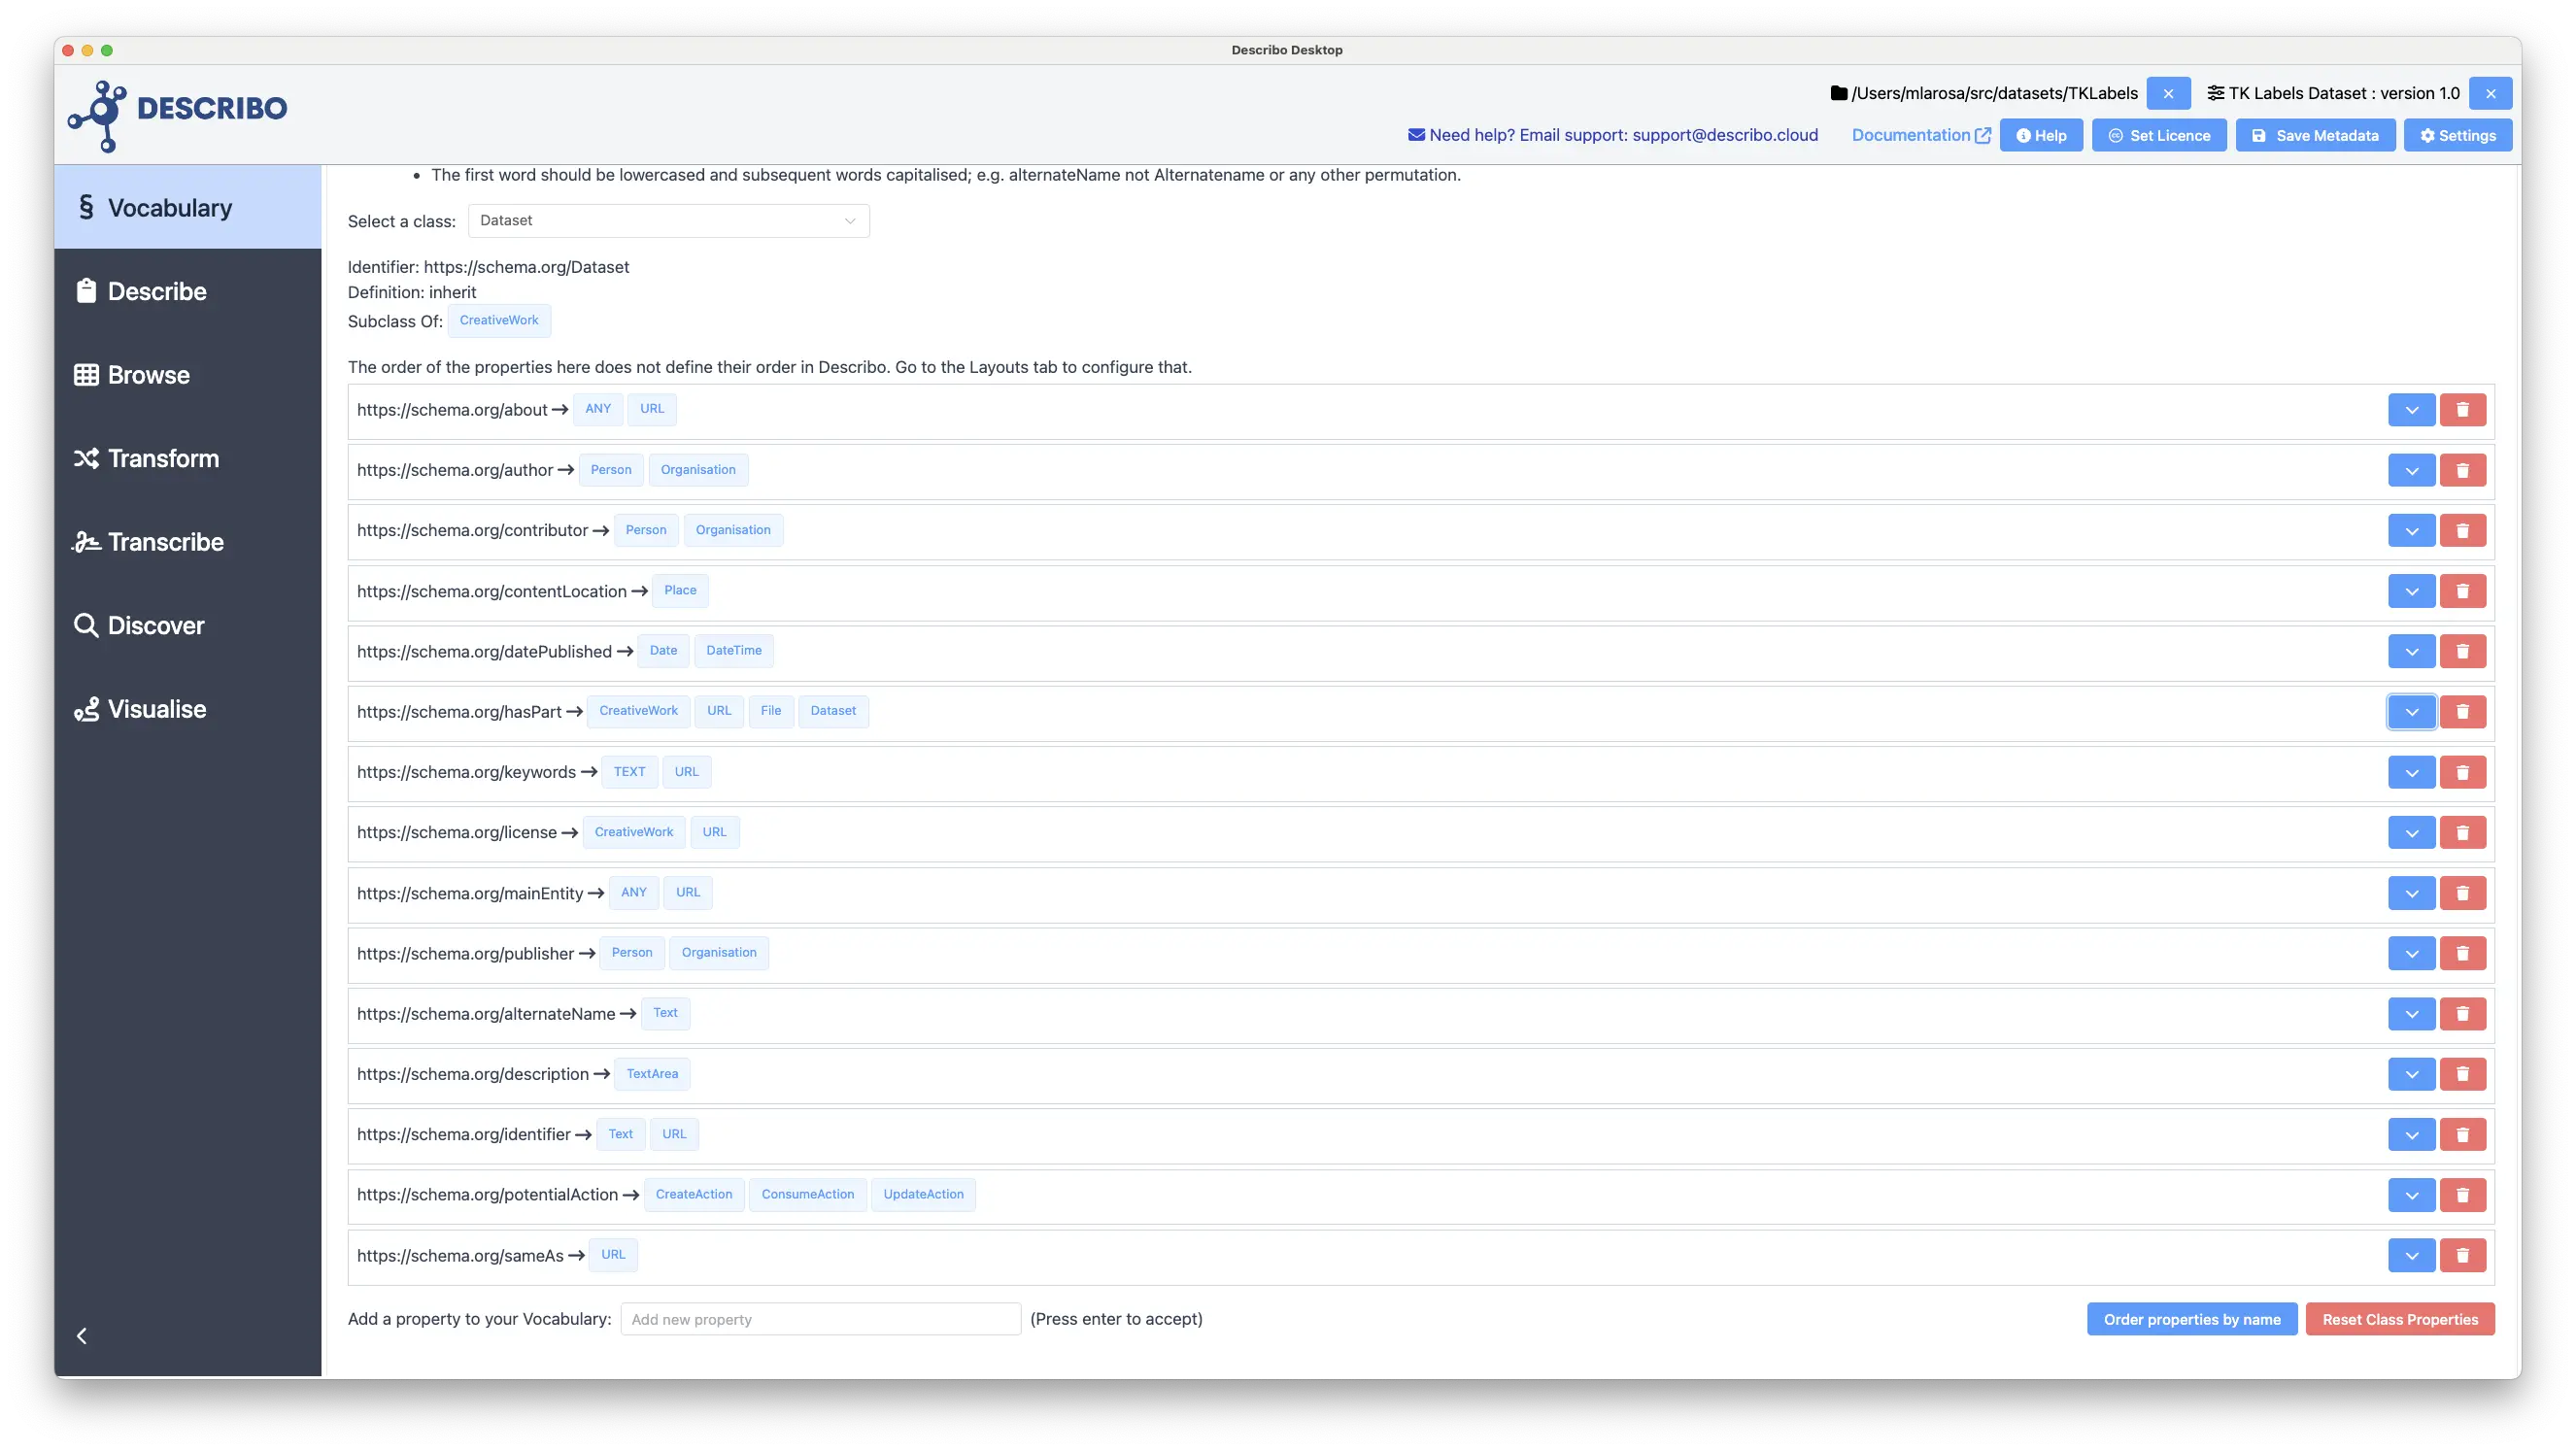
In the image the Dataset class is selected and we can see a number of properties that can be defined. In the middle there is a property hasPart. Let's alter that so that we can add an entity of type TKLabel to that property.
Metadata and Controls
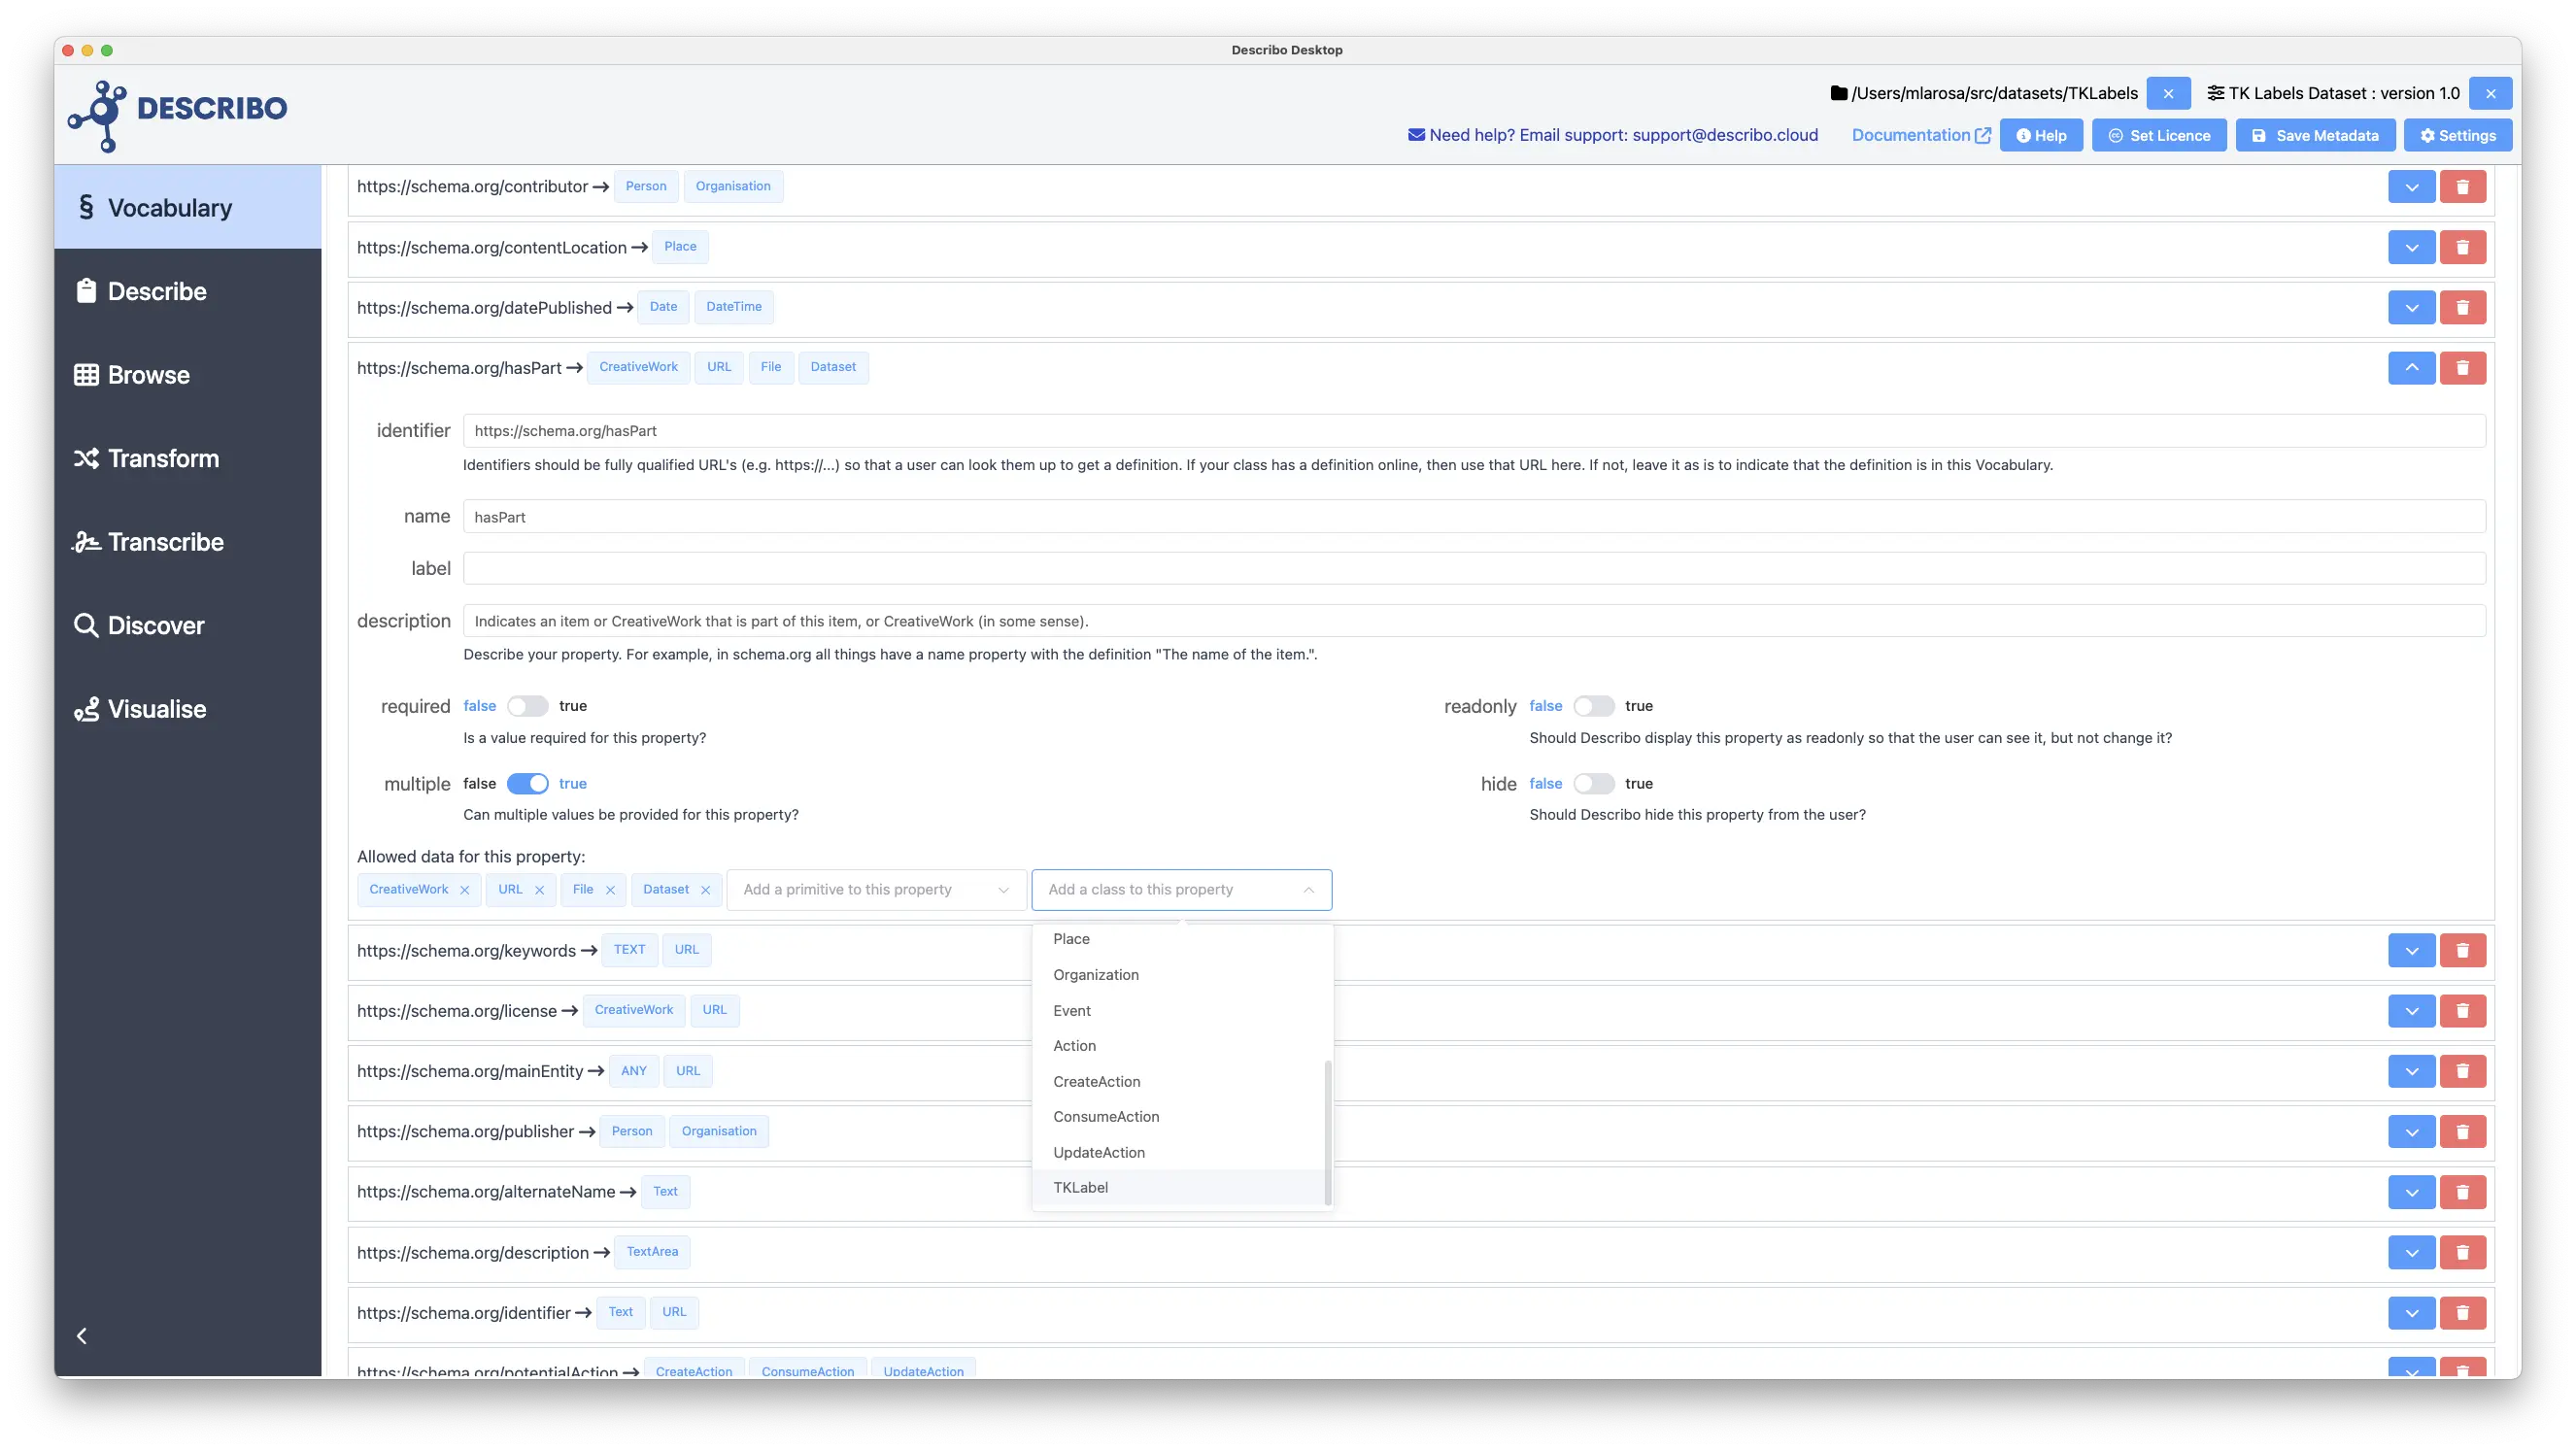
Expanding the property definition shows us what we can do and there's a lot going on so let's go through this step by step.
- A property has metadata: an
identifier, aname, adescriptionor alabelto show in place of the name. - A property can be
required. - A property can have
multiplevalues. - A property can be shown by Describo as
readonly. - A property can be
hiddenfrom view by Describo. - A property can have specific data attached to it.
- In this image we see that hasPart allows entities of @type
CreativeWork,URL,FileandDataset. Let's say we can also add entities of @typeTKLabel.
Now, whenever an entity of @type Dataset is being edited, the hasPart property will allows us to define entities of type TKLabel!
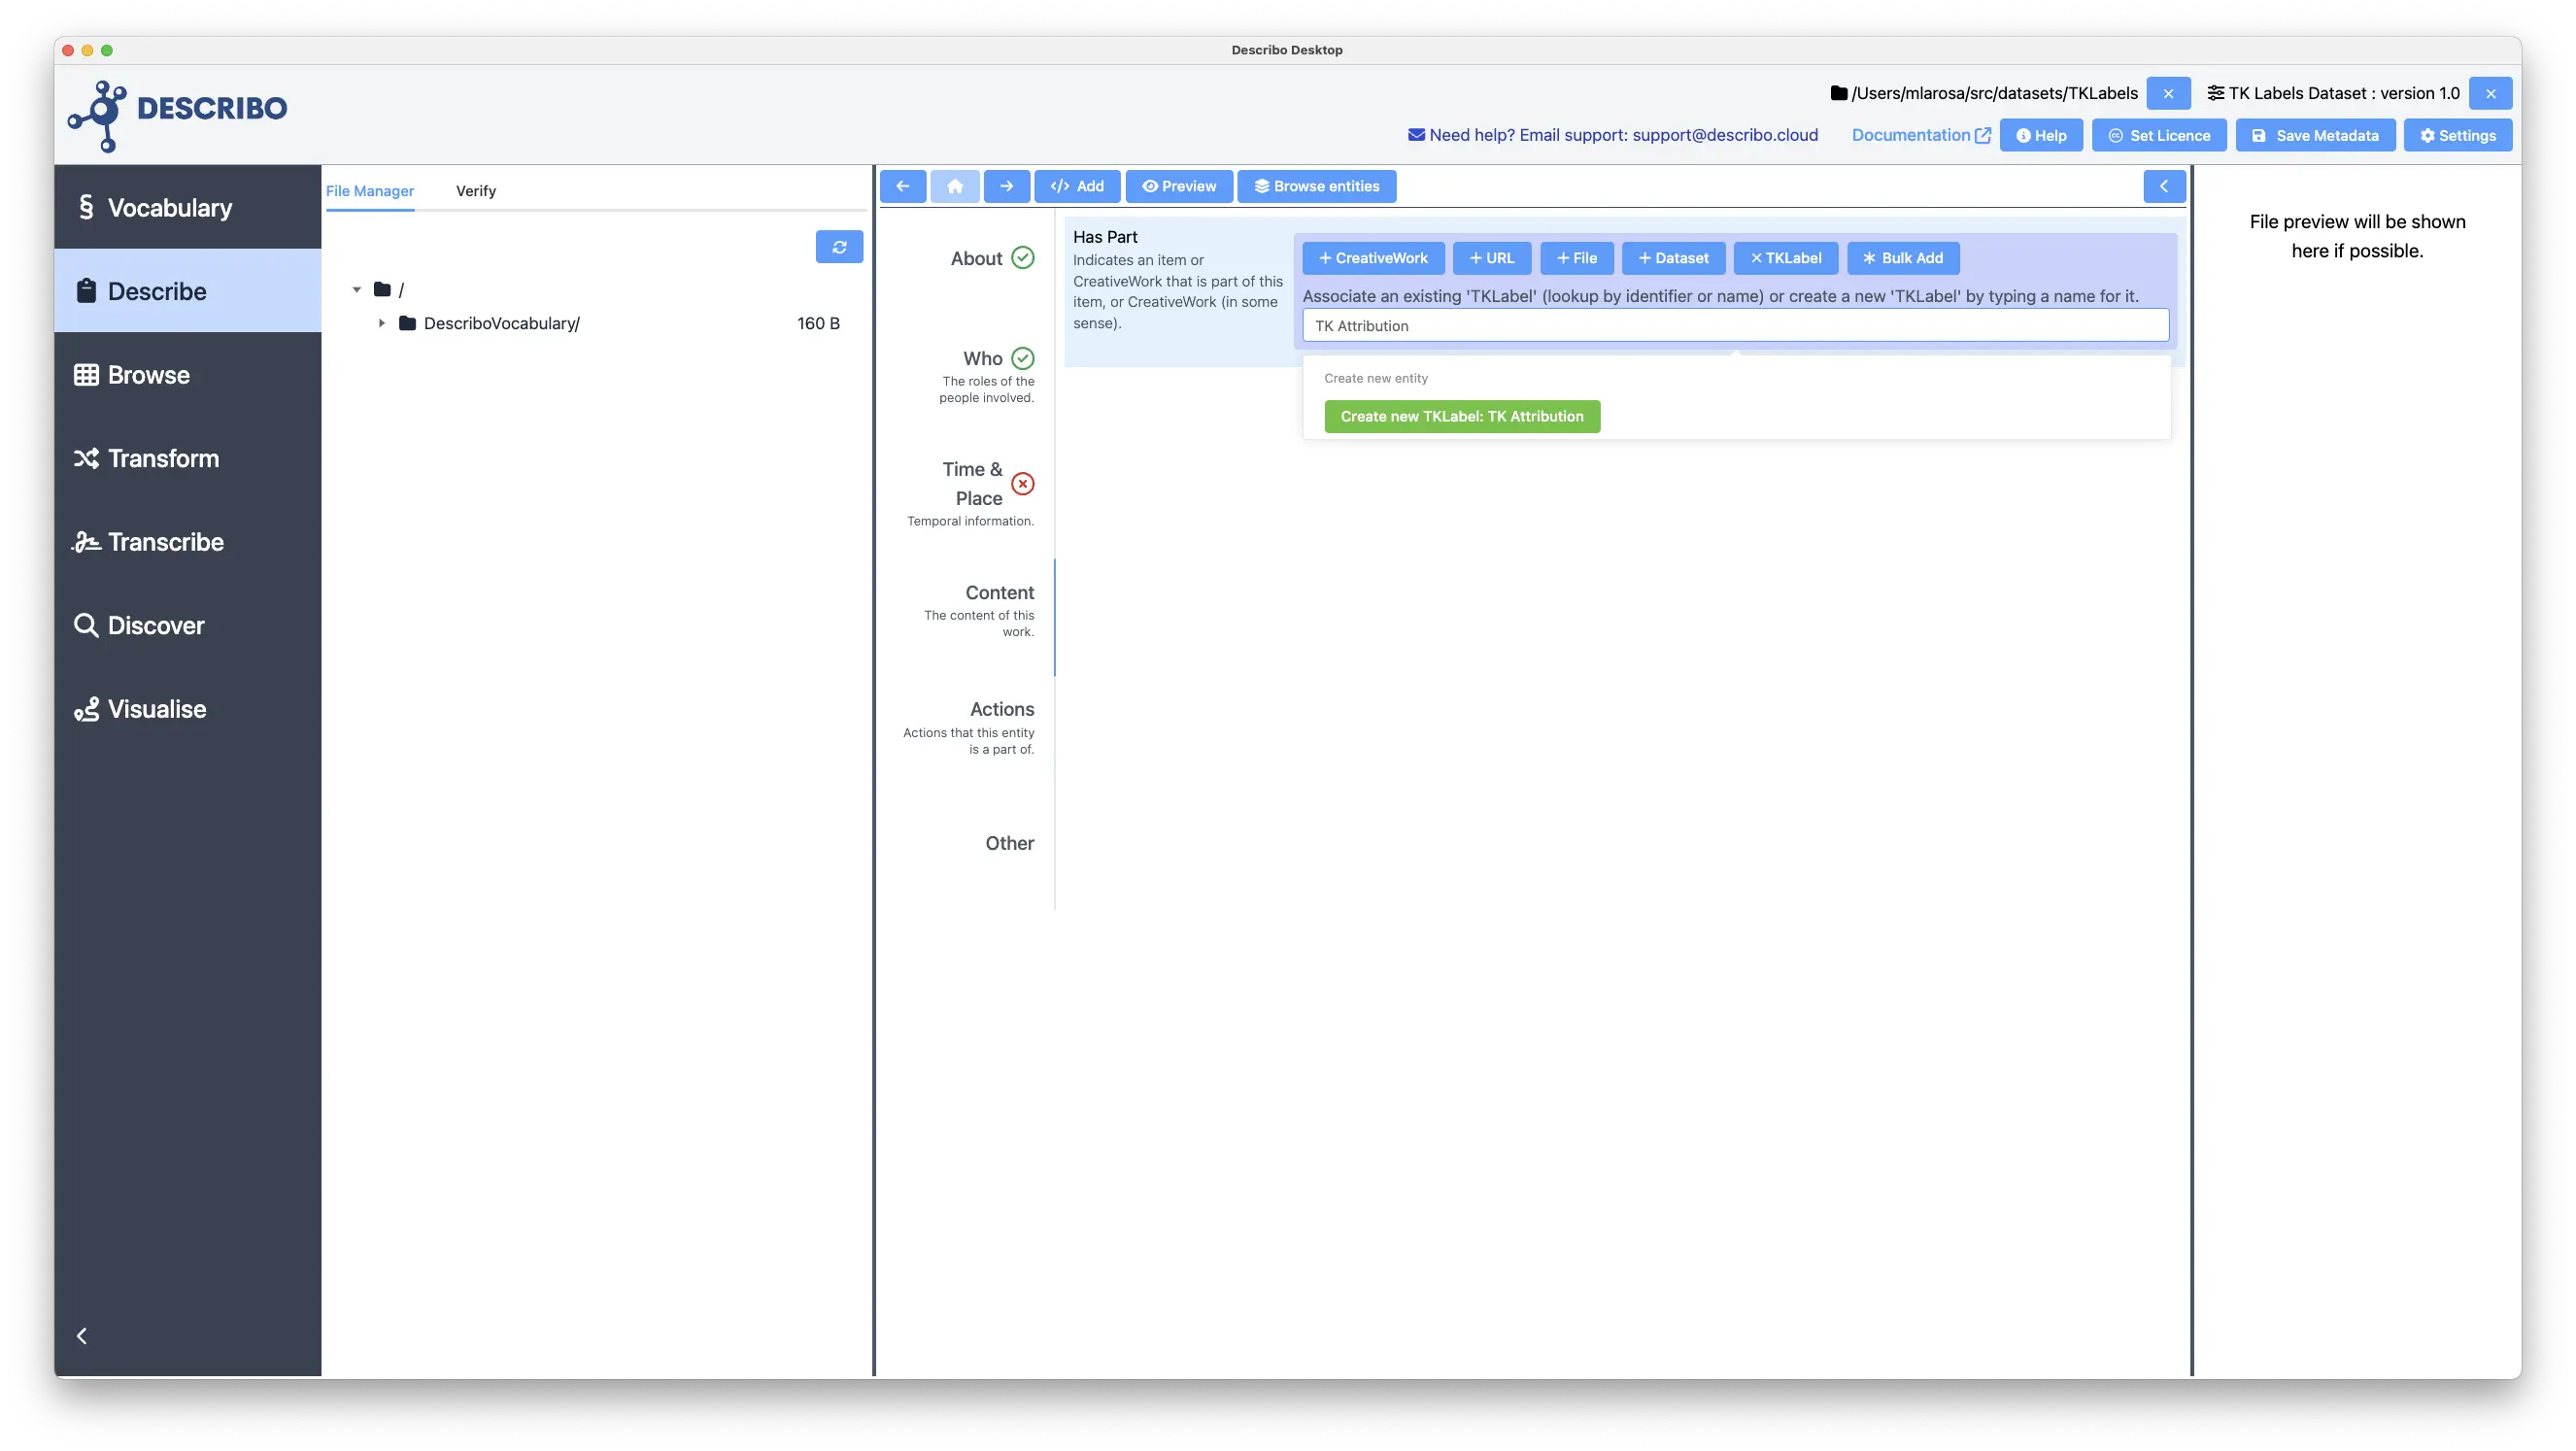
In the next image we can see this in action on the Describe tab. Notice that the hasPart property has a button for adding a TKLabel and in the dropdown, we're defining a TKLabel called TKAttribution.
Constraints
Before we move onto Layouts we need to cover some other property configurations. We'll use the TKLabel class for this example. Let's say we need to add a property called something. Consider the following image:
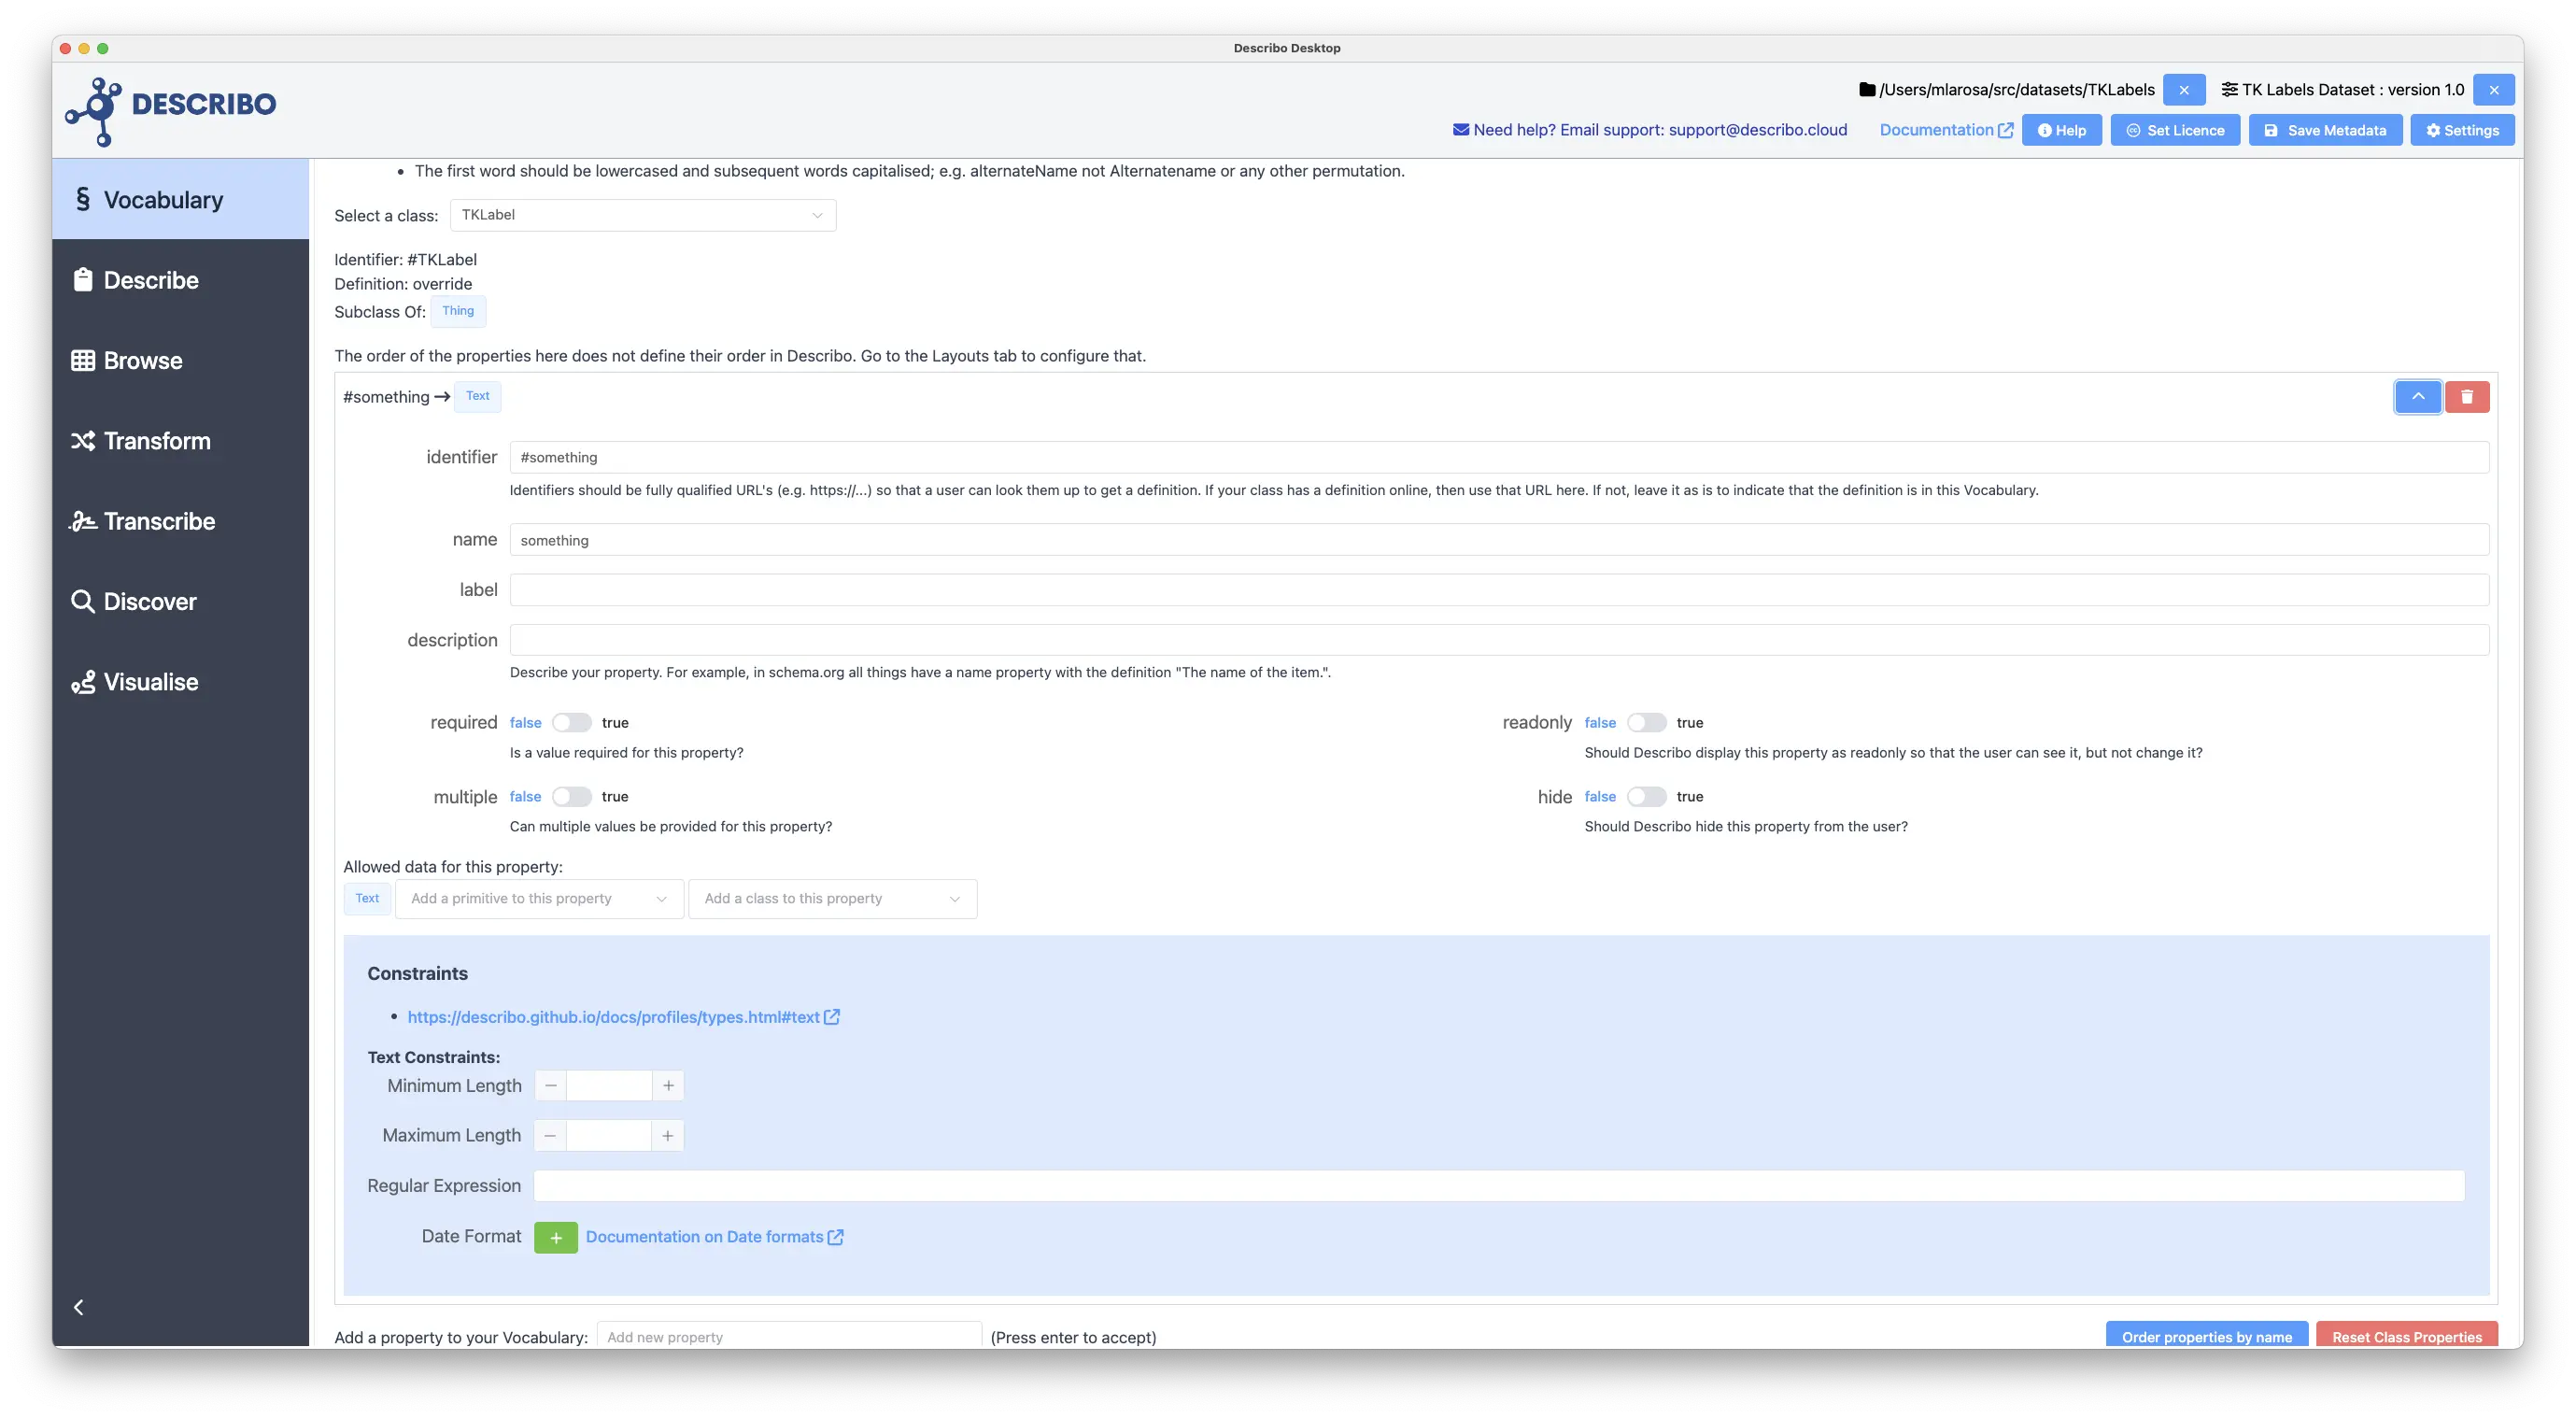
When we create a new property, it is automatically configured to accept Text. When we display the property configuration, we can change that to other primitive types or specific entity types.
If a primitive supports constraints, they will be shown underneath. In the case of a Text field we can provide constraints on the type of data that the field will accept. In the case of a text field that can include a minimum or maximum length, a regular expression that must be satisfied or even some date formats (e.g. YYYY-MM-DD, YYYY-MM)
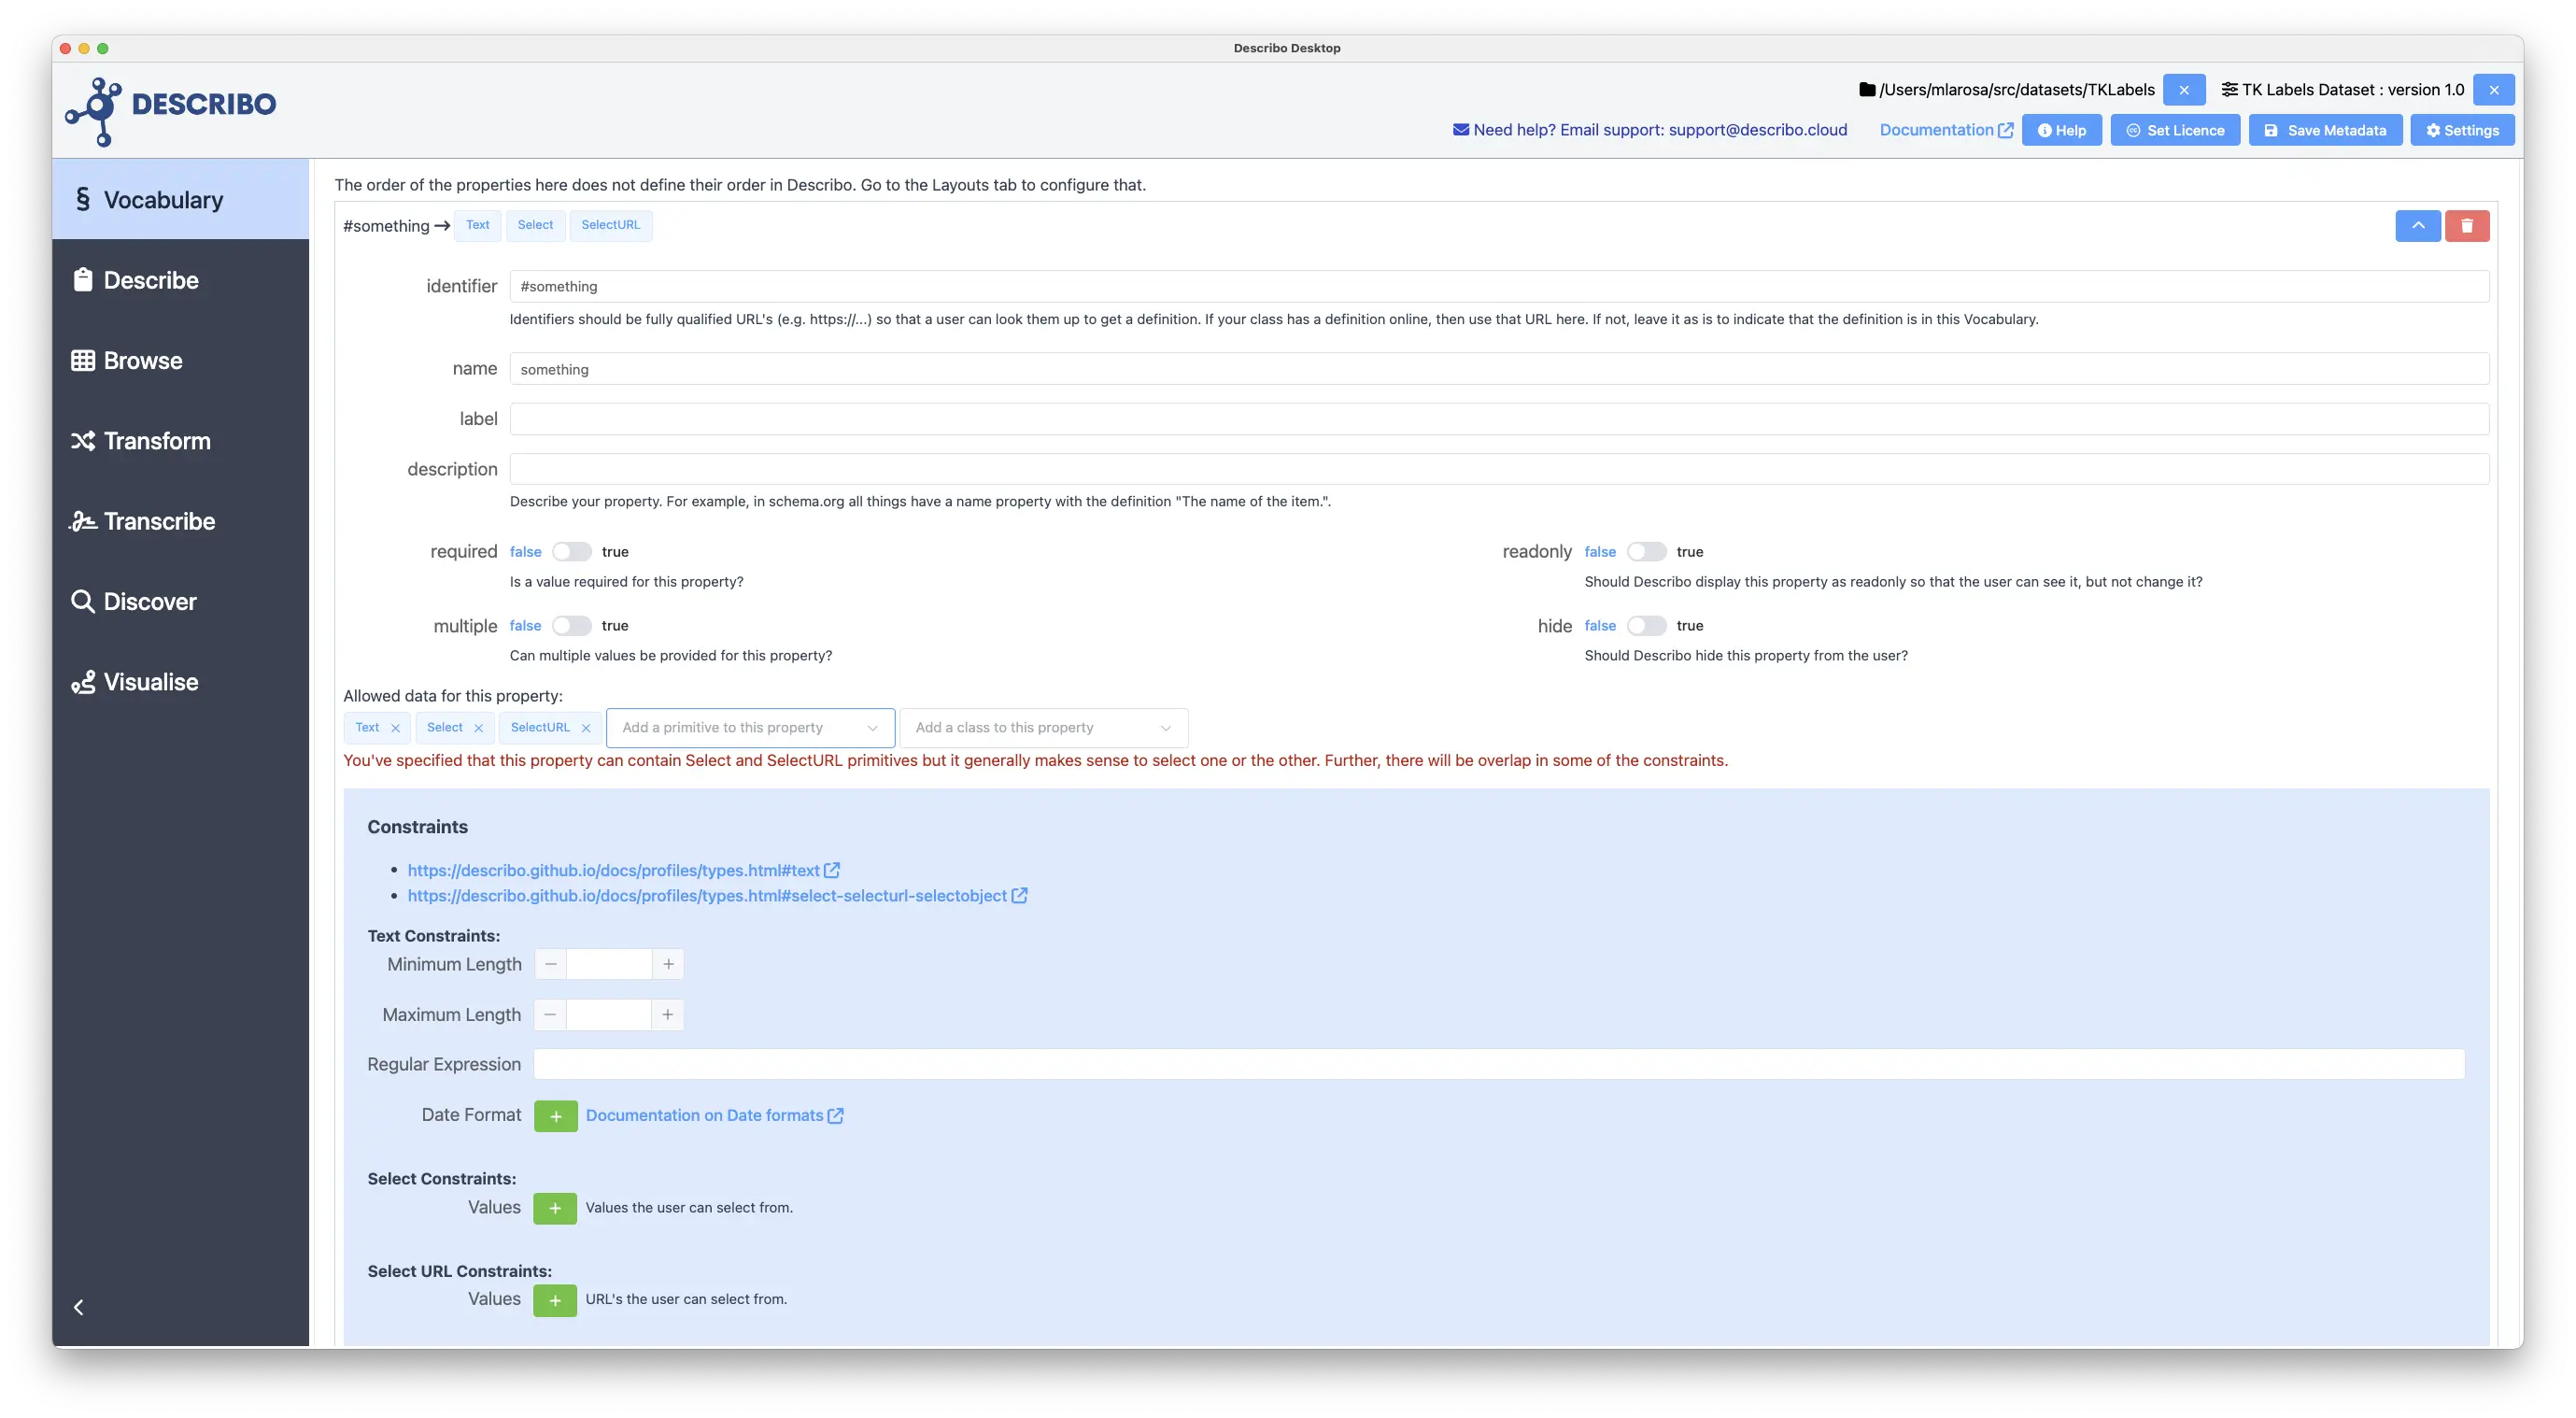
There are a number of primitive types that support constraints. When they are enabled, the constraints section will show the controls for each. In addition, if you have types whose contraints overlap (e.g. Select and SelectURL), a message will be shown.
Layouts
Layouts tell Describo how to show the properties. Specifically, layouts allow you to group properties together and determine the order (from top to bottom) in which they are shown.
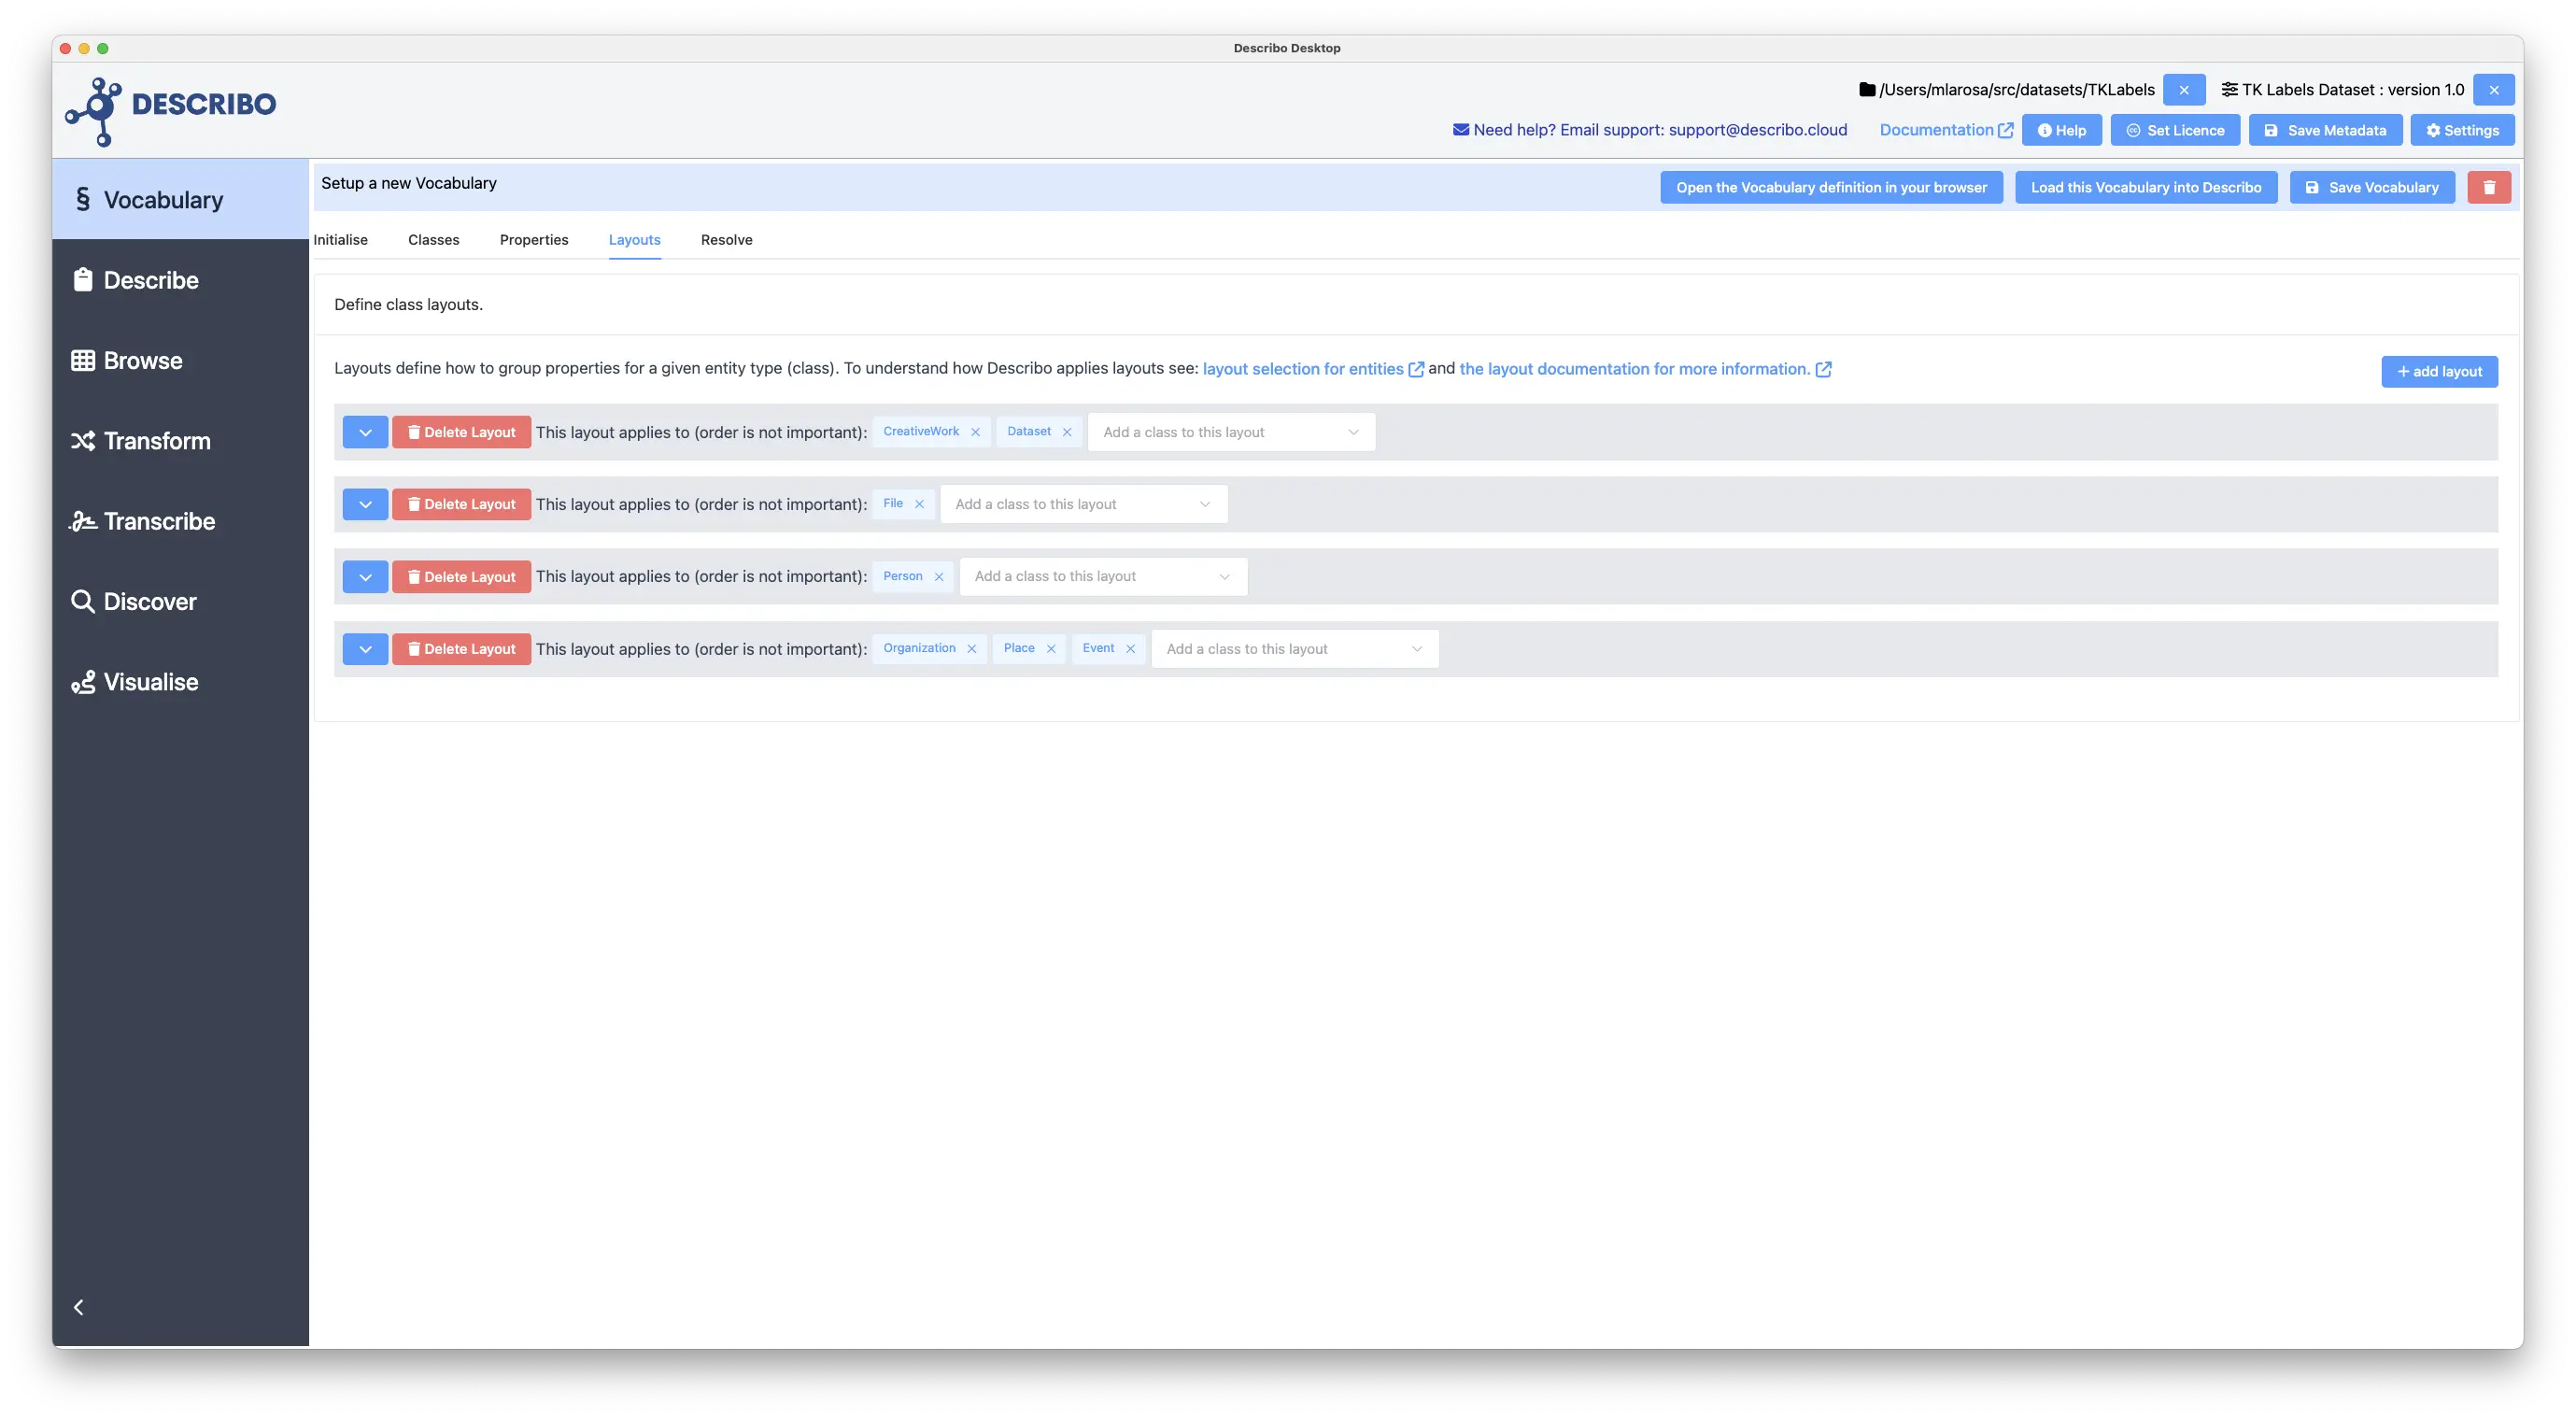
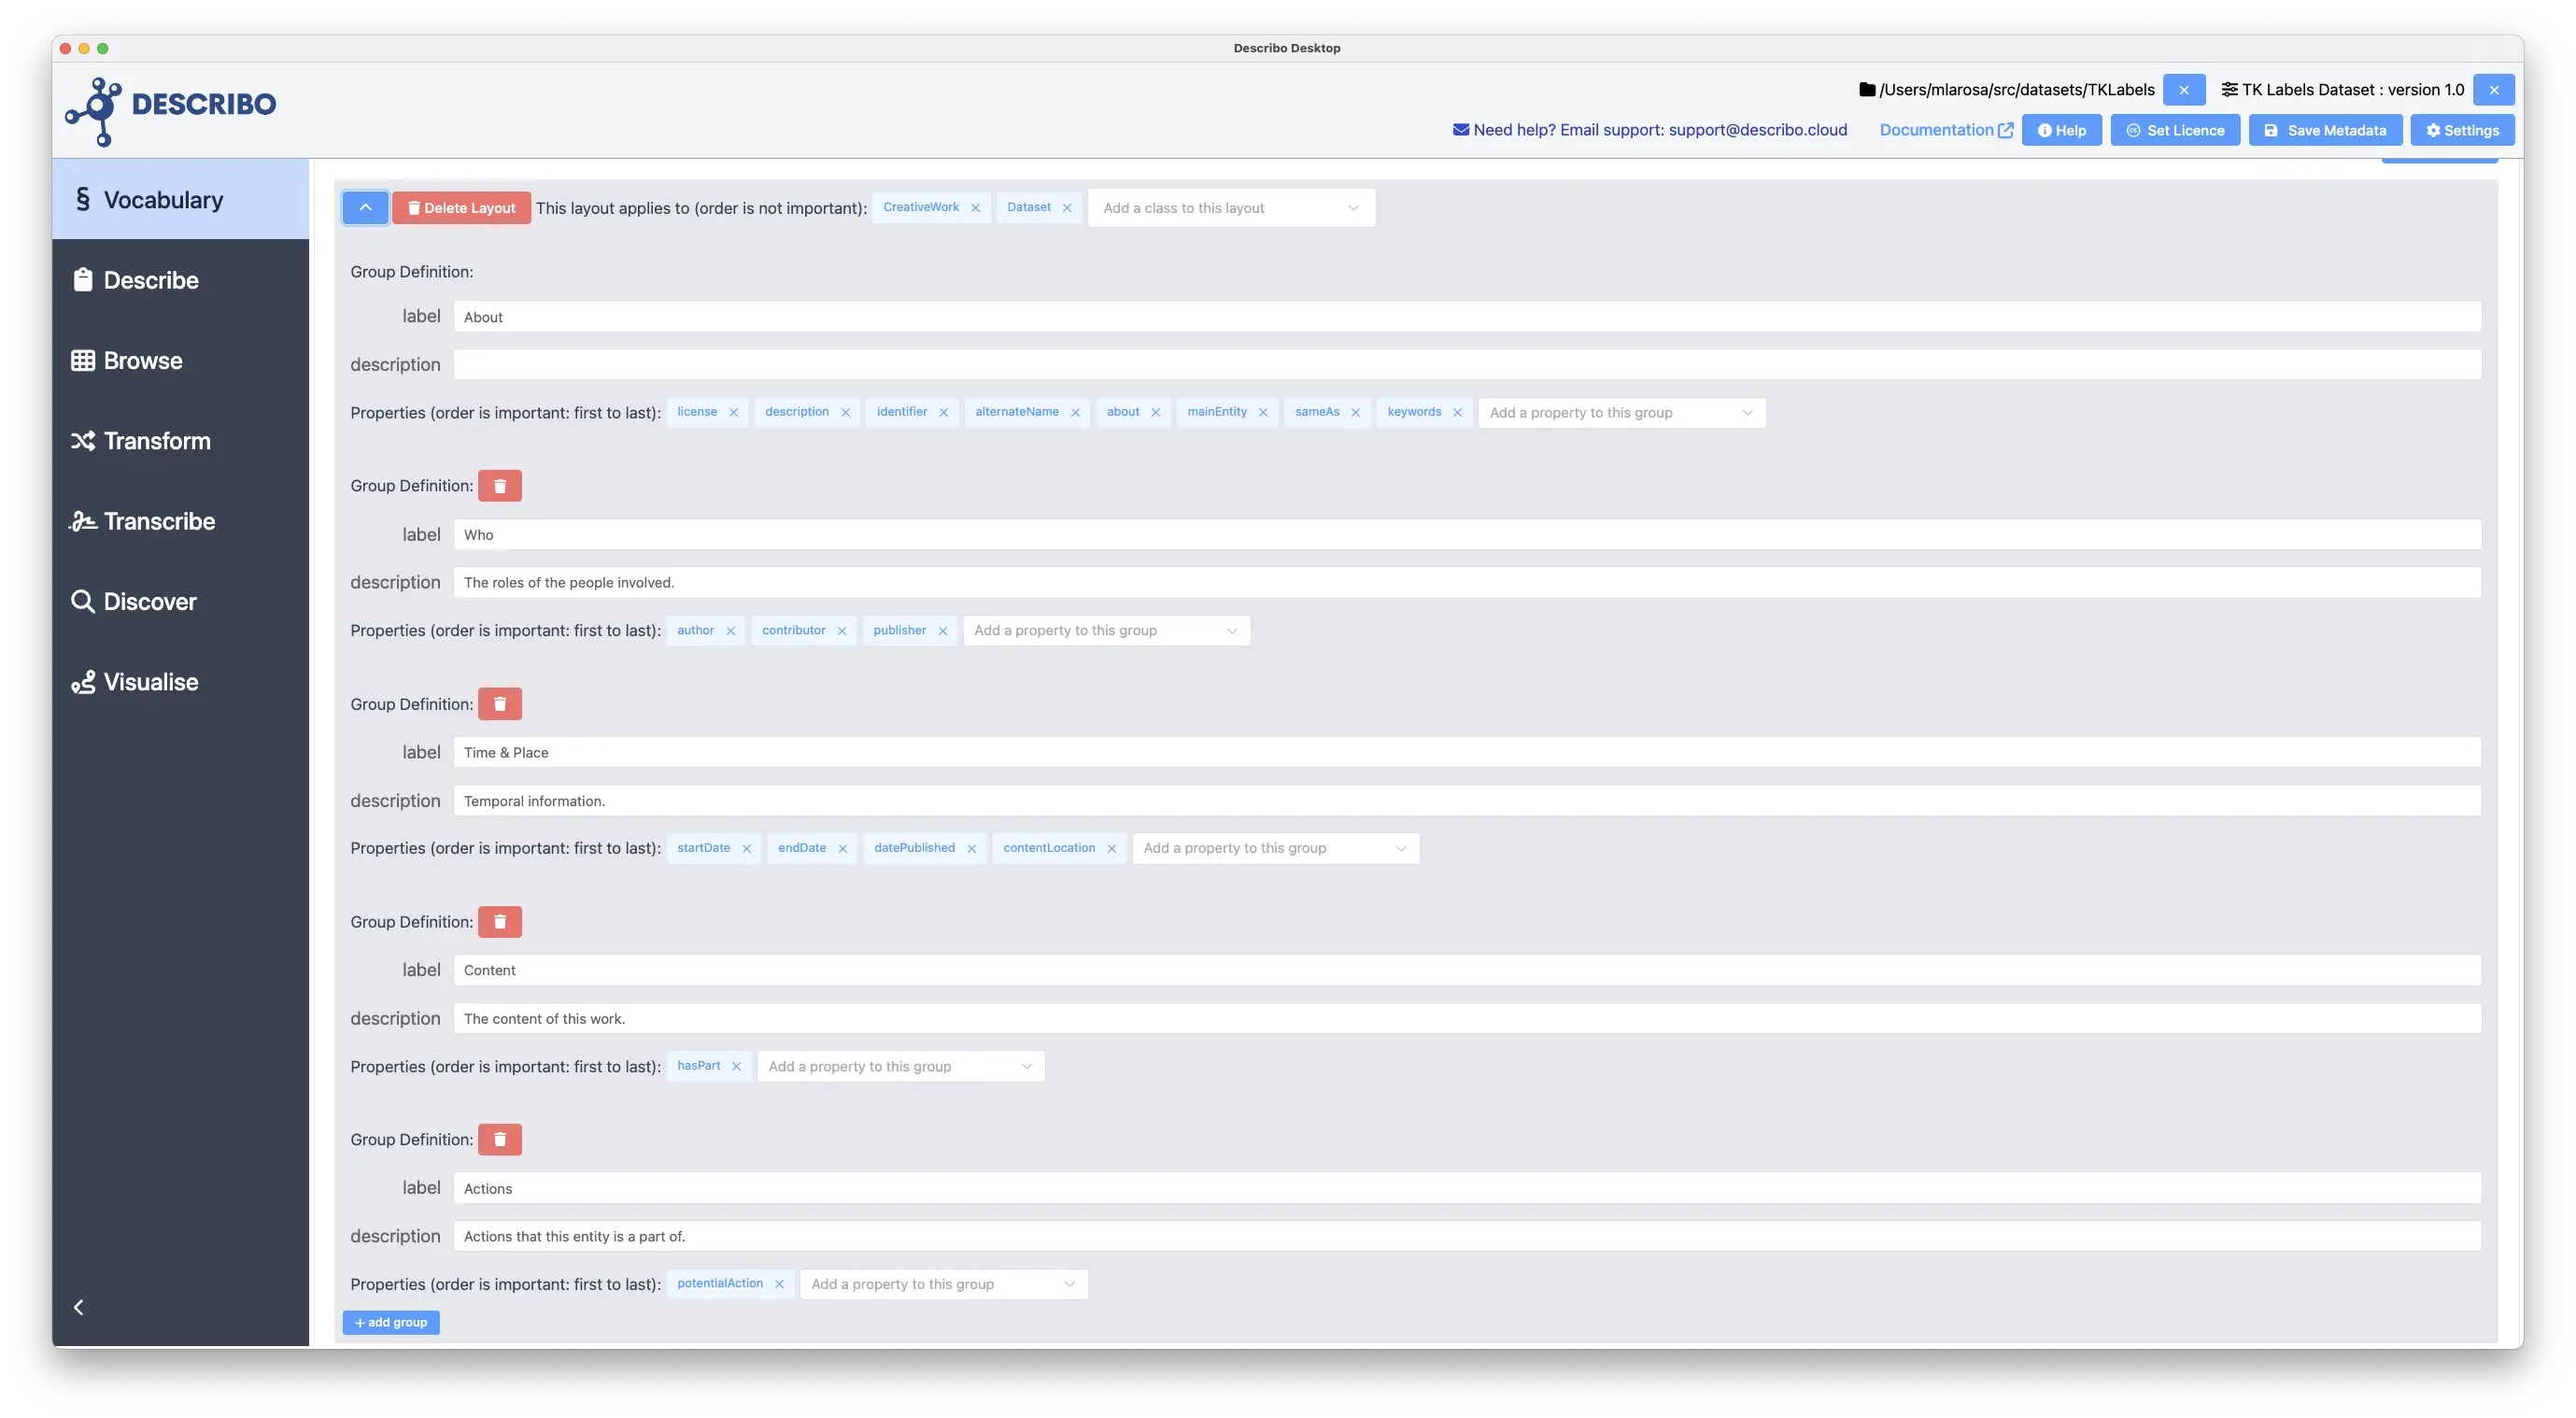
In the following image we see 4 default layouts. The first will apply to any entity that has as it's @type either CreativeWork or Dataset. The @type field can have other types but so long as it has either one of these, that layout will be applied.
The order of layouts (from top to bottom) determines which layout is applied. So, if the second layout also applied to Dataset, it would not be used as the first layout would match first.
Expanding a layout allows us to define groups and which properties they contain. In the following image we see that the first layout has 5 groups, and each group defines the properties that are shown as part of that group.
Resolve
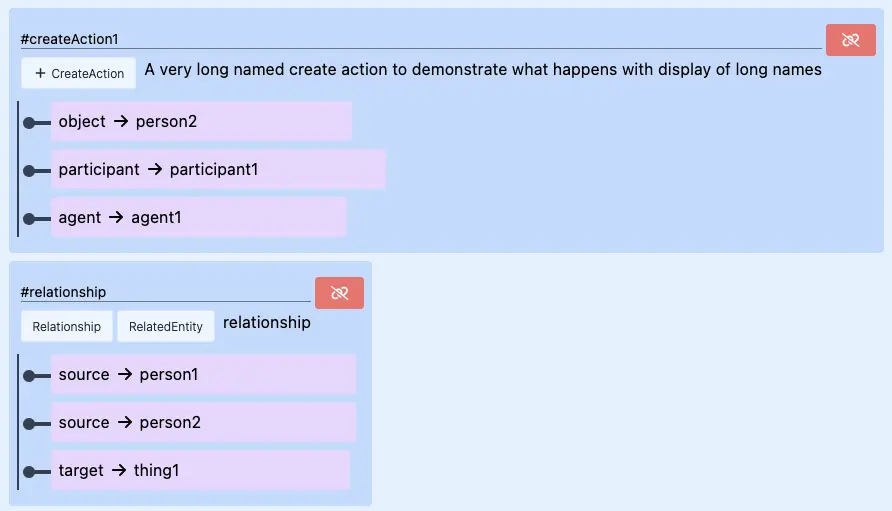
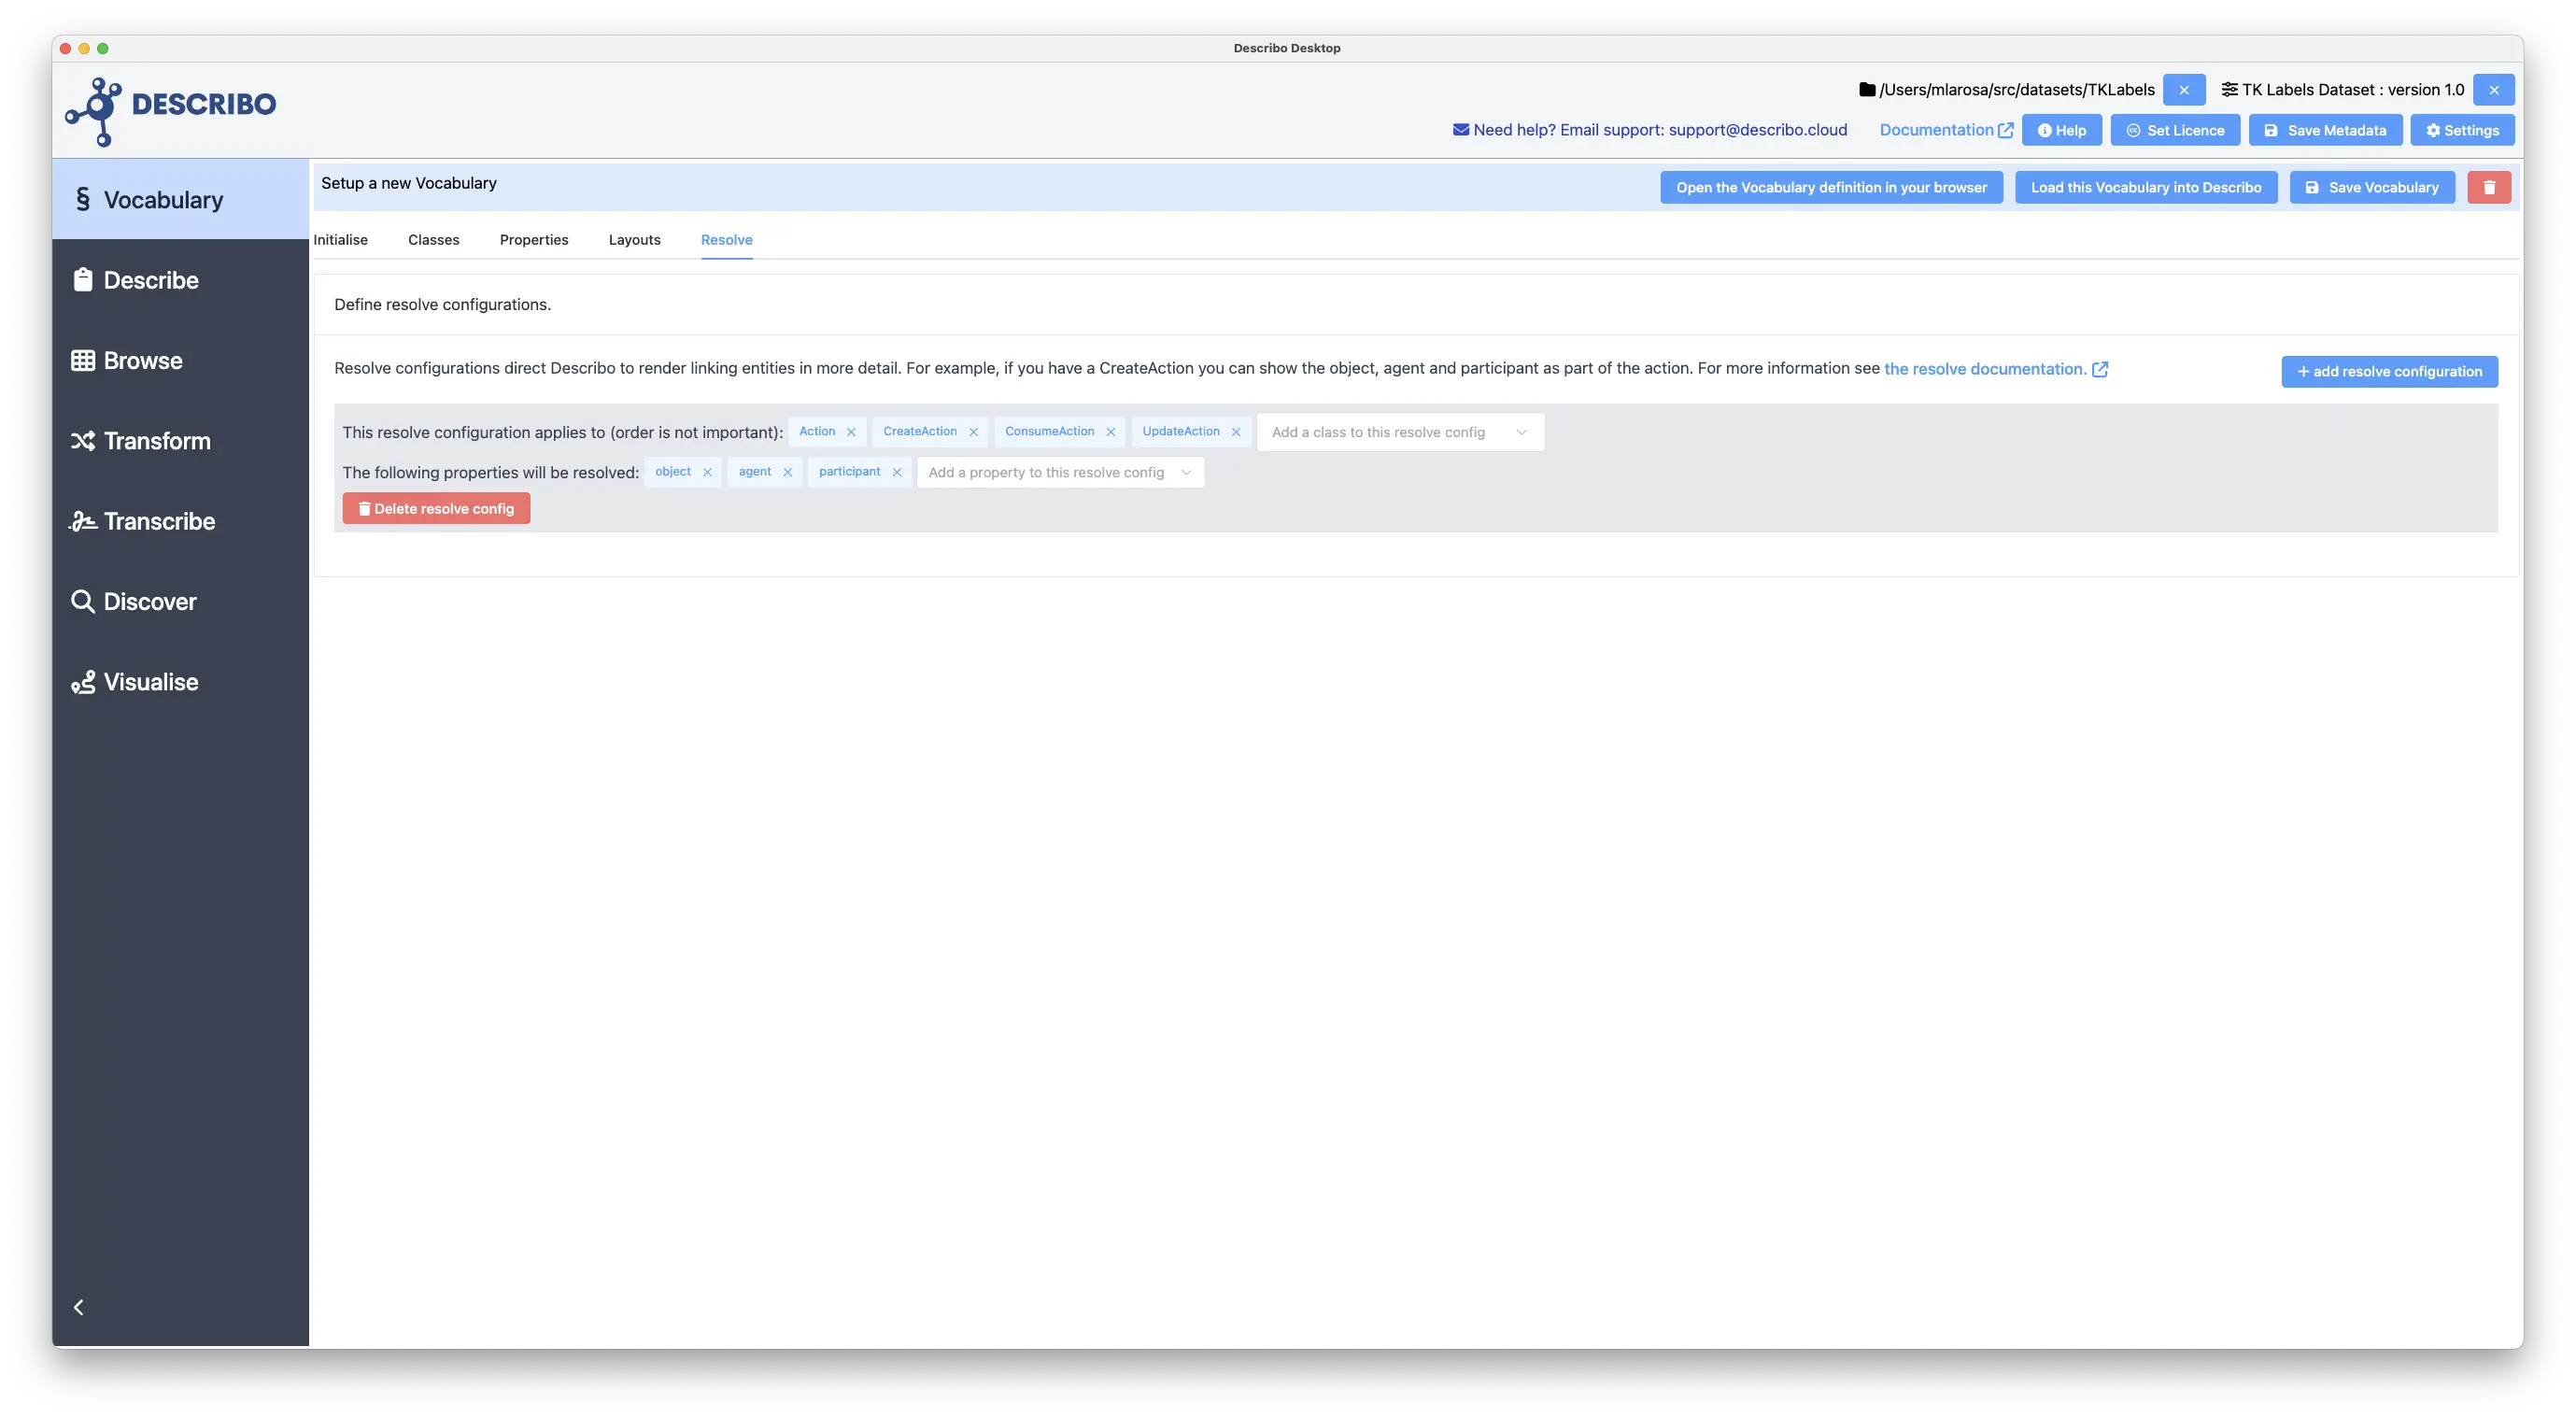
Resolve tells Describo to alter how it renders certain entities. Consider an action. An action can relate an object, an agent and possibly a participant. Whilst the action itself can be described, it's really about the related entities. So with a resolve property we can direct Describo to show those in the view which then allows the user to navigate to either the action or the linked entities directly.
The resolve configuration is a lot like layouts. You can define how to resolve different entity types and specify which of their properties should be resolved. Consider the image following:
With a resolve configuration the display of the entities looks like:
